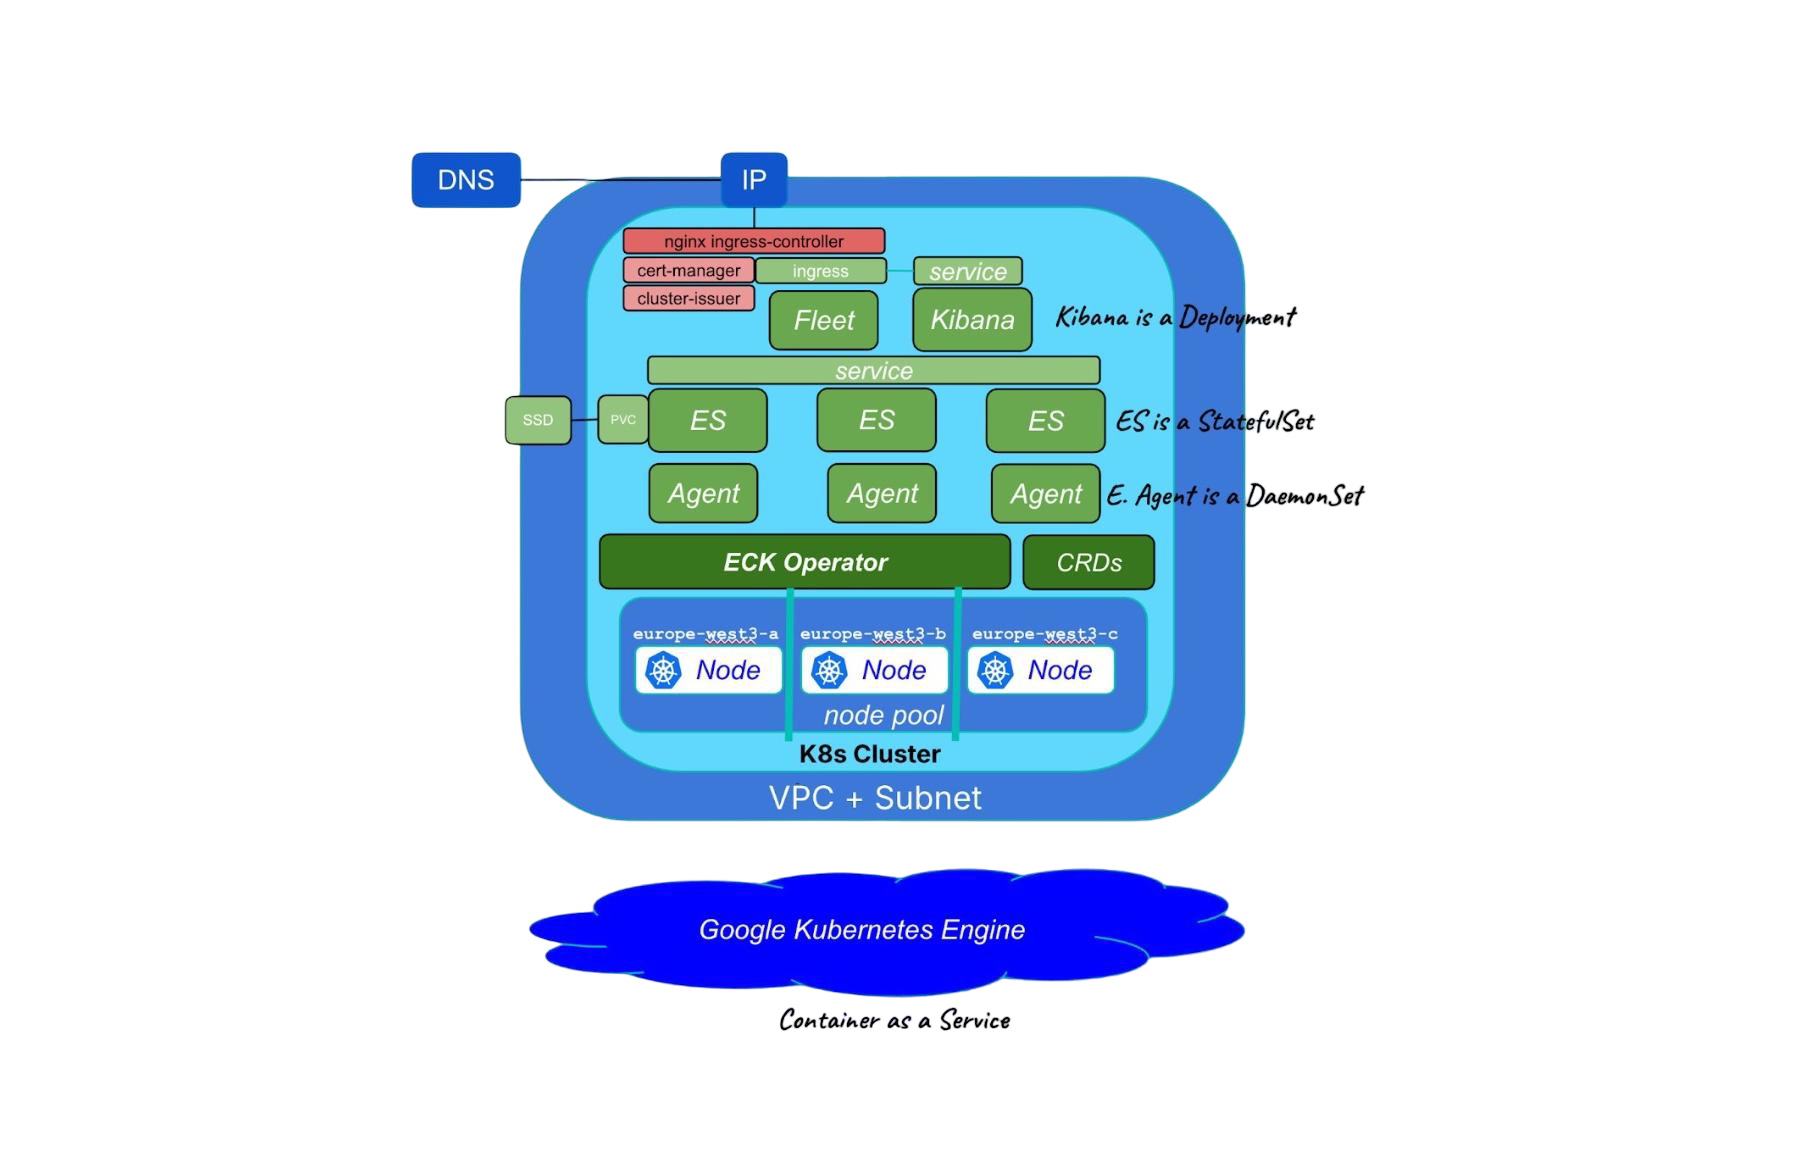
In this article, we are going to learn how to deploy Elasticsearch on Google Cloud Kubernetes (GKE) using Autopilot.
For Elasticsearch, we are going to use Elastic Cloud on Kubernetes (ECK), which is the official Elasticsearch Kubernetes operator that simplifies the Kubernetes deployments orchestration of all the Elastic Stack components.
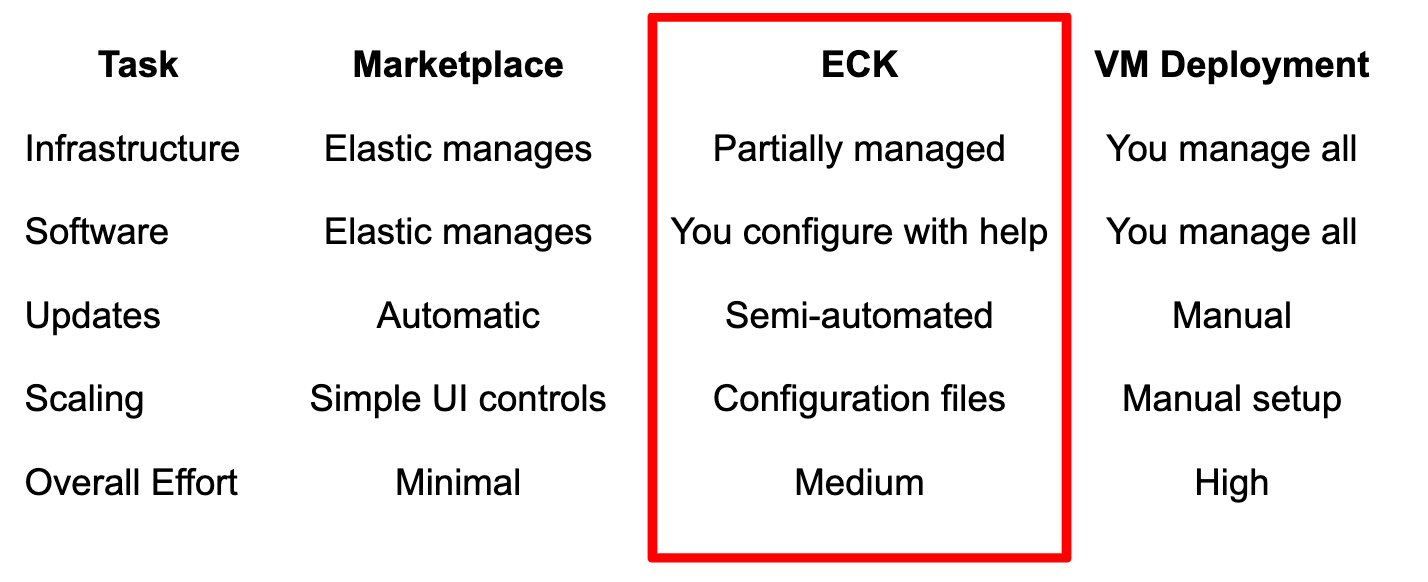
Elasticsearch deployment effort
What is GKE Autopilot?
Google Kubernetes Engine (GKE) Autopilot provides a fully managed Kubernetes experience where Google handles cluster configuration, node management, security, and scaling while developers focus on deploying applications, allowing teams to go from code to production in minutes with built-in best practices.

When to use the ECK in Google Cloud?
Elastic Cloud on Kubernetes (ECK) is best suited for organizations with existing Kubernetes infrastructure seeking to deploy Elasticsearch with advanced features like dedicated node roles, high availability, and automation.
How to set up
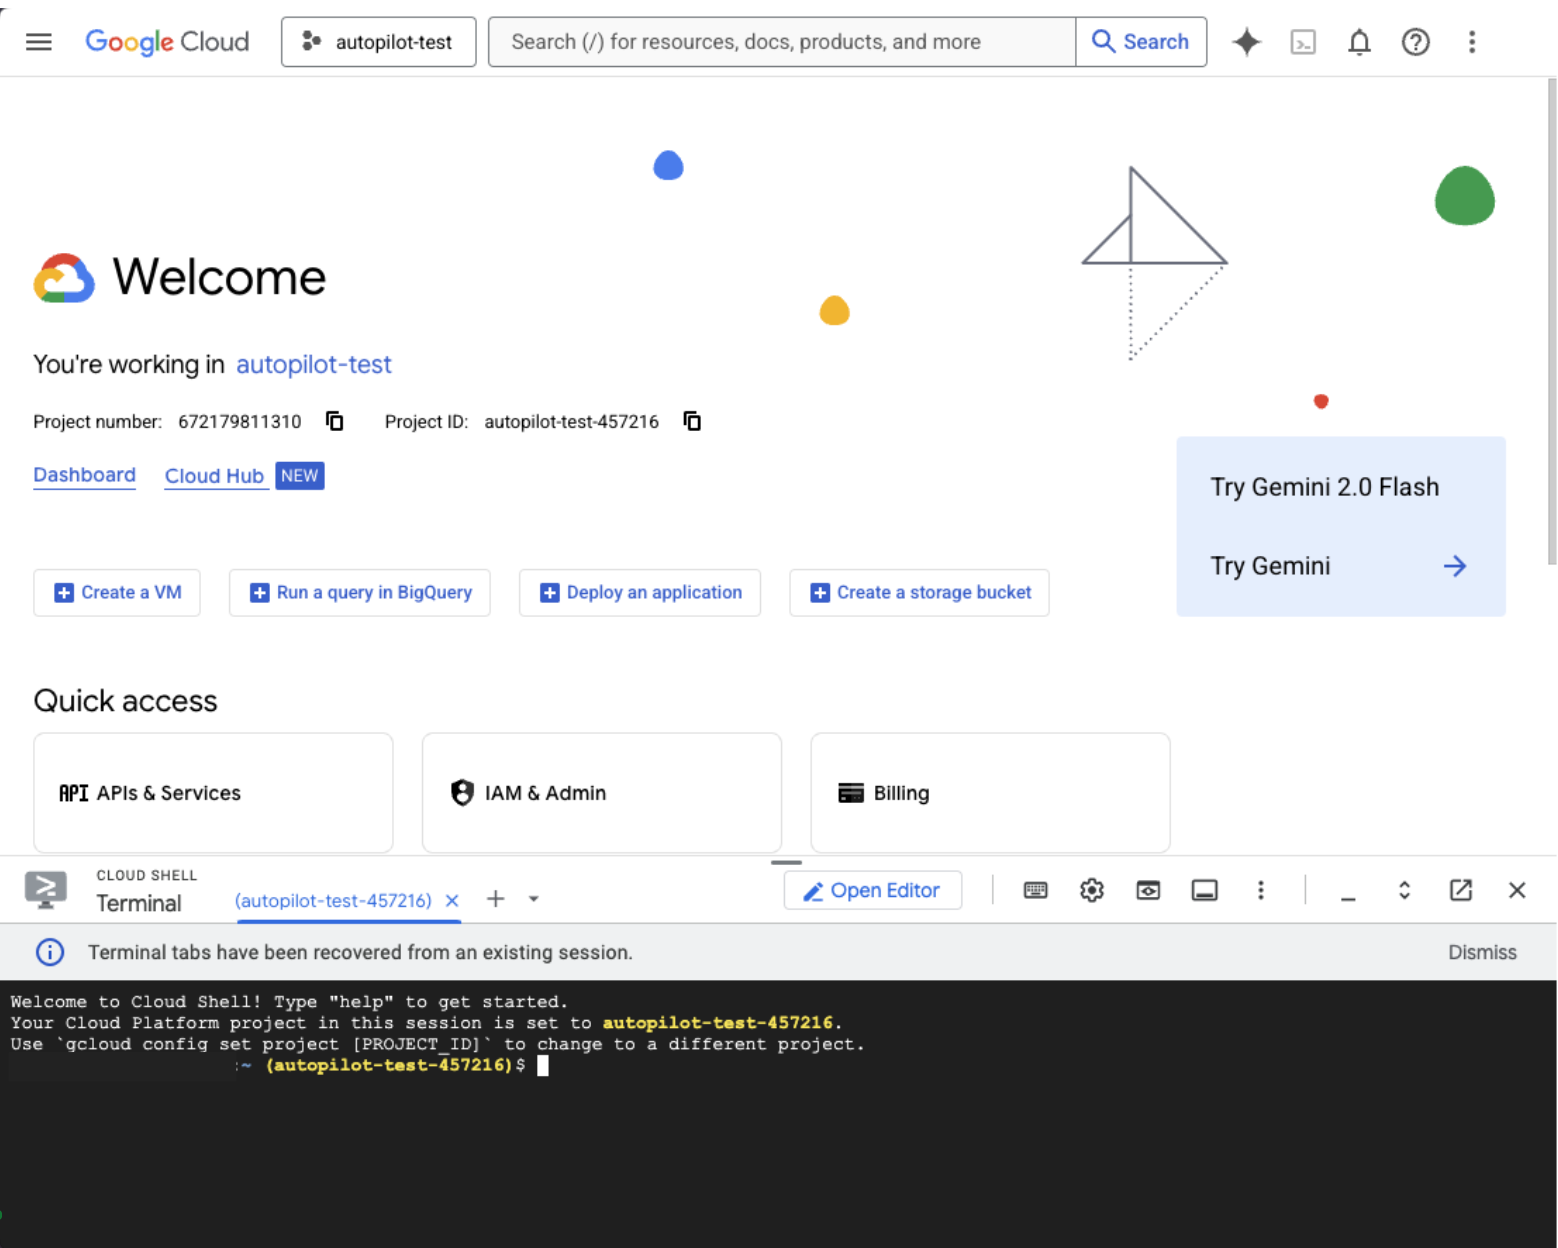
1. Log in to the Google Cloud Console.
2. In the top right click on the Cloud Shell button to access the console, and deploy the GKE cluster from there. Alternatively, you can use the gcloud CLI.
Remember to update the project id with yours during the tutorial.
3. Enable the Google Kubernetes Engine API.
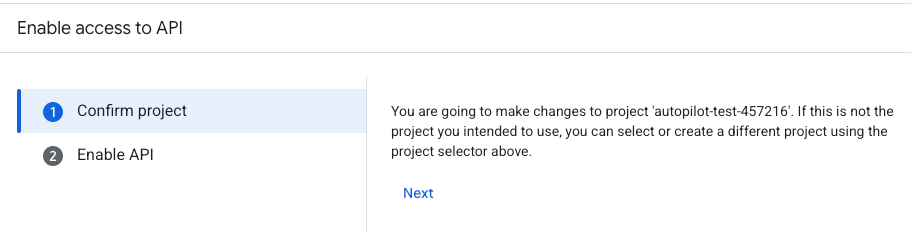
Click Next.
Now, Kubernetes Engine API should show enabled when searching for Kubernetes Engine API.

4. In Cloud shell create an Autopilot cluster. We will name it autopilot-cluster-1, and also replace autopilot-test with the id of your project.
gcloud beta container --project "autopilot-test-457216" clusters create-auto "autopilot-cluster-1" --region "us-central1" --release-channel "regular" --tier "standard" --enable-ip-access --no-enable-google-cloud-access --network "projects/autopilot-test-457216/global/networks/default" --subnetwork "projects/autopilot-test-457216/regions/us-central1/subnetworks/default" --cluster-ipv4-cidr "/17" --binauthz-evaluation-mode=DISABLED5. Wait until it is ready. It takes around 10 minutes to create.

A confirmation message will display after correctly setting up the cluster.
6. Configure kubectl command line access.
gcloud container clusters get-credentials autopilot-cluster-1 --region us-central1 --project autopilot-test-457216You should see:

kubeconfig entry generated for autopilot-cluster-1.
7. Install the Elastic Cloud on Kubernetes (ECK) operator.
# Install ECK Custom Resource Definitions
kubectl create -f https://download.elastic.co/downloads/eck/2.16.1/crds.yaml

# Install the ECK operator
kubectl apply -f https://download.elastic.co/downloads/eck/2.16.1/operator.yaml
8. Let’s create a single node Elasticsearch instance with the default values.
If you want to check some recipes for different setups, you can visit this link.
Keep in mind that if you don’t specify a storageClass, ECK will use the one set by default which for GKE is standard-rwo which uses the Compute Engine persistent disk CSI Driver, and create a 1GB volume with it.
cat <<EOF | kubectl apply -f -
apiVersion: elasticsearch.k8s.elastic.co/v1
kind: Elasticsearch
metadata:
  name: quickstart
spec:
  version: 9.0.0
  nodeSets:
  - name: default
    count: 1
    config:
      node.store.allow_mmap: false
EOF
We disabled nmap because the default GKE machine has a too low vm.max_map_count value. Disabling it is not recommended for production but increasing the value of vm.max_map_count. You can read more about how to do this here.
9. Let’s also deploy a Kibana single node cluster. For Kibana, we will add a LoadBalancer which will give us an external IP we can use to reach Kibana from our device.
cat <<EOF | kubectl apply -f -
apiVersion: kibana.k8s.elastic.co/v1
kind: Kibana
metadata:
  name: quickstart
spec:
  version: 9.0.0
  http:
    service:
      metadata:
        annotations:
          cloud.google.com/l4-rbs: "enabled"
      spec:
        type: LoadBalancer
  count: 1
  elasticsearchRef:
    name: quickstart
EOF
Note the annotation:
cloud.google.com/l4-rbs: "enabled"
It is very important because it tells Autopilot to provide a public-facing LoadBalancer. If not set, the LoadBalancer will be internal.
10. Check that your pods are running
kubectl get pods
11. You can also run kubectl get elasticsearch and kubectl get kibana for more specific stats like Elasticsearch version, nodes and health.


12. Access your services.
kubectl get svc
This will show you the external URL for Kibana under EXTERNAL-IP. It might take a few minutes for the LoadBalancer to provision. Copy the value of EXTERNAL-IP.
13 Get the Elasticsearch password for the ‘elastic’ user:
kubectl get secret quickstart-es-elastic-user -o=jsonpath='{.data.elastic}' | base64 --decode
14. Access Kibana through your browser:
- URL: https://<EXTERNAL_IP>:5601
- Username:elastic
- Password:28Pao50lr2GpyguX470L2uj5 (from previous step)

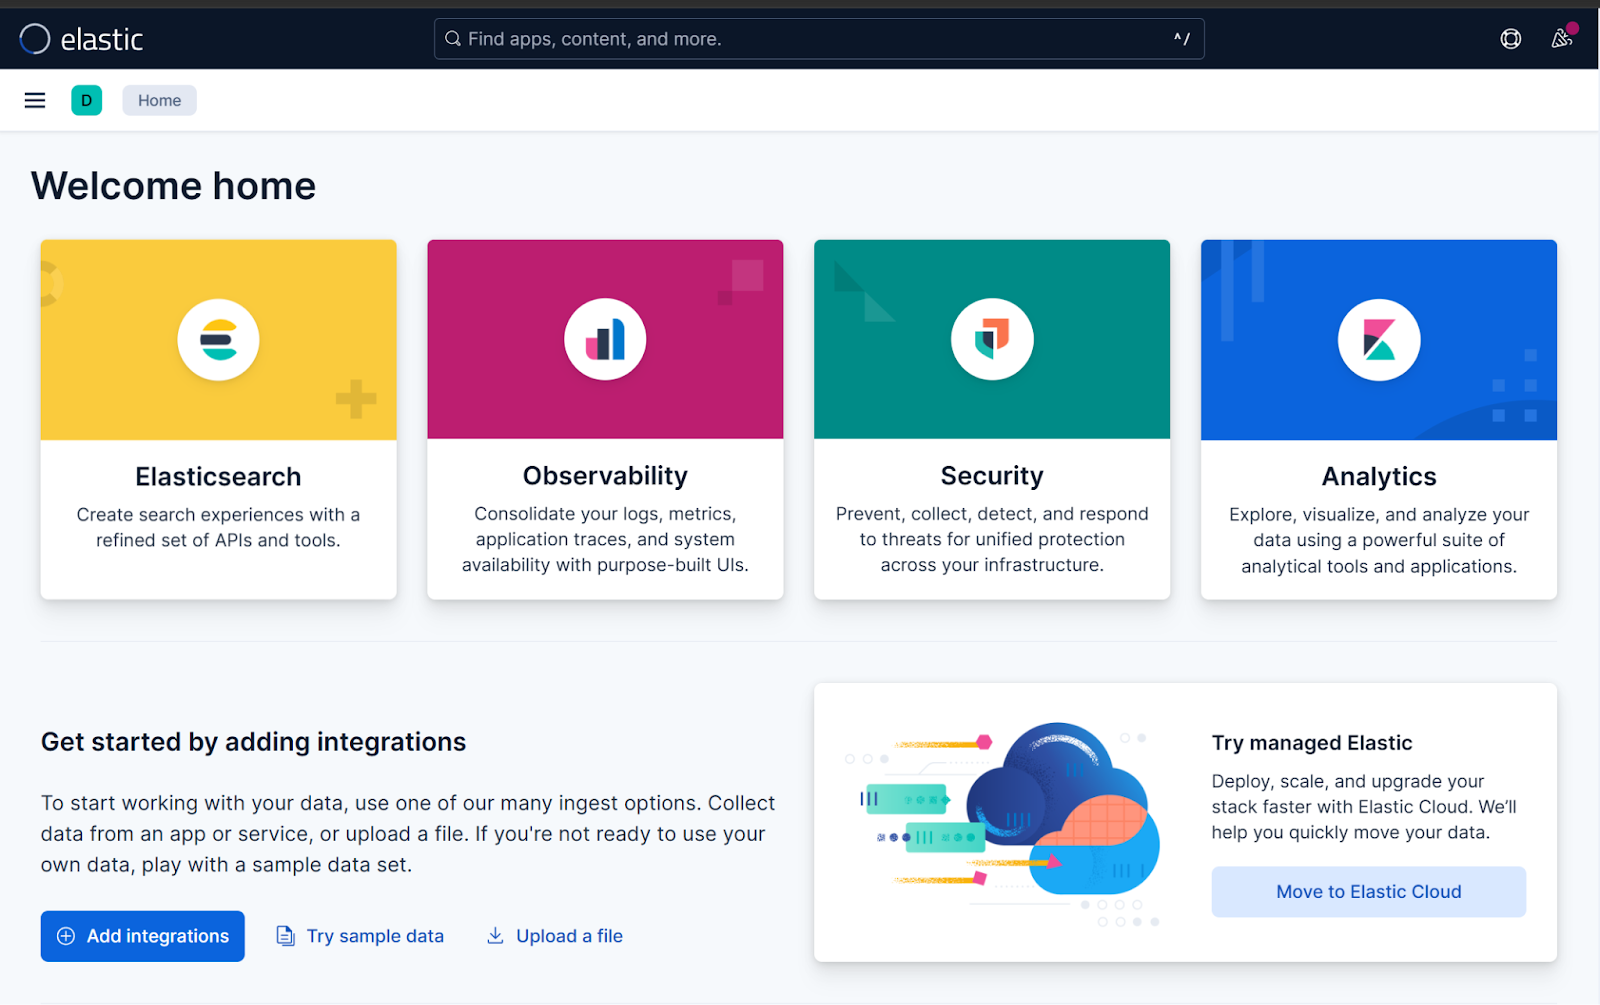
15. Accessing from your browser you will see the welcome screen.
If you want to change the Elasticsearch cluster specifications, like changing or resizing nodes, you can apply the yml manifest again with the new settings:
cat <<EOF | kubectl apply -f -
apiVersion: elasticsearch.k8s.elastic.co/v1
kind: Elasticsearch
metadata:
  name: quickstart
spec:
  version: 9.0.0
  nodeSets:
    - name: default
      count: 2
      config:
        node.store.allow_mmap: false
      podTemplate:
        spec:
          containers:
            - name: elasticsearch
              resources:
                requests:
                  memory: 1.5Gi
                  cpu: 2
                limits:
                  memory: 1.5Gi
                  cpu: 2
EOF
In this example, we are going to add one more node, and modify RAM and CPU. As you can see, now kubectl get elasticsearch shows 2 nodes:

The same applies for Kibana:
cat <<EOF | kubectl apply -f -
apiVersion: kibana.k8s.elastic.co/v1
kind: Kibana
metadata:
  name: quickstart
spec:
  version: 9.0.0
  http:
    service:
      metadata:
        annotations:
          cloud.google.com/l4-rbs: "enabled"
      spec:
        type: LoadBalancer
  count: 1
  elasticsearchRef:
    name: quickstart
  podTemplate:
    spec:
      containers:
        - name: kibana
          env:
            - name: NODE_OPTIONS
              value: "--max-old-space-size=1024"
          resources:
            requests:
              memory: 0.5Gi
              cpu: 0.5
            limits:
              memory: 1Gi
              cpu: 1
EOF
We can adjust the container CPU/RAM and also the Node.js memory usage (max-old-space-size).
Keep in mind that existing volume claims cannot be downsized. After applying the update, the operator will make the changes with the minimal disruption time.
Remember to delete the cluster when you're done testing to avoid unnecessary costs.
gcloud container clusters delete autopilot-cluster-1Next steps
If you want to learn more about Kubernetes and the Google Kubernetes Engine, check these articles:
- Elastic Cloud on Kubernetes | Elastic Docs
- Introducing GKE Autopilot | Google Cloud Blog
- Autopilot overview | Google Kubernetes Engine (GKE)
Ready to try this out on your own? Start a free trial.
Want to get Elastic certified? Find out when the next Elasticsearch Engineer training is running!
Related content
September 5, 2025
Running cloud-native Elasticsearch with ECK
Learn how to provision a GKE cluster with Terraform and run the Elastic Stack on Kubernetes using ECK.
September 1, 2025
Using UBI in Elasticsearch: Creating an app with UBI and search-ui
Learn how to use UBI in Elasticsearch through a practical example. We’ll be creating an application that produces UBI events on search and click results.
August 13, 2025
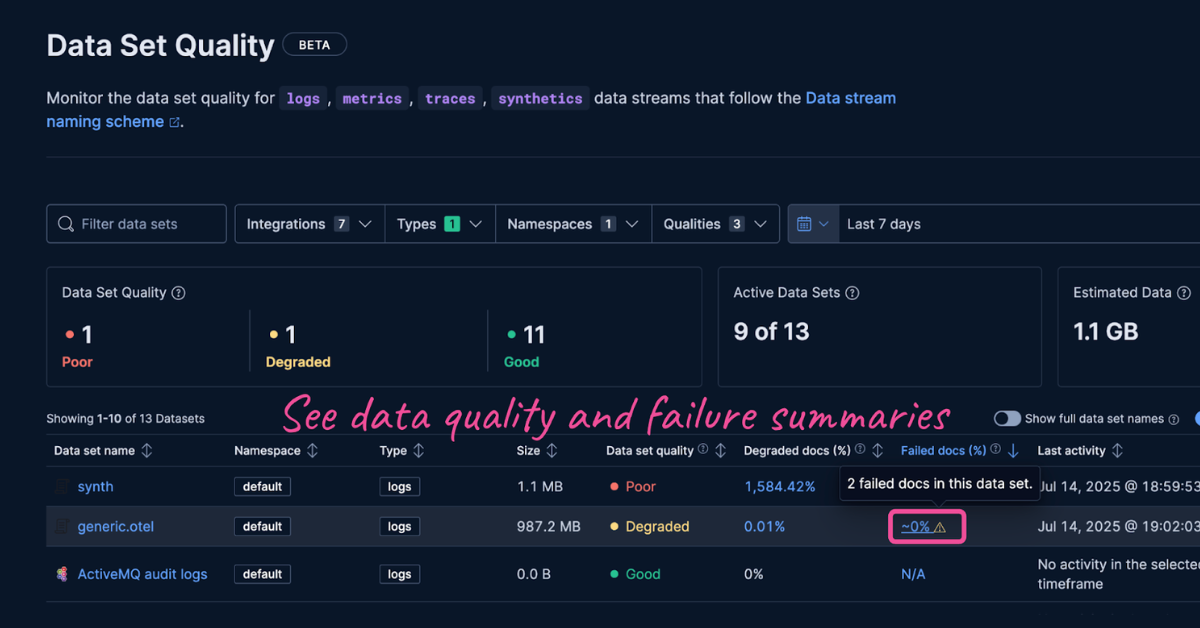
Failure store: see what didn’t make it
Learn about failure store, a new feature in the Elastic Stack that captures and indexes previously lost events.

August 14, 2025
Elasticsearch shards and replicas: A practical guide
Master the concepts of Elasticsearch shards and replicas and learn how to optimize them.

August 4, 2025
Working with your App Search data in a post Enterprise Search world
With Enterprise Search decommissioned in the Elastic Stack version 9, you can still work with your existing App Search data—we’ll show you how.