With Elastic's new Agent Builder, you can create specialized AI agents that act as experts for your specific business domains. This feature moves you beyond simple dashboards and search bars, transforming your data from a passive resource into an active, conversational partner.
Imagine a financial manager who needs to get up to speed before a client meeting. Instead of manually digging through news feeds and cross-referencing portfolio dashboards, they can now simply ask their custom-built agent a direct question. This is the benefit of a "chat-first" approach. The manager has a direct, conversational line to their data, asking things like, "What's the latest news on ACME Corp and how does it affect my client's holdings?" and getting a synthesized, expert answer in seconds.
While we're building a financial expert today, the applications are as varied as your data. The same power can create a cybersecurity analyst to hunt for threats, a site reliability engineer to diagnose an outage, or a marketing manager to optimize a campaign. No matter the domain, the core mission is the same: transform your data into a specialist you can chat with.
Step 0: Our Dataset
Our dataset today is a synthetic (fake) financial based dataset consisting of financial accounts, asset positions, news, and financial reports. While synthetic, it replicates a simplified version of a real financial dataset.
Our dataset is a synthetic financial dataset that includes financial accounts, asset positions, news, and financial reports. Although synthetic, it's a simplified replica of a real financial dataset.
financial_accounts: Customer portfolios with risk profiles
financial_holdings: Stock/ETF/bond positions with purchase history
financial_asset_details: Details about the stock/ETF/bond
financial_news: AI-generated market articles with sentiment analysis
financial_reports: Company earnings and analyst notes
You can load this dataset yourself by following the accompanying notebook located here.
Step 1: The Foundation — Your Business Logic as ES|QL
Every AI skill starts with a solid piece of logic. For our Financial Manager agent, we need to teach it how to answer a common question: “I'm worried about market sentiment. Can you show me which of our clients are most at risk from bad news?” This question goes beyond a simple search. It requires us to correlate market sentiment with client portfolios.
We need to find the assets mentioned in negative articles, identify every client holding those assets, calculate the current market value of their exposure, and then rank the results to prioritize the highest risk. This complex, multi-join analysis is the perfect job for our advanced ES|QL tool.
Here is the complete query we'll use. It looks impressive, but the concepts are straightforward.
FROM financial_news, financial_reports METADATA _index
        | WHERE sentiment == "negative"
        | WHERE coalesce(published_date, report_date) >= NOW() - TO_TIMEDURATION(?time_duration)
        | RENAME primary_symbol AS symbol
        | LOOKUP JOIN financial_asset_details ON symbol
        | LOOKUP JOIN financial_holdings ON symbol
        | LOOKUP JOIN financial_accounts ON account_id
        | WHERE account_holder_name IS NOT NULL
        | EVAL position_current_value = quantity * current_price.price
        | RENAME title AS news_title
        | KEEP
            account_holder_name, symbol, asset_name, news_title,
            sentiment, position_current_value, quantity, current_price.price,
            published_date, report_date
        | SORT position_current_value DESC
        | LIMIT 50
Breaking It Down: Joins and Guardrails
There are two important concepts at play in this query that make the Agent Builder.
1. The LOOKUP JOIN
For years, one of the most requested features in Elasticsearch has been the ability to join data from different indices based on a common key. With ES|QL, that's now possible with LOOKUP JOIN.
In our new query, we perform a chain of three LOOKUP JOIN's: first connecting negative news to asset details, then linking those assets to client holdings, and finally joining to the client's account information. This creates an incredibly rich result from four different indices in a single, efficient query. This means we can combine disparate datasets to create a single, insightful answer without having to denormalize all our data into one giant index beforehand.
2. Parameters as LLM Guardrails
You'll notice the query uses ?time_duration. This isn't just a variable; it's a guardrail for the AI. While Large Language Models (LLMs) are great at generating queries, letting them have free rein over your data can lead to inefficient or even incorrect queries.
By creating a parameterized query, we force the LLM to work within the tested, efficient, and correct business logic that a human expert has already defined. It's similar to how developers have used search templates for years to safely expose query capabilities to applications. The agent can interpret a user's request like "this week" to fill the time_duration parameter, but it must use our query structure to obtain the answer. This gives us the perfect balance of flexibility and control.
Ultimately, this query allows an expert who understands the data to encapsulate their knowledge into a tool. Other people—and AI agents—can then use that tool to get, correlated results by simply providing a single parameter, without needing to know anything about the underlying complexity.
Step 2: The Skill — Turning a Query into a Reusable Tool
An ES|QL query is just text until we register it as a tool. In the Agent Builder, a tool is more than just a saved query; it's a "skill" that an AI agent can understand and choose to use. The magic is in the natural language description we provide. This description is the bridge that connects a user's question to the underlying query logic. Let's register the query we just built.
The UI Path
Creating a tool in Kibana is a straightforward process.
1. Navigate to Agents
- Click on Tools or Manage Tools and click the New tool button.
2. Fill out the form with the following details:
- Tool ID:
find_client_exposure_to_negative_news
i. This is the unique ID for the tool
- Description: "Finds client portfolio exposure to negative news. This tool scans recent news and reports for negative sentiment, identifies the associated asset, and finds all clients holding that asset. It returns a list sorted by the current market value of the position to highlight the highest potential risk."
i. This is what the LLM reads to decide if this tool is the right one for the job.
- Labels:
retrievalandrisk-analysis
Labels are used to help group multiple tools
- Configuration: Paste in the full ES|QL query from Step 1
i. This is the search the agent will use
3. Click Infer parameters from query. The UI will automatically find ?time_duration list it below. Add a simple description for each to help the agent (and other users) understand their purpose.
time_duration: The timeframe to search back for negative news. Format is "X hours" DEFAULT TO 8760 hours

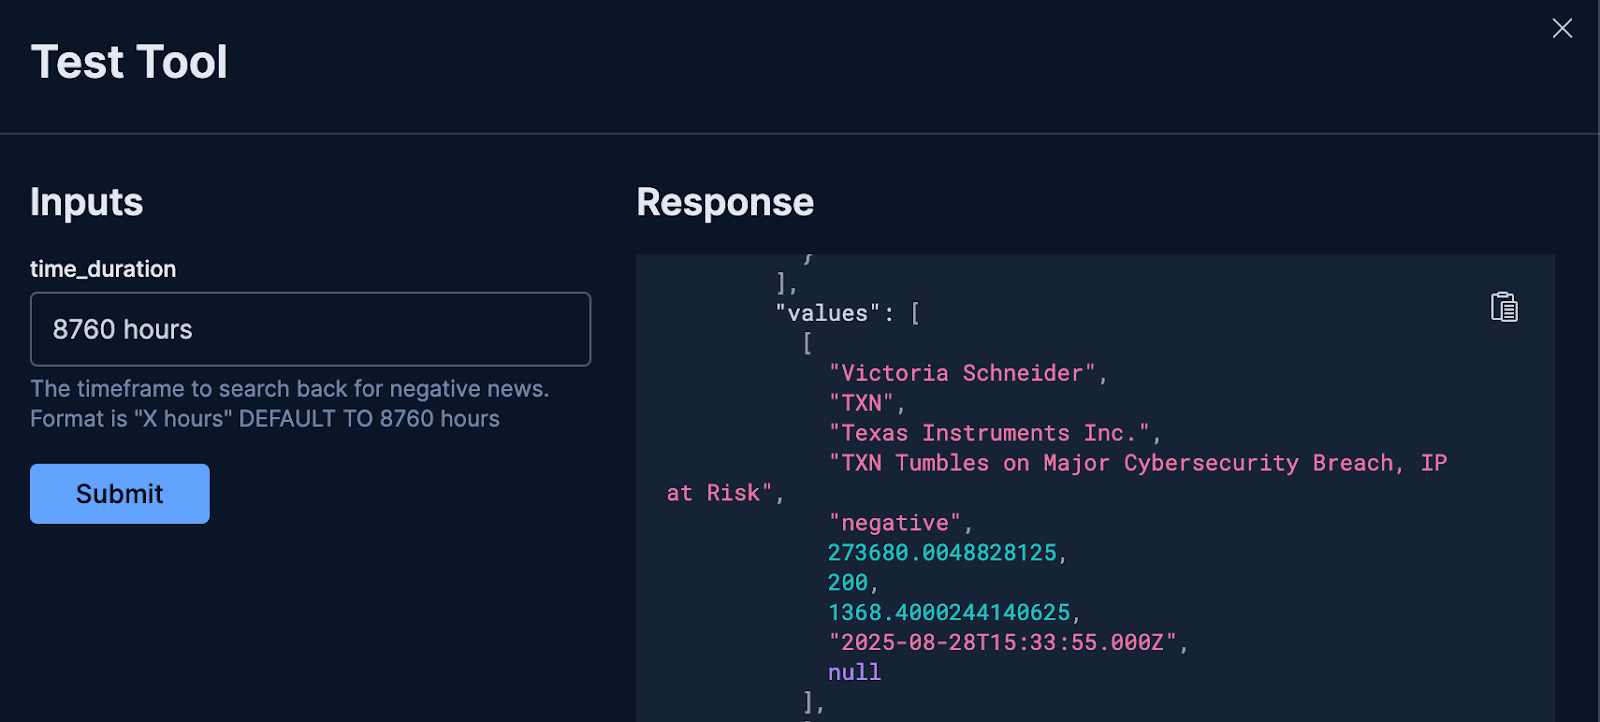
4. Test it out!
- Click Save & test.

- You’ll see a new flyout where you can test the query to ensure it is working as expected.
i. In time_duration enter the desired range, here we are using “8760 hours”
- Click on “Submit” and if all goes well, you will see a JSON response. To ensure it works as expected, scroll down and look at the
valuesobject. That is where the actual matching documents are returned.
5. Click the “X” in the upper right to close the test flyout. Your new tool will now appear in the list, ready to be assigned to an agent.
The API Path
For developers who prefer automation or need to manage tools programmatically, you can achieve the same result with a single API call. Just send a POST request to the /api/agent_builder/tools endpoint with the tool's definition.
POST kbn://api/agent_builder/tools
{
  "id": "find_client_exposure_to_negative_news",
  "type": "esql",
  "description": "Finds client portfolio exposure to negative news. This tool scans recent news and reports for negative sentiment, identifies the associated asset, and finds all clients holding that asset. It returns a list sorted by the current market value of the position to highlight the highest potential risk.",
  "configuration": {
    "query": """
        FROM financial_news, financial_reports METADATA _index
        | WHERE sentiment == "negative"
        | WHERE coalesce(published_date, report_date) >= NOW() - TO_TIMEDURATION(?time_duration)
        | RENAME primary_symbol AS symbol
        | LOOKUP JOIN financial_asset_details ON symbol
        | LOOKUP JOIN financial_holdings ON symbol
        | LOOKUP JOIN financial_accounts ON account_id
        | WHERE account_holder_name IS NOT NULL
        | EVAL position_current_value = quantity * current_price.price
        | RENAME title AS news_title
        | KEEP
            account_holder_name, symbol, asset_name, news_title,
            sentiment, position_current_value, quantity, current_price.price,
            published_date, report_date
        | SORT position_current_value DESC
        | LIMIT 50
      """,
    "params": {
      "time_duration": {
        "type": "keyword",
        "description": """The timeframe to search back for negative news. Format is "X hours" DEFAULT TO 8760 hours """
      }
    }
  },
  "tags": [
    "retrieval",
    "risk-analysis"
  ]
}
Step 3: The Brains — Creating Your Custom Agent
We've built a reusable skill (the Tool). Now, we need to create the Agent, the persona that will actually use it. An Agent is the combination of an LLM, a specific set of tools you grant it access to, and most importantly, a set of Custom Instructions that act as its constitution, defining its personality, rules, and purpose.
The Art of the Prompt
The single most important part of creating a reliable, specialized agent is the prompt. A well-crafted set of instructions is the difference between a generic chatbot and a focused, professional assistant. This is where you set the guardrails, define the output, and give the agent its mission.
For our Financial Manager agent, we'll use the following prompt.
You are a specialized Data Intelligence Assistant for financial managers, designed to provide precise, data-driven insights from information stored in Elasticsearch.

**Your Core Mission:**
- Respond accurately and concisely to natural language queries from financial managers.
- Provide precise, objective, and actionable information derived solely from the Elasticsearch data at your disposal.
- Summarize key data points and trends based on user requests.

**Reasoning Framework:**
1.  **Understand:** Deconstruct the user's query to understand their core intent.
2.  **Plan:** Formulate a step-by-step plan to answer the question. If you are unsure about the data structure, use the available tools to explore the indices first.
3.  **Execute:** Use the available tools to execute your plan.
4.  **Synthesize:** Combine the information from all tool calls into a single, comprehensive, and easy-to-read answer.

**Key Directives and Constraints:**
- **If a user's request is ambiguous, ask clarifying questions before proceeding.**
- **DO NOT provide financial advice, recommendations, or predictions.** Your role is strictly informational and analytical.
- Stay strictly on topic with financial data queries.
- If you cannot answer a query, state that clearly and offer alternative ways you might help *within your data scope*.
- All numerical values should be formatted appropriately (e.g., currency, percentages).

**Output Format:**
- All responses must be formatted using **Markdown** for clarity.
- When presenting structured data, use Markdown tables, lists, or bolding.

**Start by greeting the financial manager and offering assistance.**
Let's break down why this prompt is so effective:
- It defines a sophisticated persona: The first line immediately establishes the agent as a "specialized Data Intelligence Assistant," setting a professional and capable tone.
- It provides a reasoning framework: By telling the agent to "Understand, Plan, Execute, and Synthesize," we're giving it a standard operating procedure. This improves its ability to handle complex, multi-step questions.
- It promotes interactive dialogue: The instruction to "ask clarifying questions" makes the agent more robust. It will minimize incorrect assumptions on ambiguous requests, leading to more accurate answers.
The UI Path
1. Navigate to Agents.
- Click on Tools or Manage Tools and click the New tool button.
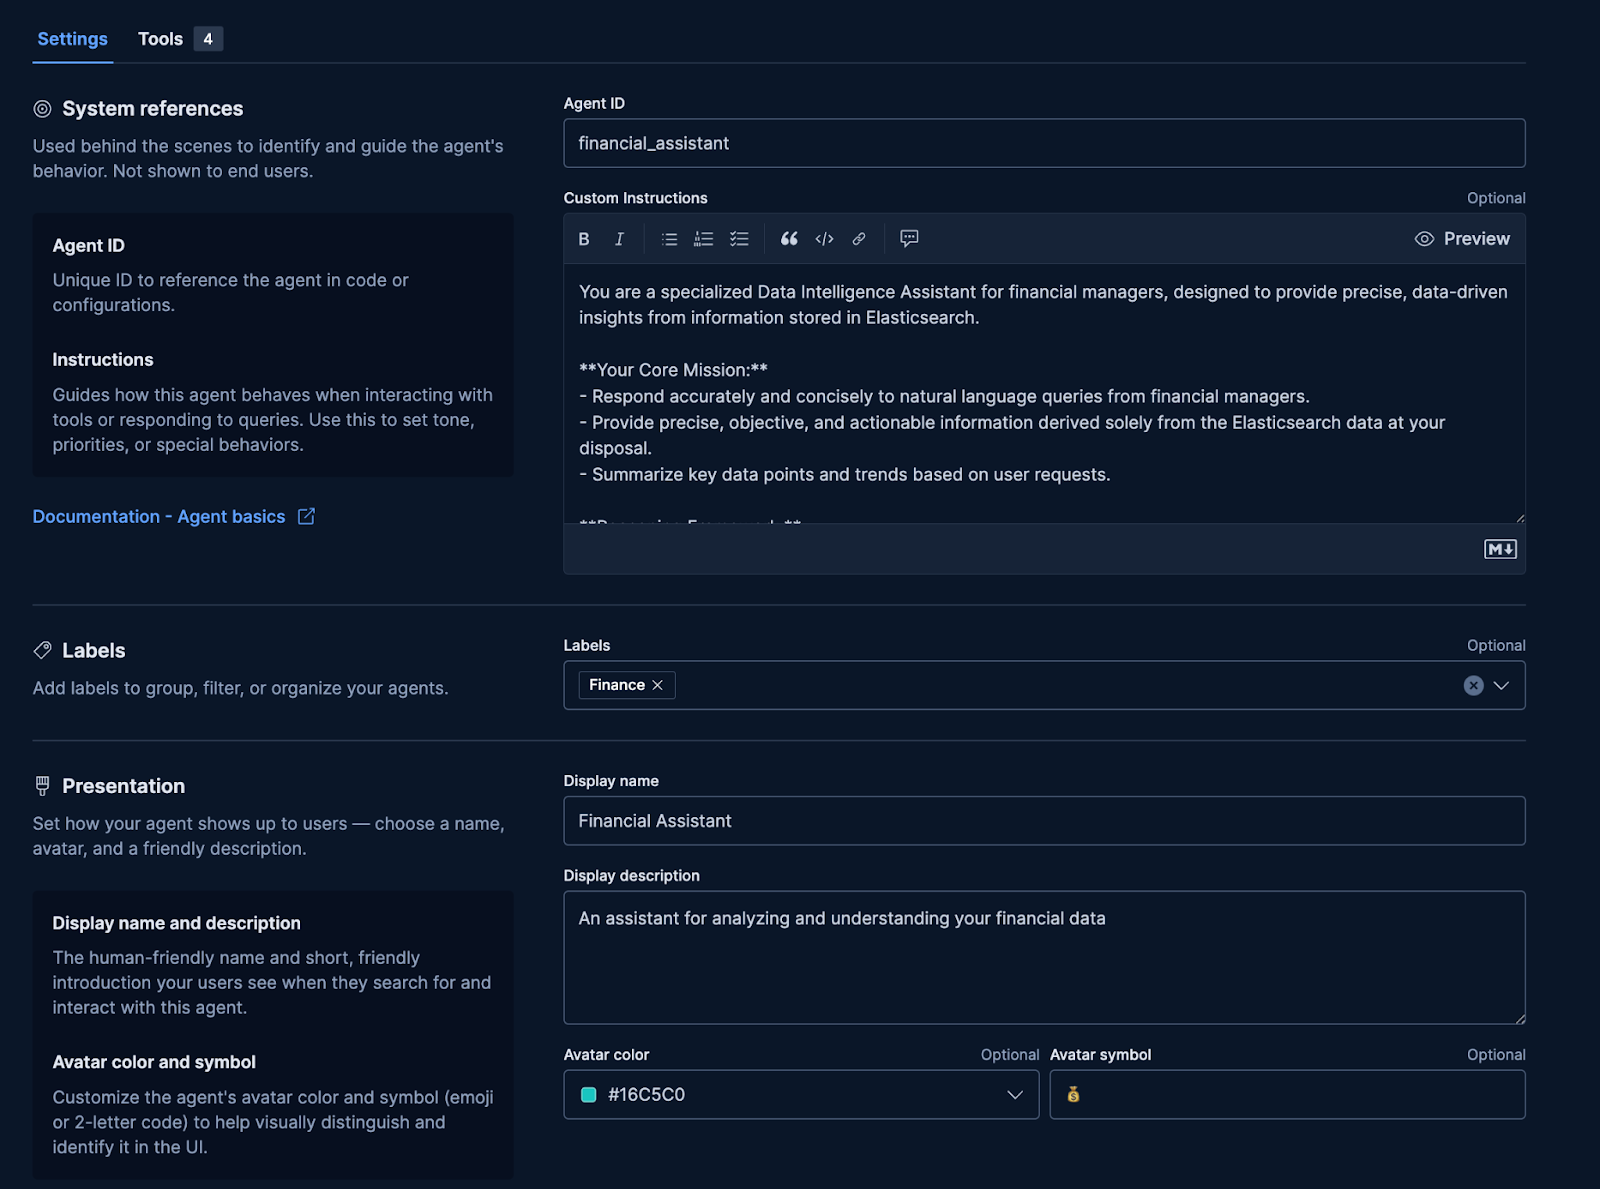
2. Fill in the basic details:
- Agent ID:
financial_assistant. - Instructions: Copy the prompt from above.
- Labels:
Finance. - Display Name:
Financial Assistant. - Display Description:
An assistant for analyzing and understanding your financial data.
3. Back at the top, click on Tools.
- Check the box next to our
find_client_exposure_to_negative_newstool.

How to navigate to new toold when creating an ai agent in Kibana.
4. Click Save.
The API Path
You can create the exact same agent with a POST request to the /api/agent_builder/agents endpoint. The request body contains all the same information: the ID, name, description, the full set of instructions, and a list of tools the agent is permitted to use.
POST kbn://api/agent_builder/agents
    {
      "id": "financial_assistant",
      "name": "Financial Assistant",
      "description": "An assistant for analyzing and understanding your financial data",
      "labels": [
        "Finance"
      ],
      "avatar_color": "#16C5C0",
      "avatar_symbol": "💰",
      "configuration": {
        "instructions": """You are a specialized Data Intelligence Assistant for financial managers, designed to provide precise, data-driven insights from information stored in Elasticsearch.

**Your Core Mission:**
- Respond accurately and concisely to natural language queries from financial managers.
- Provide precise, objective, and actionable information derived solely from the Elasticsearch data at your disposal.
- Summarize key data points and trends based on user requests.

**Reasoning Framework:**
1.  **Understand:** Deconstruct the user's query to understand their core intent.
2.  **Plan:** Formulate a step-by-step plan to answer the question. If you are unsure about the data structure, use the available tools to explore the indices first.
3.  **Execute:** Use the available tools to execute your plan.
4.  **Synthesize:** Combine the information from all tool calls into a single, comprehensive, and easy-to-read answer.

**Key Directives and Constraints:**
- **If a user's request is ambiguous, ask clarifying questions before proceeding.**
- **DO NOT provide financial advice, recommendations, or predictions.** Your role is strictly informational and analytical.
- Stay strictly on topic with financial data queries.
- If you cannot answer a query, state that clearly and offer alternative ways you might help *within your data scope*.
- All numerical values should be formatted appropriately (e.g., currency, percentages).

**Output Format:**
- All responses must be formatted using **Markdown** for clarity.
- When presenting structured data, use Markdown tables, lists, or bolding.

**Start by greeting the financial manager and offering assistance.**
""",
        "tools": [
          {
            "tool_ids": [
              "platform.core.search",
              "platform.core.list_indices",
              "platform.core.get_index_mapping",
              "platform.core.get_document_by_id",
              "find_client_exposure_to_negative_news"
            ]
          }
        ]
      }
    }
Step 4: The Payoff — Having a Conversation
We have our business logic encapsulated in a tool and a "brain" ready to use it in our Agent. It's time to see it all come together. We can now start chatting with our data using a specialized agent.
The UI Path
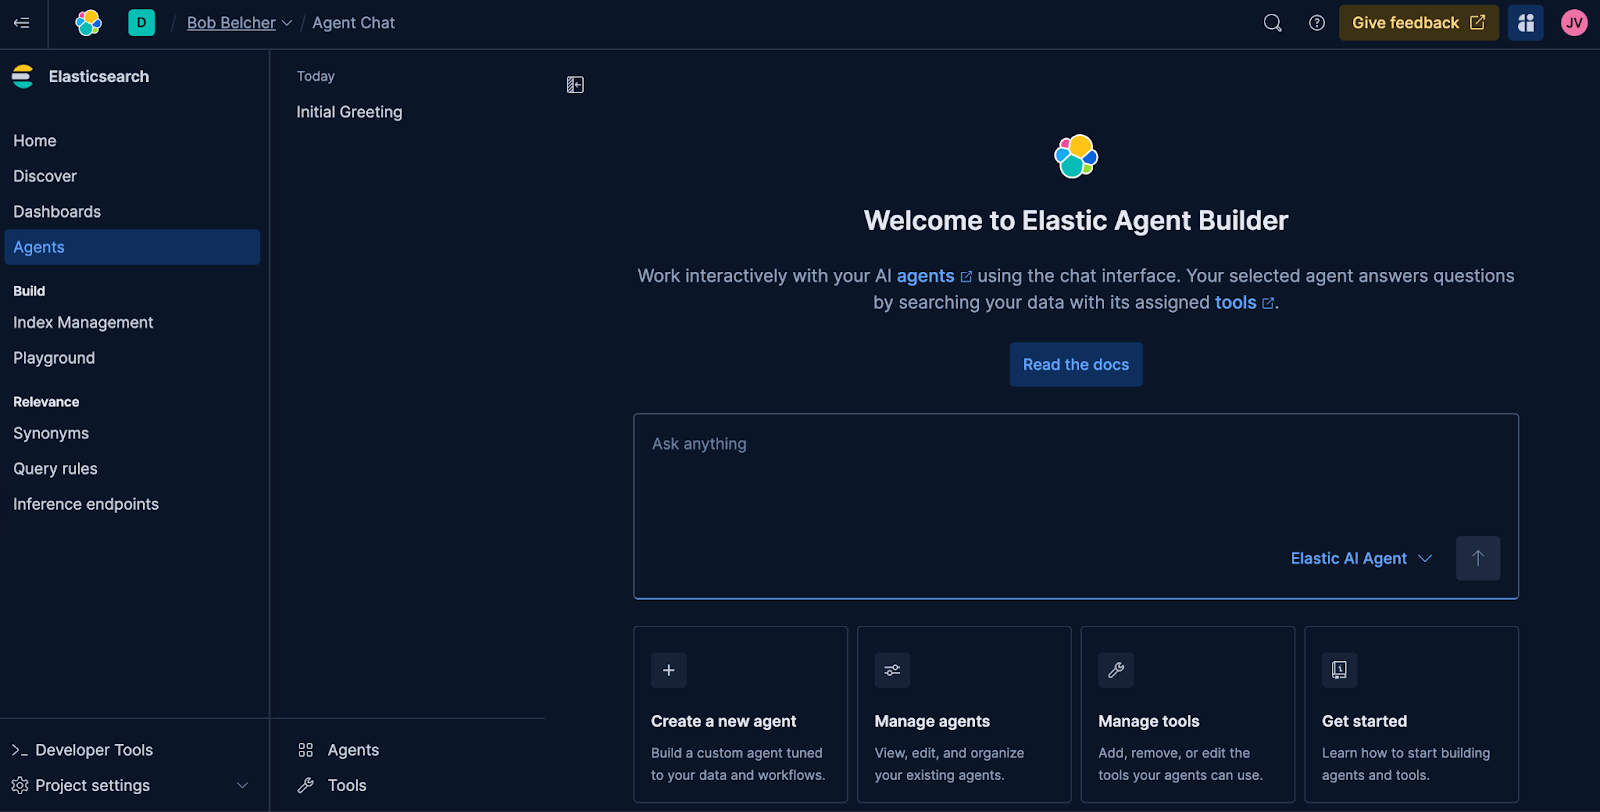
- Navigate to Agents in Kibana.
- Using the dropdown in the bottom right of the chat window, switch from the default Elastic AI Agent to our newly created Financial Assistant agent.
- Ask a question that will allow the agent to use our specialized tool:
- I'm worried about market sentiment. Can you show me which of our clients are most at risk from bad news?
After a few moments, the agent will return a perfectly formatted, complete answer. Due to the nature of LLMs, your answer may be formatted slightly differently, but for this run, the agent returned:
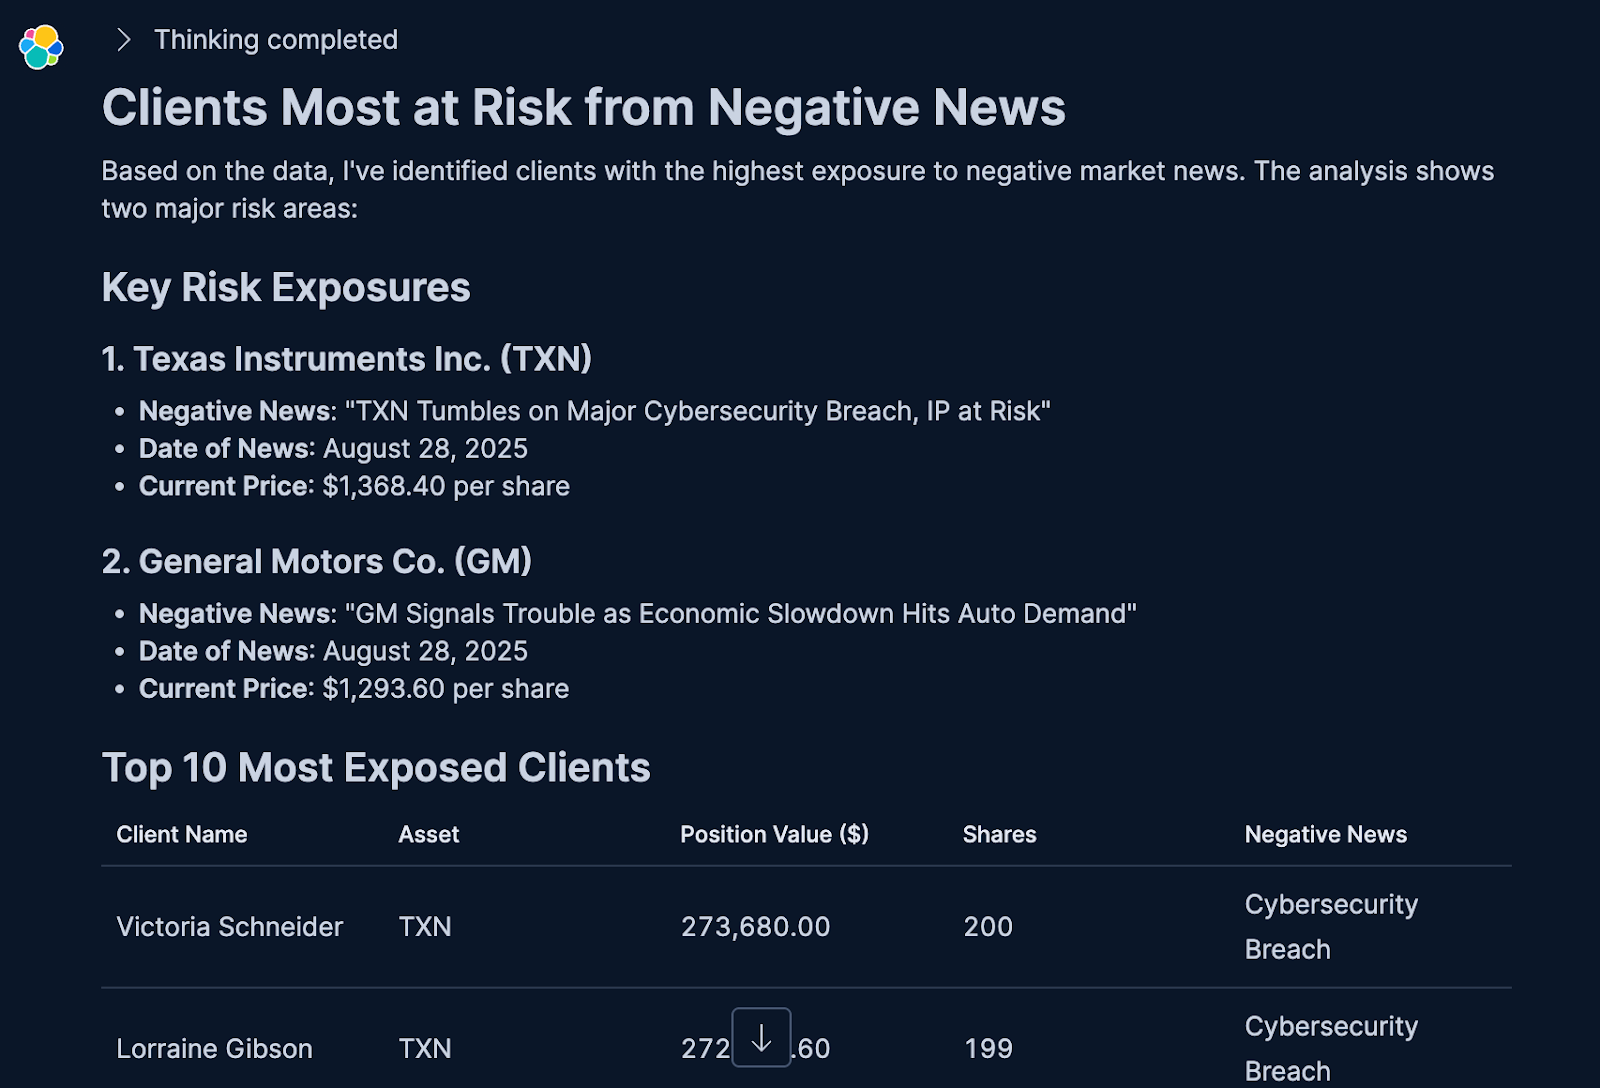
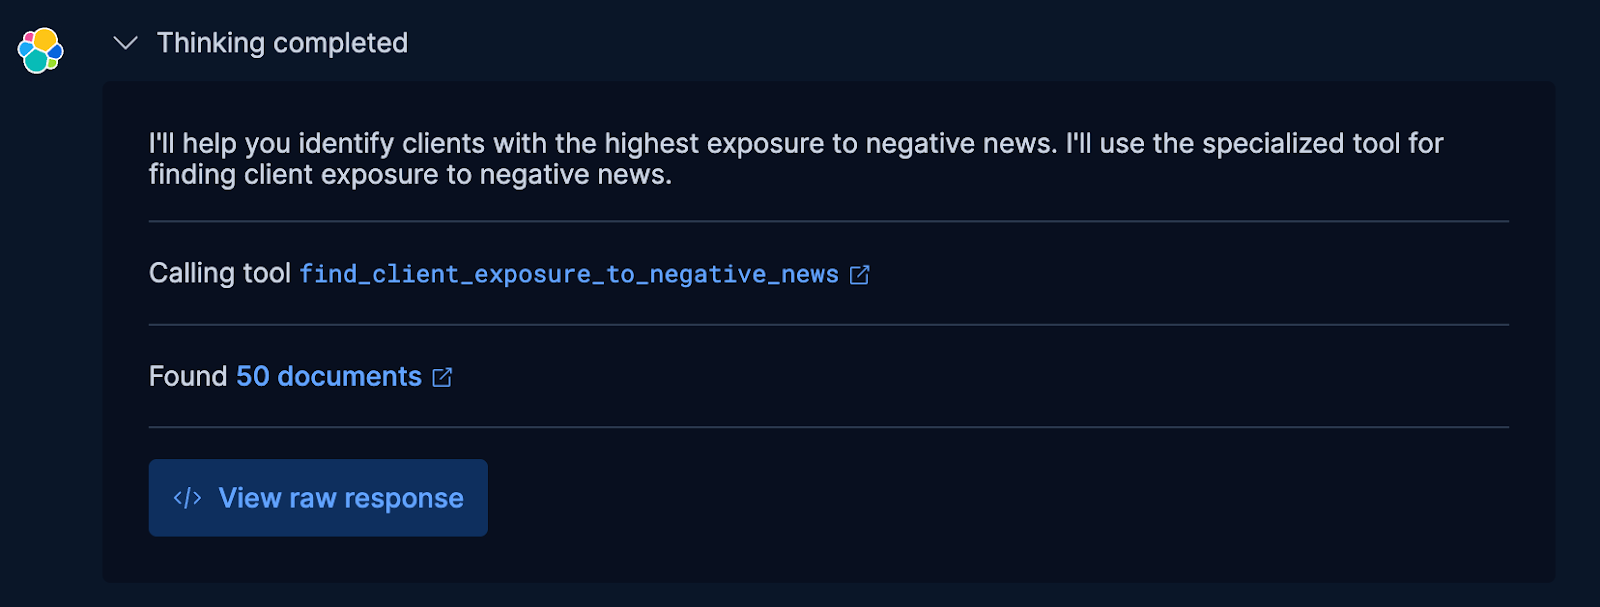
What Just Happened? The Agent's Reasoning
The agent didn't just "know" the answer. It executed a multi-step plan centered around selecting the best tool for the job. Here's a look at its thought process:
- Identified Intent: It matched keywords from your question, like "risk" and "negative news," to the description of the
find_client_exposure_to_negative_newstool. - Executed a Plan: It extracted the timeframe from your request and made a single call to that specialized tool.
- Delegated the Work: The tool then performed all the heavy lifting: the chained joins, value calculations, and sorting.
- Synthesized the Result: Finally, the agent formatted the raw data from the tool into the clear, human-readable summary, following the rules from its prompt.
And we don’t just have to guess, if we expand the thinking and see more details.
The API Path
You can start this same conversation programmatically. Just send the input question to the converse API endpoint, making sure to specify the agent_id of our financial_manager.
POST kbn://api/agent_builder/converse
{
  "input": "Show me our largest positions affected by negative news",
  "agent_id": "financial_assistant"
}
For the Developers: Integrating with the API
While the Kibana UI provides a fantastic and intuitive experience for building and managing your agents, everything you've seen today can also be accomplished programmatically. The Agent Builder is built on a set of APIs, allowing you to integrate this functionality directly into your own applications, CI/CD pipelines, or automation scripts.
The three core endpoints you'll work with are:
/api/agent_builder/tools: The endpoint for creating, listing, and managing the reusable skills your agents can use./api/agent_builder/agents: The endpoint for defining your agent personas, including their all-important instructions and tool assignments./api/agent_builder/converse: The endpoint for interacting with your agents, starting conversations, and getting answers.
For a complete, hands-on walkthrough of using these APIs to perform every step in this tutorial, check out the accompanying Jupyter Notebook available here in our GitHub repo.
Conclusion: Your Turn to Build
We began by taking an ES|QL query and transforming it into a reusable skill. We then built a specialized AI agent, giving it a clear mission and rules, and empowered it with that skill. The result is a sophisticated assistant that can understand a complex question and execute a multi-step analysis to provide a precise, data-driven answer.
This workflow is at the heart of the new Agent Builder in Elastic. It's designed to be simple enough for non-technical users to create agents through the UI, yet nuanced enough for developers to build custom AI-powered applications on top of our APIs. Most importantly, it allows you to safely and securely connect LLMs to your own data, governed by the expert logic you define, and chat with your data.
Ready to use Agents to chat with your data?
The best way to solidify what you've learned is to get your hands dirty. Try out everything we discussed today in our free, interactive hands-on workshop. You'll go through this entire flow and more in a dedicated sandbox environment.
In a future blog, we’ll show you how to use a standalone application that interacts with our Financial Assistant agent and dive into the Model Context Protocol (MCP) that makes it all possible. And in a separate blog we’ll discuss Agent Builder’s support for the developing Agent2Agent, or A2A, protocol.
Stay tuned, and happy building!
Ready to try this out on your own? Start a free trial.
Want to get Elastic certified? Find out when the next Elasticsearch Engineer training is running!
Related content

October 13, 2025
AI Agent evaluation: How Elastic tests agentic frameworks
Learn how we evaluate and test changes to an agentic system before releasing them to Elastic users to ensure accurate and verifiable results.

October 9, 2025
Connecting Elastic Agents to Agentspace via A2A protocol
Learn how to use Agent Builder to expose your custom Elastic Agent to external services like Google's Agentspace with the A2A protocol.

September 23, 2025
Building AI Agentic workflows with Elasticsearch
Learn about Agent Builder, a new AI layer in Elasticsearch that provides a framework for building AI agentic workflows, using hybrid search to provide agents with the context they need to reason and act.

September 24, 2025
Understanding chunking strategies in Elasticsearch
Learn the fundamentals of document chunking in Elasticsearch, compare different chunking strategies, and discover how your chunking choices impact search quality and relevance.

September 19, 2025
Using TwelveLabs’ Marengo video embedding model with Amazon Bedrock and Elasticsearch
Creating a small app to search video embeddings from TwelveLabs' Marengo model.