Follow up to the blog ChatGPT and Elasticsearch: OpenAI meets private data.
In this blog, you will learn how to:
- Create an Elasticsearch Serverless project
- Create an Inference Endpoint to generate embeddings with ELSER
- Use a Semantic Text field for auto-chunking and calling the Inference Endpoint
- Use the Open Crawler to crawl blogs
- Connect to an LLM using Elastic’s Playground to test prompts and context settings for a RAG chat application.
If you want to jump right into the code, you can view the accompanying Jupyter Notebook here.

ChatGPT and Elasticsearch (April 2023)
A lot has changed since I wrote the initial ChatGPT and Elasticsearch: OpenAI meets private data. Most people were just playing around with ChatGPT, if they had tried it at all. And every booth at every tech conference didn’t feature the letters “AI” (whether it is a useful fit or not).
Updates in Elasticsearch (August 2024)
Since then, Elastic has embraced being a full featured vector database and is putting a lot of engineering effort into making it the best vector database option for anyone building a search application. So as not to spend several pages talking about all the enhancements to Elasticsearch, here is a non-exhaustive list in no particular order:
- ELSER - The Elastic Learned Sparse Encoder
- Elastic Serverless Service was built and is in public beta
- Elasticsearch open Inference API
- Semantic_text type - Simplify semantic search
- Automatic chunking
- Playground - Visually experiment with RAG application building in Elasticsearch
- Retrievers
- Open web crawler
With all that change and more, the original blog needs a rewrite. So let’s get started.
Updated flow: ChatGPT, Elasticsearch & RAG
The plan for this updated flow will be:
- Setup
- Create a new Elasticsearch serverless search project
- Create an embedding inference API using ELSER
- Configure an index template with a
semantic_textfield - Create a new LLM connector
- Configure a chat completion inference service using our LLM connector
- Ingest and Test
- Crawl the Elastic Labs sites (Search, Observability, Security) with the Elastic Open Web Crawler.
- Use Playground to test prompts using our indexed Labs content
- Configure and deploy our App
- Export the generated code from Playground to an application using FastAPI as the backend and React as the front end.
- Run it locally
- Optionally deploy our chatbot to Google Cloud Run
Setup
Elasticsearch Serverless Project
We will be using an Elastic serverless project for our chatbot. Serverless removes much of the complexity of running an Elasticsearch cluster and lets you focus on actually using and gaining value from your data. Read more about the architecture of Serverless here.
If you don’t have an Elastic Cloud account, you can create a free two-week trial at elastic.co (Serverless pricing available here). If you already have one, you can simply log in.
Once logged in, you will need to create a cloud API key.
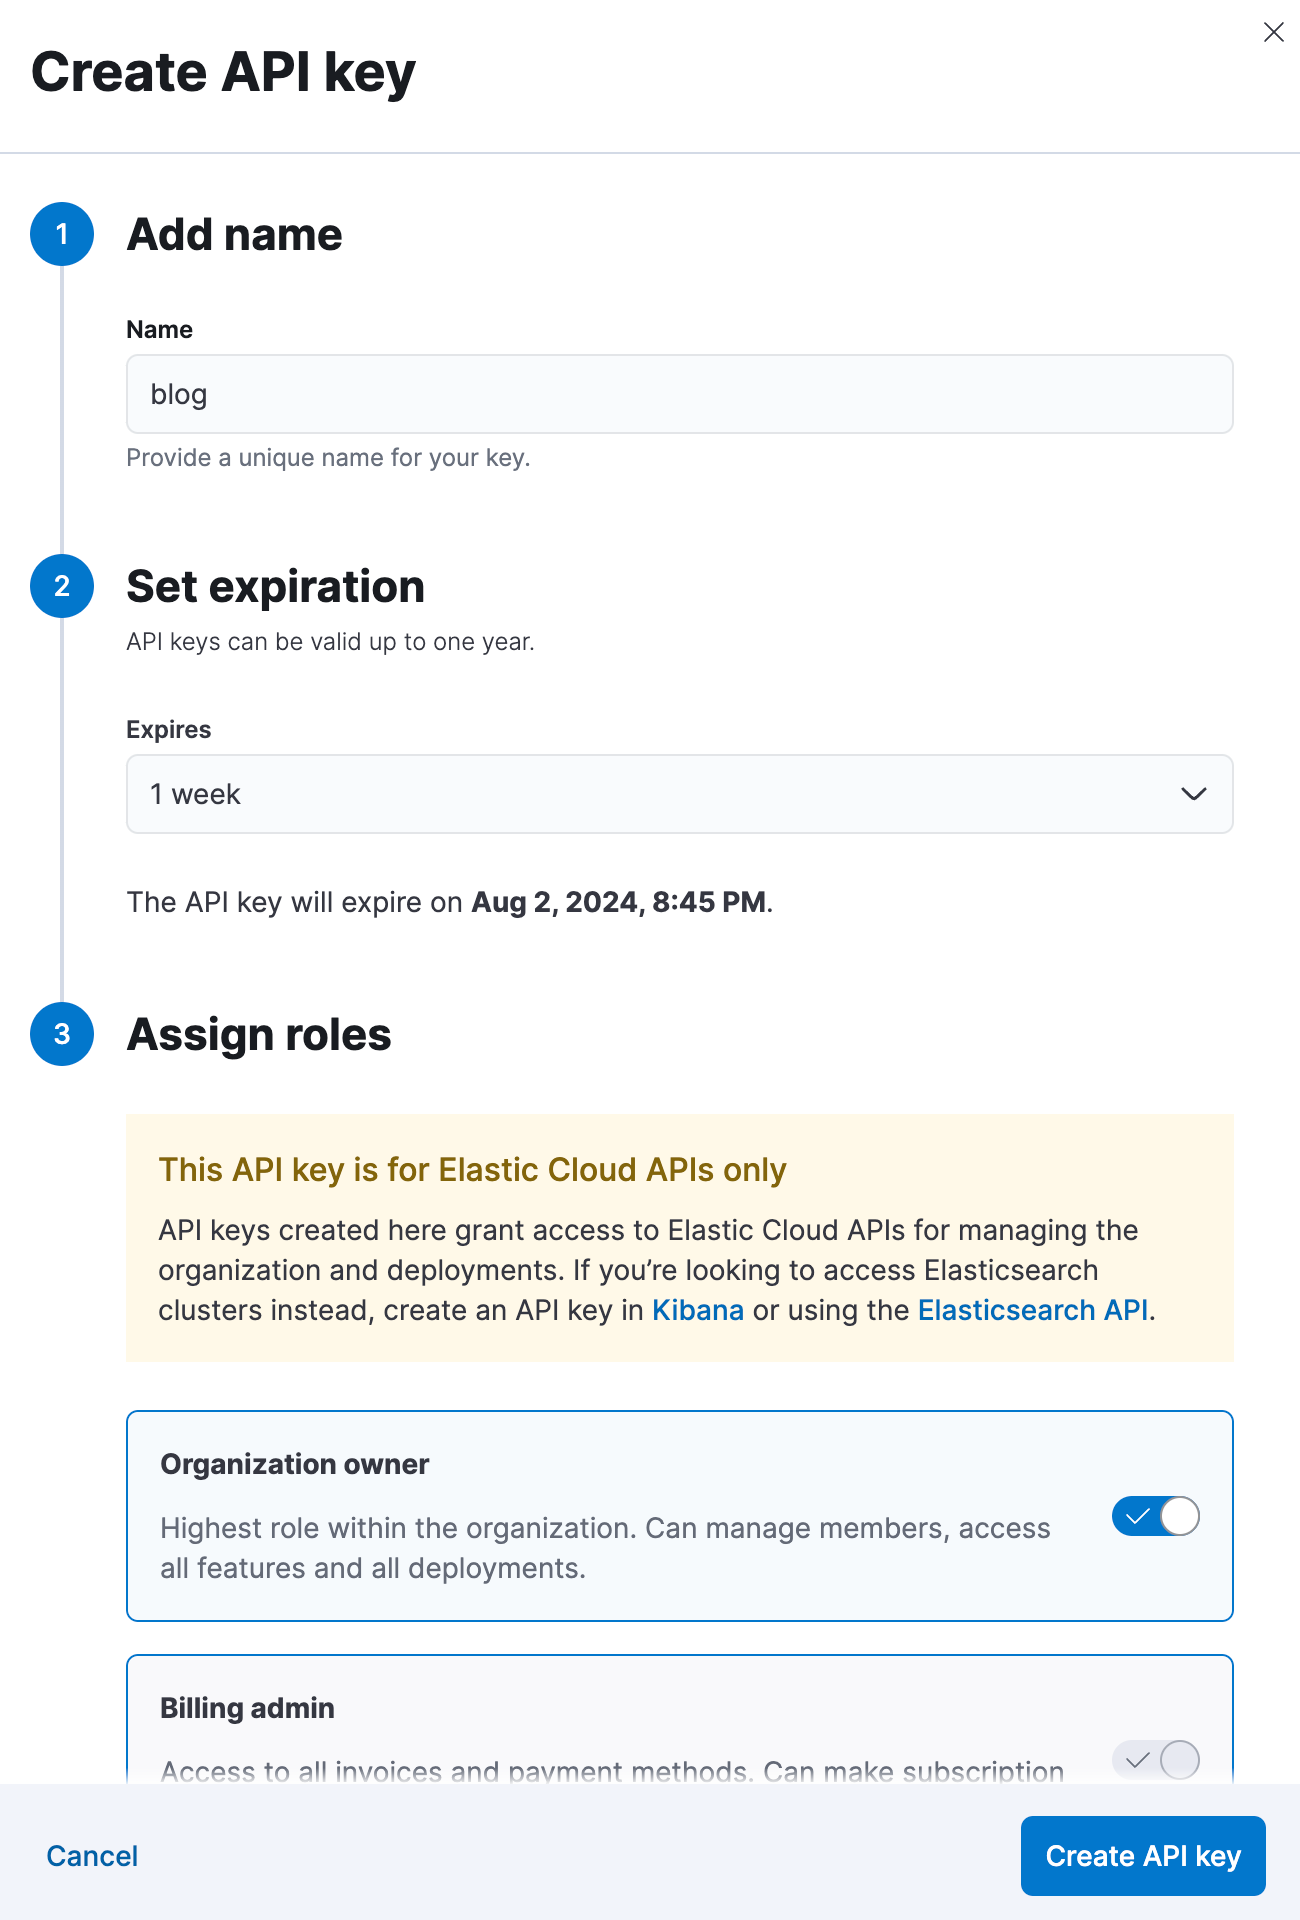
NOTE: In the steps below, I will show the relevant parts of Python code. For the sake of brevity, I’m not going to show complete code that will import required libraries, wait for steps to complete, catch errors, etc.
For more robust code you can run, please see the accompanying Jypyter notebook!
Create Serverless Project
We will use our newly created API key to perform the next setup steps.
First off, create a new Elasticsearch project.
url = "https://api.elastic-cloud.com/api/v1/serverless/projects/elasticsearch"

project_data = {
    "name": "The RAG Really Tied the App Together",
    "region_id": "aws-us-east-1",
    "optimized_for": "vector"
}

auth_header = f"ApiKey {api_key}"  # seeing what a comment lokos like with pound
headers = {
    "Content-Type": "application/json",
    "Authorization": auth_header
}

es_project = requests.post(url, json=project_data, headers=headers) :four:url- This is the standard Serverless endpoint for Elastic Cloudproject_data- Your Elasticsearch Serverless project settingsname- Name we want for the projectregion_id- Region to deployoptimized_for- Configuration type - We are usingvectorwhich isn’t strictly required for the ELSER model but can be suitable if you select a dense vector model such as e5.
Create Elasticsearch Python client
One nice thing about creating a programmatic project is that you will get back the connection information and credentials you need to interact with it!
es = Elasticsearch(es_project_keys['endpoints']['elasticsearch'],
                   basic_auth=(es_project_keys['credentials']['username'],
                              es_project_keys['credentials']['password']
                              )
                   )
ELSER Embedding API
Once the project is created, which usually takes less than a few minutes, we can prepare it to handle our labs’ data.
The first step is to configure the inference API for embedding. We will be using the Elastic Learned Sparse Encoder (ELSER).
- Command to create the inference endpoint
- Specify this endpoint will be for generating sparse embeddings
model_config = {
    "service": "elser",
    "service_settings": {
        "num_allocations": 8,
        "num_threads": 1
    }
}

inference_id = "my-elser-model"

create_endpoint = es.inference.put_model(
    inference_id=inference_id,
    task_type="sparse_embedding",
    body=model_config
)model_config- Settings we want to use for deploying our semantic reranking modelservice- Use the pre-definedelserinference serviceservice_settings.num_allocations- Deploy the model with 8 allocationsservice_settings.num_threads- Deploy with one thread per allocation
inference_id- The name you want to give to you inference endpointtask_type- Specifies this endpoint will be for generating sparse embeddings
This single command will trigger Elasticsearch to perform a couple of tasks:
- It will download the ELSER model.
- It will deploy (start) the ELSER model with eight allocations and one thread per allocation.
- It will create an inference API we use in our field mapping in the next step.
Index Mapping
With our ELSER API created, we will create our index template.
template_body = {
    "index_patterns": ["elastic-labs*"],
    "template": {
        "mappings": {
            "properties": {
                "body": {
                    "type": "text",
                    "copy_to": "semantic_body"
                },
                "semantic_body": {
                    "type": "semantic_text",
                    "inference_id": "my-elser-model"
                },
                "headings": {
                    "type": "text"
                },
                "id": {
                    "type": "keyword"
                },
                "meta_description": {
                    "type": "text"
                },
                "title": {
                    "type": "text"
                }
            }
        }
    }
}

template_resp = es.indices.put_index_template(  :eight:
    name="labs_template",
    body=template_body
)index_patterns- The pattern of indices we want this template to apply to.body- The main content of a web page the crawler collects will be written totype- It is a text fieldcopy_to- We need to copy that text to our semantic text field for semantic processing
semantic_bodyis our semantic text field- This field will automatically handle chunking of long text and generating embeddings which we will later use for semantic search
inference_idspecifies the name of the inference endpoint we created above, allowing us to generate embeddings from our ELSER model
headings- Heading tags from the htmlid- crawl id for this documentmeta_description- value of the description meta tag from the htmltitleis the title of the web page the content is from
Other fields will be indexed but auto-mapped. The ones we are focused on pre-defining in the template will not need to be both keyword and text type, which is defined automatically otherwise.
Most importantly, for this guide, we must define our semantic_text field and set a source field to copy from with copy_to. In this case, we are interested in performing semantic search on the body of the text, which the crawler indexes into the body.
Crawl All the Labs!
We can now install and configure the crawler to crawl the Elastic * Labs. We will loosely follow the excellent guide from the Open Crawler released for tech-preview Search Labs blog.
The steps below will use docker and run on a MacBook Pro. To run this with a different setup, consult the Open Crawler Github readme.
Clone the repo
Open the command line tool of your choice. I’ll be using Iterm2. Clone the crawler repo to your machine.
~/repos
❯ git clone git@github.com:elastic/crawler.git
Cloning into 'crawler'...
remote: Enumerating objects: 1944, done.
remote: Counting objects: 100% (418/418), done.
remote: Compressing objects: 100% (243/243), done.
remote: Total 1944 (delta 237), reused 238 (delta 170), pack-reused 1526
Receiving objects: 100% (1944/1944), 84.85 MiB | 31.32 MiB/s, done.
Resolving deltas: 100% (727/727), done.
Build the crawler container
Run the following command to build and run the crawler.
docker build -t crawler-image . && docker run -i -d --name crawler crawler-image~/repos
❯ cd crawler
~/repos/crawler main
❯ docker build -t crawler-image . && docker run -i -d --name crawler crawler-image
[+] Building 66.9s (6/10) docker:desktop-linux
=> [internal] load build definition from Dockerfile 0.0s
=> => transferring dockerfile: 333B 0.0s
=> [internal] load .dockerignore 0.0s
=> => transferring context: 2B 0.0s
=> [internal] load metadata for docker.io/library/jruby:9.4.7.0-jdk21 1.7s
=> [auth] library/jruby:pull token for registry-1.docker.io 0.0s
...
...
=> [5/5] RUN make clean install 50.7s
=> exporting to image 0.9s
=> => exporting layers 0.9s
=> => writing image sha256:6b3f4000a121e76aba76fdbbf11b53f53a3fabba61c0b7cf3fdcdb21e244f1d8 0.0s
=> => naming to docker.io/library/crawler-image 0.0s
cc6c16941de04355c050ef5f5fd0041ee7f3505b8cf8448c7223f0d2e80b5498Configure the crawler
Create a new YAML in your favorite editor (vim):
~/repos/crawler main
 ❯ vim config/elastic-labs.yml
We want to crawl all the documents on the three labs’ sites, but since blogs and tutorials on those sites tend to link out to other parts of elastic.co, we need to set a couple of runs to restrict the scope. We will allow crawling the three paths for our site and then deny anything else.
Paste the following in the file and save
domains:
  - url: https://www.elastic.co
    seed_urls:
      - https://www.elastic.co/search-labs
      - https://www.elastic.co/observability-labs
      - https://www.elastic.co/security-labs
    crawl_rules:
      - policy: allow
        type: begins
        pattern: /search-labs
      - policy: allow
        type: begins
        pattern: /observability-labs
      - policy: allow
        type: begins
        pattern: /security-labs
      - policy:deny
        type: regex
        pattern: .*/author/.*
      - policy: deny
        type: regex
        pattern: .*

output_sink: elasticsearch
output_index: elastic-labs
max_crawl_depth: 2

elasticsearch:
  host: "https://<your_serverless_project>.es.<region>.aws.elastic.cloud"
  port: "443"
  api_key: "<API Key generated above>"
Copy the configuration into the Docker container:
~/repos/crawler main ⇣
 ❯ docker cp config/elastic-labs.yml crawler:/app/config/elastic-labs.yml

Successfully copied 2.05kB to crawler:/app/config/elastic-labs.yml
Validate the domain
Ensure the config file has no issues by running:
 ❯ docker exec -it crawler bin/crawler validate config/elastic-labs.yml
Domain https://www.elastic.co is valid
Start the crawler
When you first run the crawler, processing all the articles on the three lab sites may take several minutes.
docker exec -it crawler bin/crawler crawl config/elastic-labs.yml~/repos/crawler/config main ⇣
❯ docker exec -it crawler bin/crawler crawl config/elastic-labs.yml
[crawl:6692c3b584f98612e3a465ce] [primary] Initialized an in-memory URL queue for up to 10000 URLs
[crawl:6692c3b584f98612e3a465ce] [primary] ES connections will be authorized with configured API key
[crawl:6692c3b584f98612e3a465ce] [primary] ES connections will use SSL without ca_fingerprint
[crawl:6692c3b584f98612e3a465ce] [primary] Elasticsearch sink initialized for index [elastic-labs] with pipeline [ent-search-generic-ingestion]
[crawl:6692c3b584f98612e3a465ce] [primary] Starting the crawl with up to 10 parallel thread(s)...
[crawl:6692c3b584f98612e3a465ce] [primary] Crawl status: queue_size=11, pages_visited=1, urls_allowed=12, urls_denied={}, crawl_duration_msec=847, crawling_time_msec=635.0, avg_response_time_msec=635.0, active_threads=1, http_client={:max_connections=>100, :used_connections=>1}, status_codes={"200"=>1}Confirm articles have been indexed
We will confirm two ways.
First, we will look at a sample document to ensure that ELSER embeddings have been generated. We just want to look at any doc so we can search without any arguments:
GET elastic-labs/_searchEnsure you get results and then check that the field body contains text and semantic_body.inference.chunks.0.embeddings contains tokens.
    "hits": [
      {
        "_index": "elastic-labs",
...
        "_source": {
          "body": "Tutorials Integrations Blog Start Free Trial Contact Sales Open navigation menu Overview ...
          "semantic_body": {
            "inference": {
              "inference_id": "my-elser-model",
              "model_settings": {
                "task_type": "sparse_embedding"
              },
              "chunks": [
                {
                  "text": "Tutorials Integrations Blog Start Free Trial Contact Sales Open navigation menu Overview ...
                  "embeddings": {
                    "##her": 2.1016746,
                    "elastic": 2.084594,
                    "##ai": 1.6336359,
                    "dock": 1.5765089,
                    ...
We can check we are gathering data from each of the three sites with a terms aggregation:
GET elastic-labs/_search
{
  "size": 0,
  "aggs": {
    "url_path_dir1": {
      "terms": {
        "field": "url_path_dir1.keyword"
      }
    }
  }
}
You should see results that start with one of our three site paths.
      "buckets": [
        {
          "key": "security-labs",
          "doc_count": 37
        },
        {
          "key": "observability-labs",
          "doc_count": 30
        },
        {
          "key": "search-labs",
          "doc_count": 6
        }
      ]
To the Playground!
With our data ingested, chunked, and inference, we can start working on the backend application code that will interact with the LLM for our RAG app.

LLM Connection
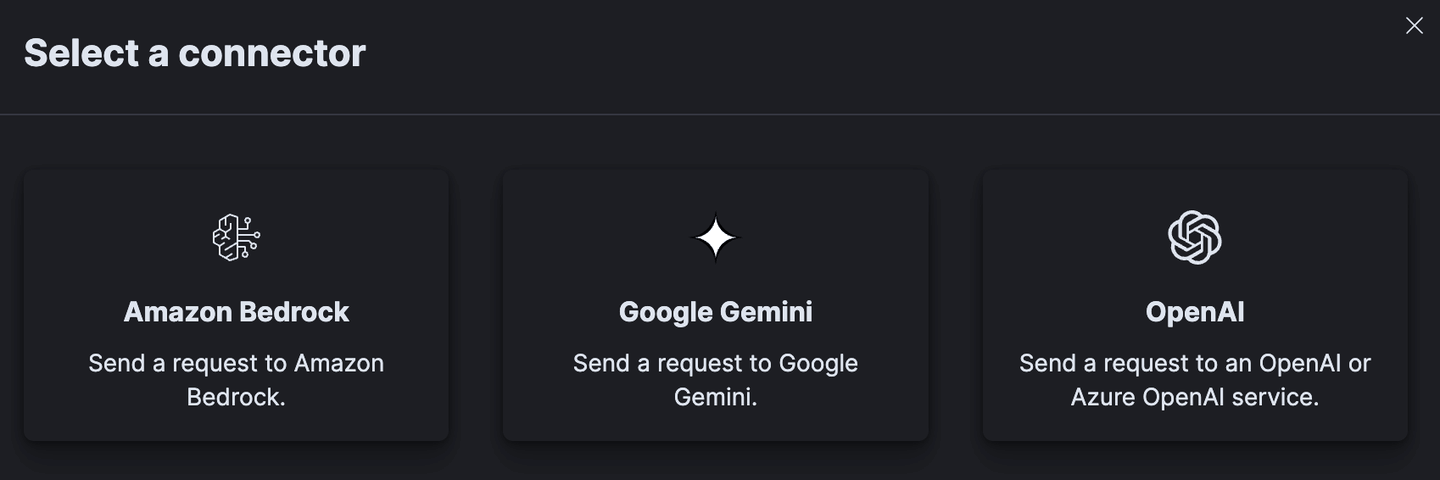
We need to configure a connection for Playground to make API calls to an LLM. As of this writing, Playground supports chat completion connections to OpenAI, AWS Bedrock, and Google Gemini. More connections are planned, so check the docs for the latest list.
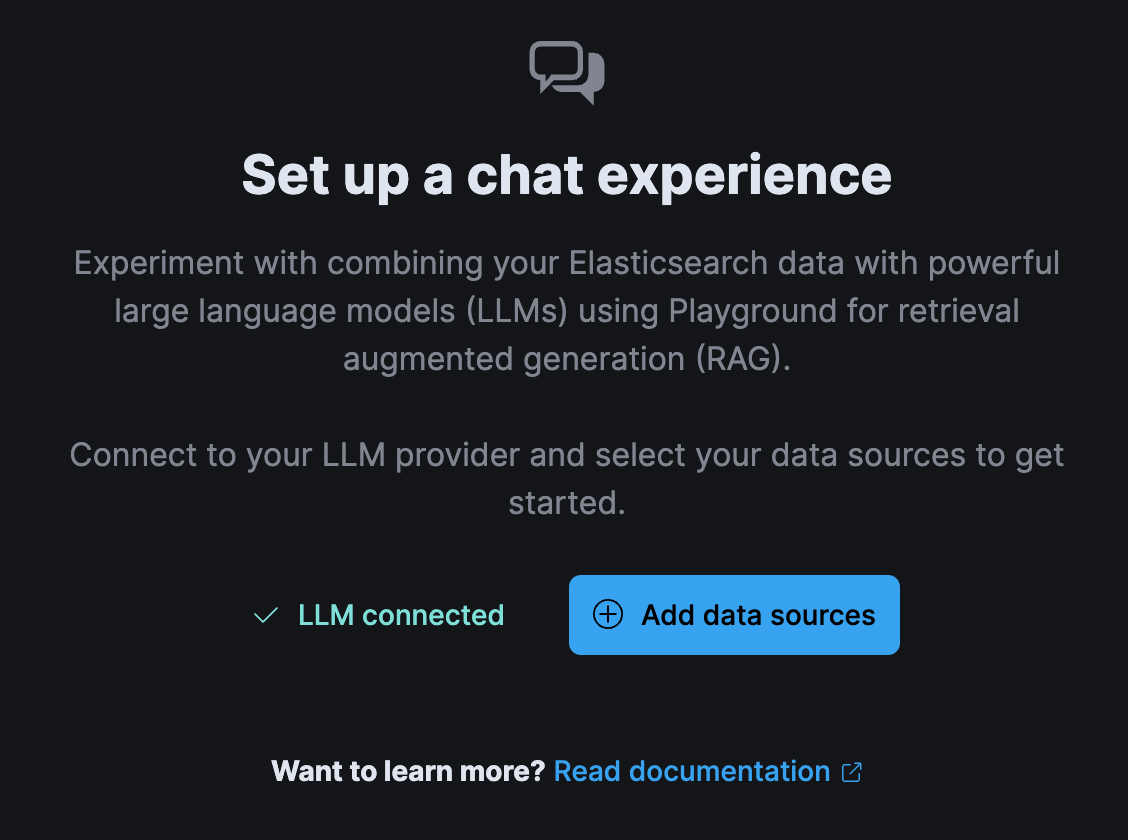
When you first enter the Playground UI, click on “Connect to an LLM”
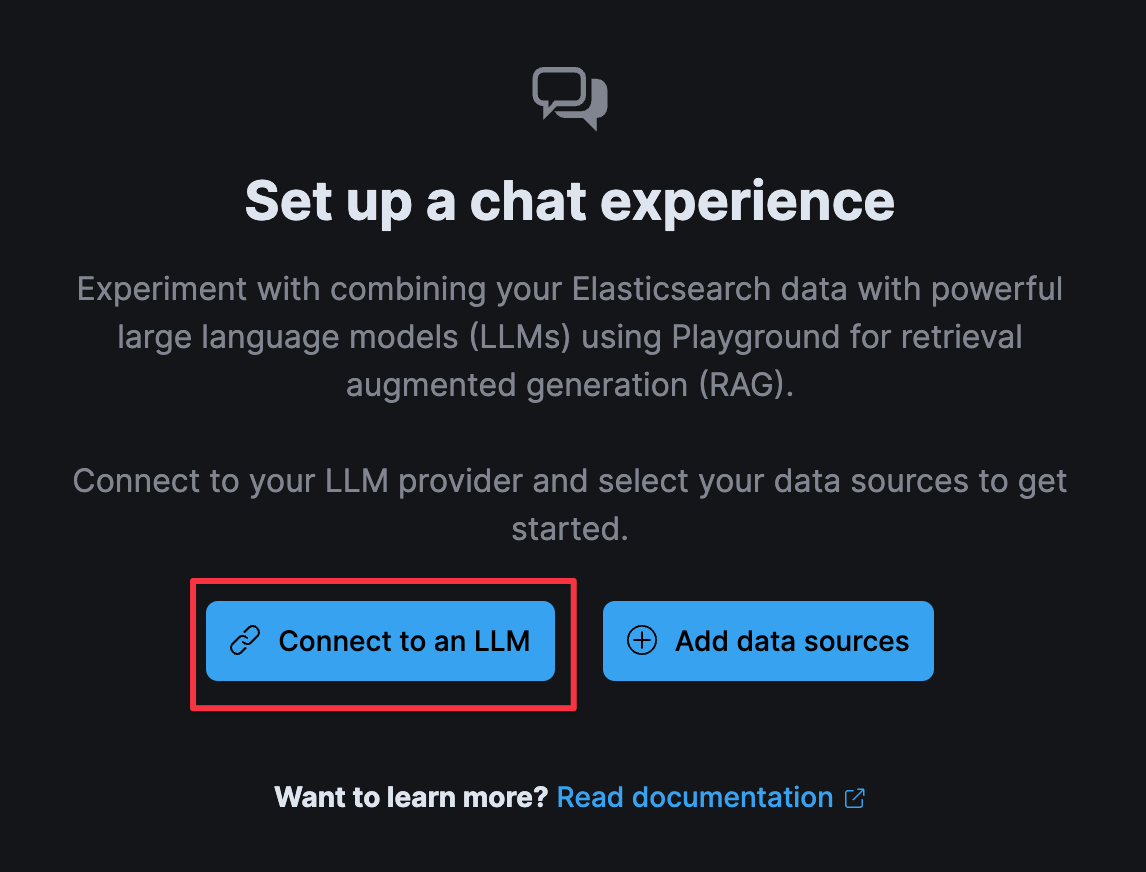
Since I used OpenAI for the original blog, we’ll stick with that. The great thing about the Playground is that you can switch connections to a different service, and the Playground code will generate code specifically to that service’s API specification. You only need to select which one you want to use today.
In this step, you must fill out the fields depending on which LLM you wish to use. As mentioned above, since Playground will abstract away the API differences, you can use whichever supported LLM service works for you, and the rest of the steps in this guide will work the same.
If you don’t have an Azure OpenAI account or OpenAI API account, you can get one here (OpenAI now requires a $5 minimum to fund the API account).
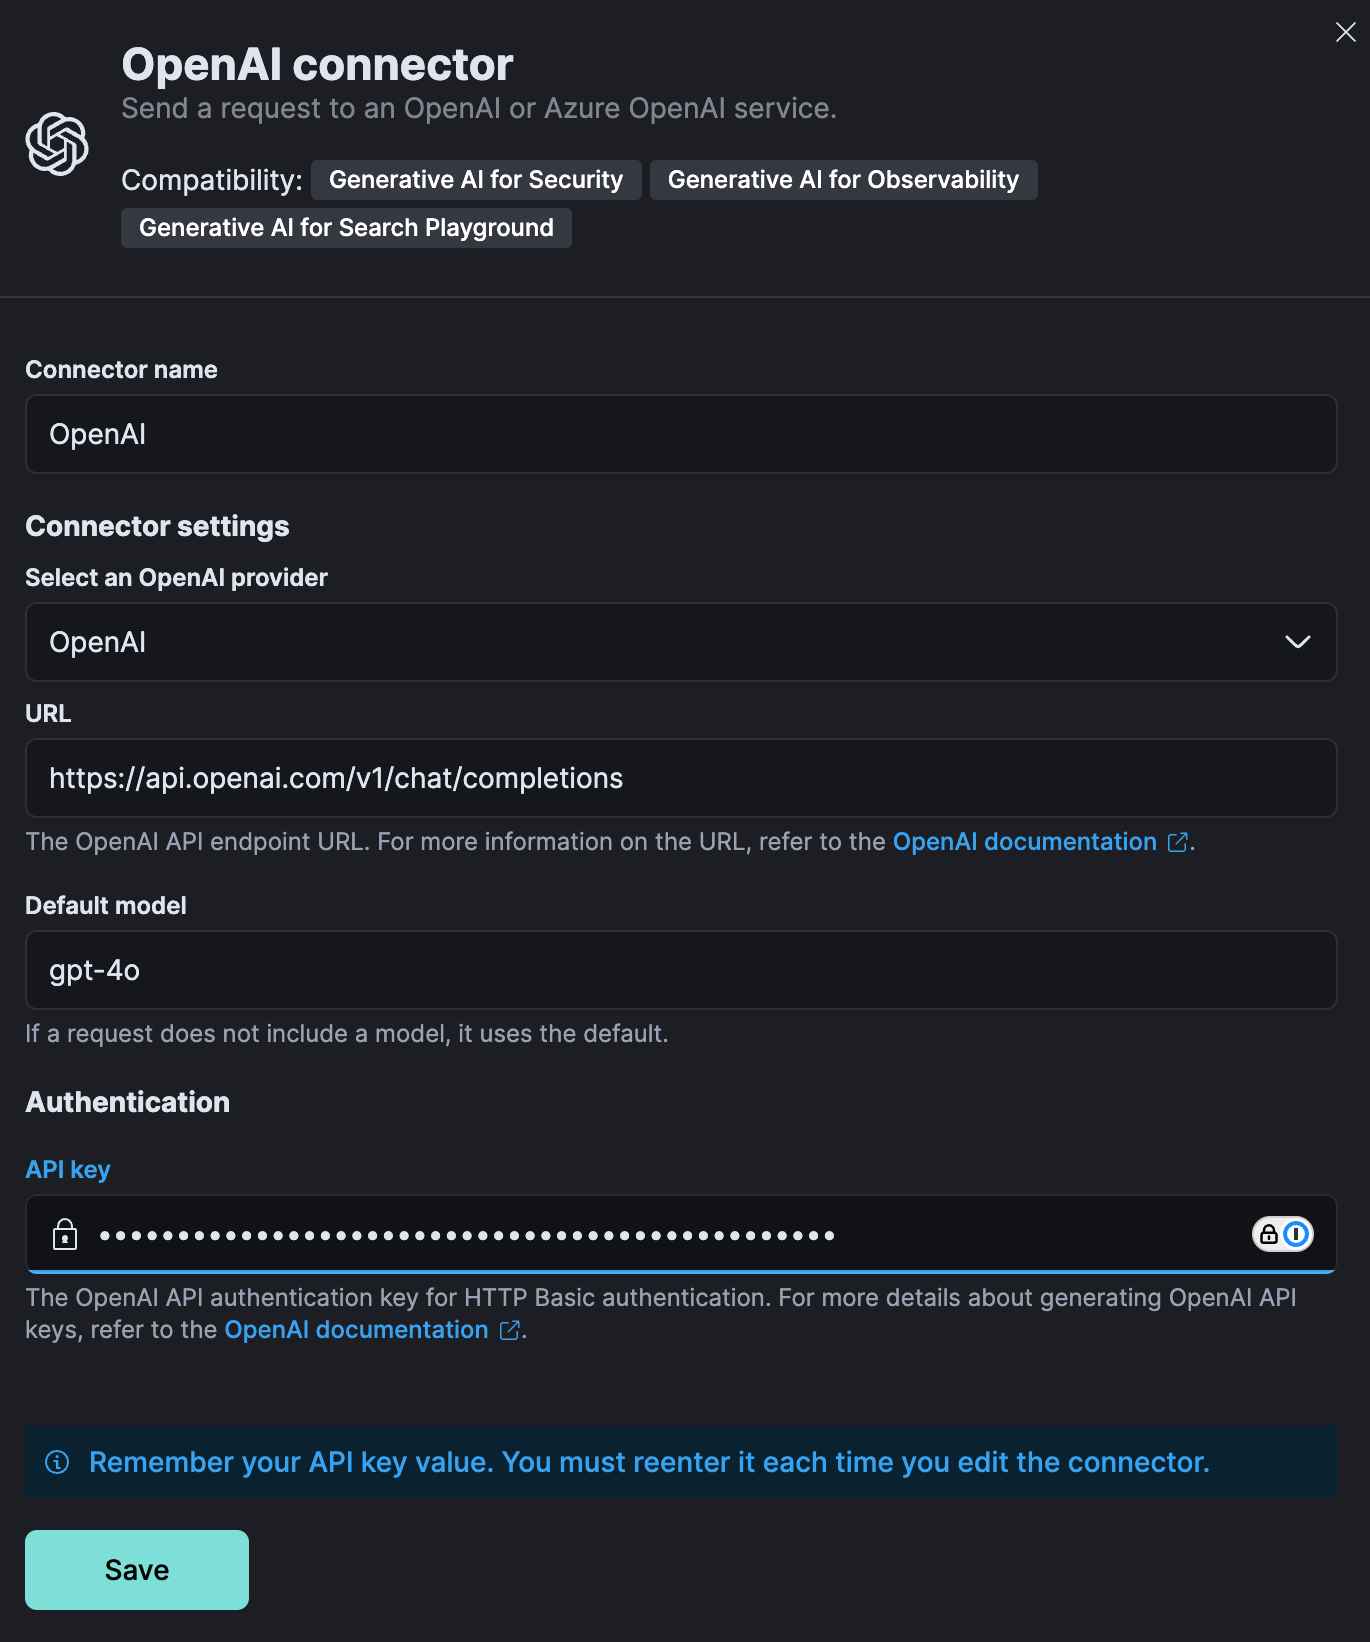
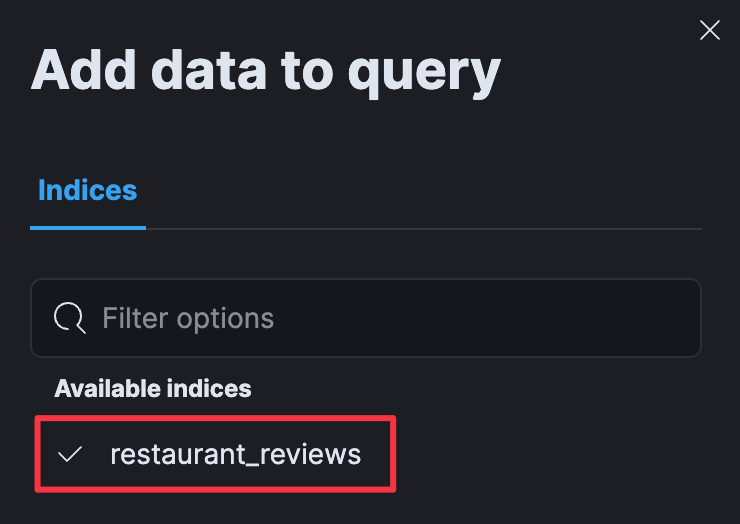
Once you have completed that, hit “Save,” and you will get confirmation that the connector has been added. After that, you just need to select the indices we will use in our app. You can select multiple, but since all our crawler data is going into elastic-labs, you can choose that one.
Click “Add data sources” and you can start using Playground!
Select the “restaurant_reviews” index created earlier.
Playing in the Playground
After adding your data source you will be in the Playground UI.
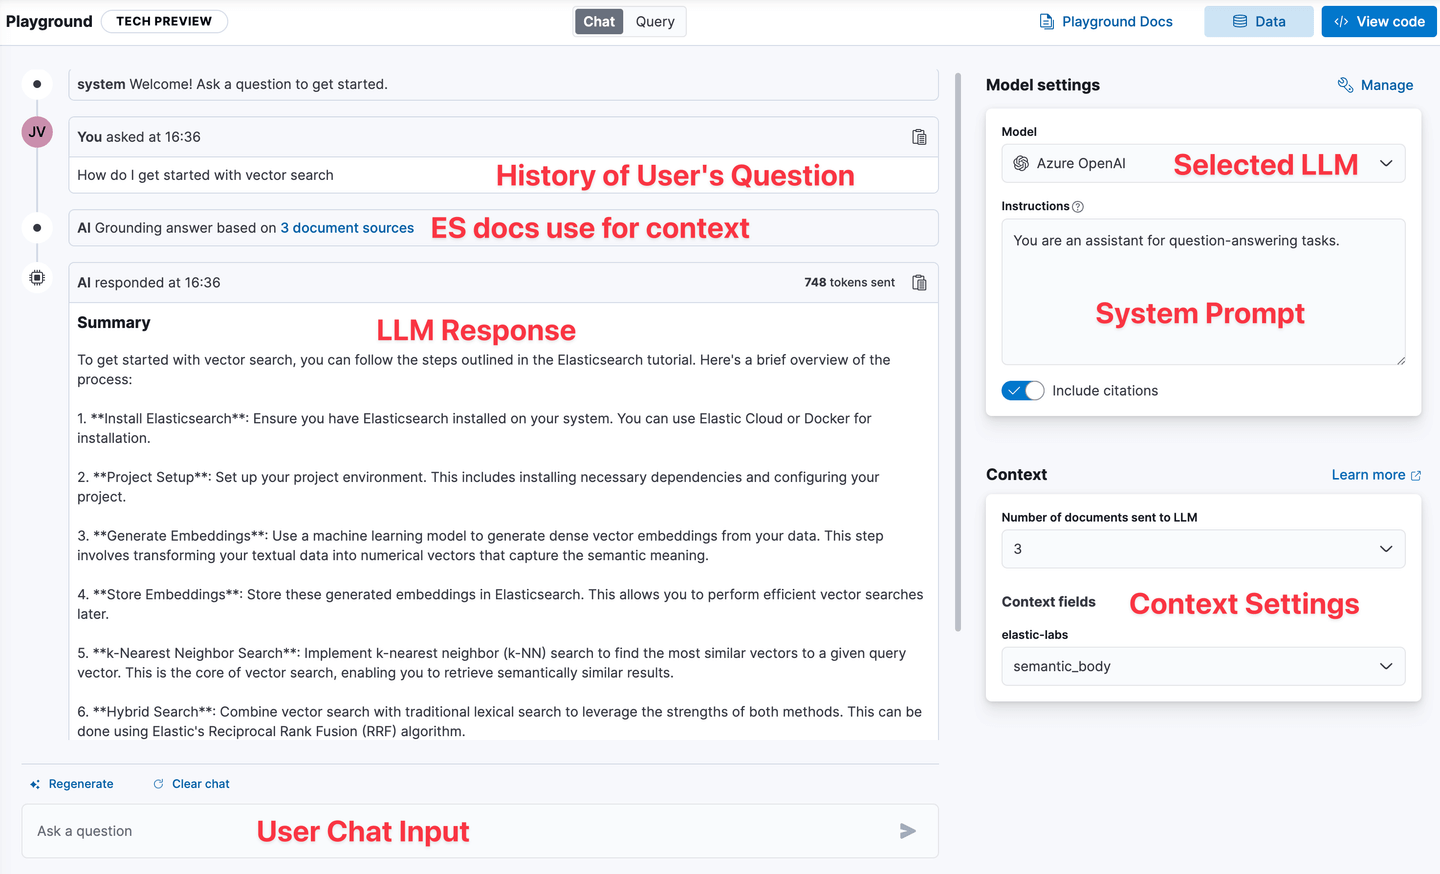
To keep getting started as simple as possible, we will stick with all the default settings other than the prompt. However, for more details on Playground components and how to use them, check out the Playground: Experiment with RAG applications with Elasticsearch in minutes blog and the Playground documentation.
Experimenting with different settings to fit your particular data and application needs is an important part of setting up a RAG-backed application.
The defaults we will be using are:
- Querying the
semantic_bodychunks - Using the three nearest semantic chunks as context to pass to the LLM
Creating a more detailed prompt
The default prompt in Playground is simply a placeholder. Prompt engineering continues to develop as LLMs become more capable. Exploring the ever-changing world of prompt engineering is a blog, but there are a few basic concepts to remember when creating a system prompt:
- Be detailed when describing the app or service the LLM response is part of. This includes what data will be provided and who will consume the responses.
- Provide example questions and responses. This technique, called few-shot-prompting, helps the LLM structure its responses.
- Clearly state how the LLM should behave.
- Specify the Desired Output Format.
- Test and Iterate on Prompts.
With this in mind, we can create a more detailed system prompt:
You are a helpful and knowledgeable assistant designed to assist users in querying information related to Search, Observability, and Security. Your primary goal is to provide clear, concise, and accurate responses based on semantically relevant documents retrieved using Elasticsearch.

Guidelines:

Audience:
Assume the user could be of any experience level but lean towards a technical slant in your explanations.
Avoid overly complex jargon unless it is common in the context of Elasticsearch, Search, Observability, or Security.

Response Structure:
Clarity: Responses should be clear and concise, avoiding unnecessary verbosity.
Conciseness: Provide information in the most direct way possible, using bullet points when appropriate.

Formatting: Use Markdown formatting for:
Bullet points to organize information
Code blocks for any code snippets, configurations, or commands
Relevance: Ensure the information provided is directly relevant to the user's query, prioritizing accuracy.

Content:
Technical Depth: Offer sufficient technical depth while remaining accessible. Tailor the complexity based on the user's apparent knowledge level inferred from their query.

Examples: Where appropriate, provide examples or scenarios to clarify concepts or illustrate use cases.
Documentation Links: When applicable, suggest additional resources or documentation from Elastic.co that can further assist the user.

Tone and Style:
Maintain a professional yet approachable tone.
Encourage curiosity by being supportive and patient with all user queries, regardless of complexity.

Example Queries:
"How can I optimize my Elasticsearch cluster for large-scale data?"
"What are the best practices for implementing observability in a microservices architecture?"
"How can I secure sensitive data in Elasticsearch?"
Feel free to to test out different prompts and context settings to see what results you feel are best for your particular data. For more examples on advanced techiques, check out the Prompt section on the two part blog Advanced RAG Techniques. Again, see the Playground blog post for more details on the various settings you can tweak.
Export the Code
Behind the scenes, Playground generates all the backend chat code we need to perform semantic search, parse the relevant contextual fields, and make a chat completion call to the LLM. No coding work from us required!
In the upper right corner click on the “View Code” button to expand the code flyout
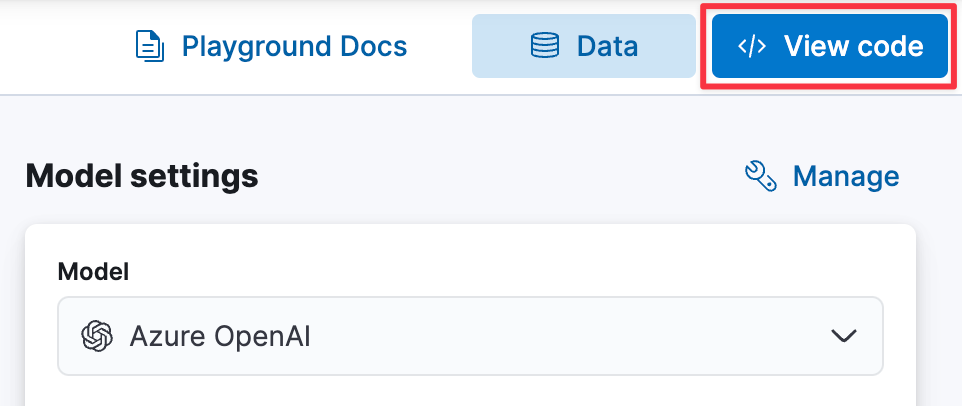
You will see the generated python code with all the settings your configured as well as the the functions to make a semantic call to Elasticsearch, parse the results, built the complete prompt, make the call to the LLM, and parse those results.
Click the copy icon to copy the code.
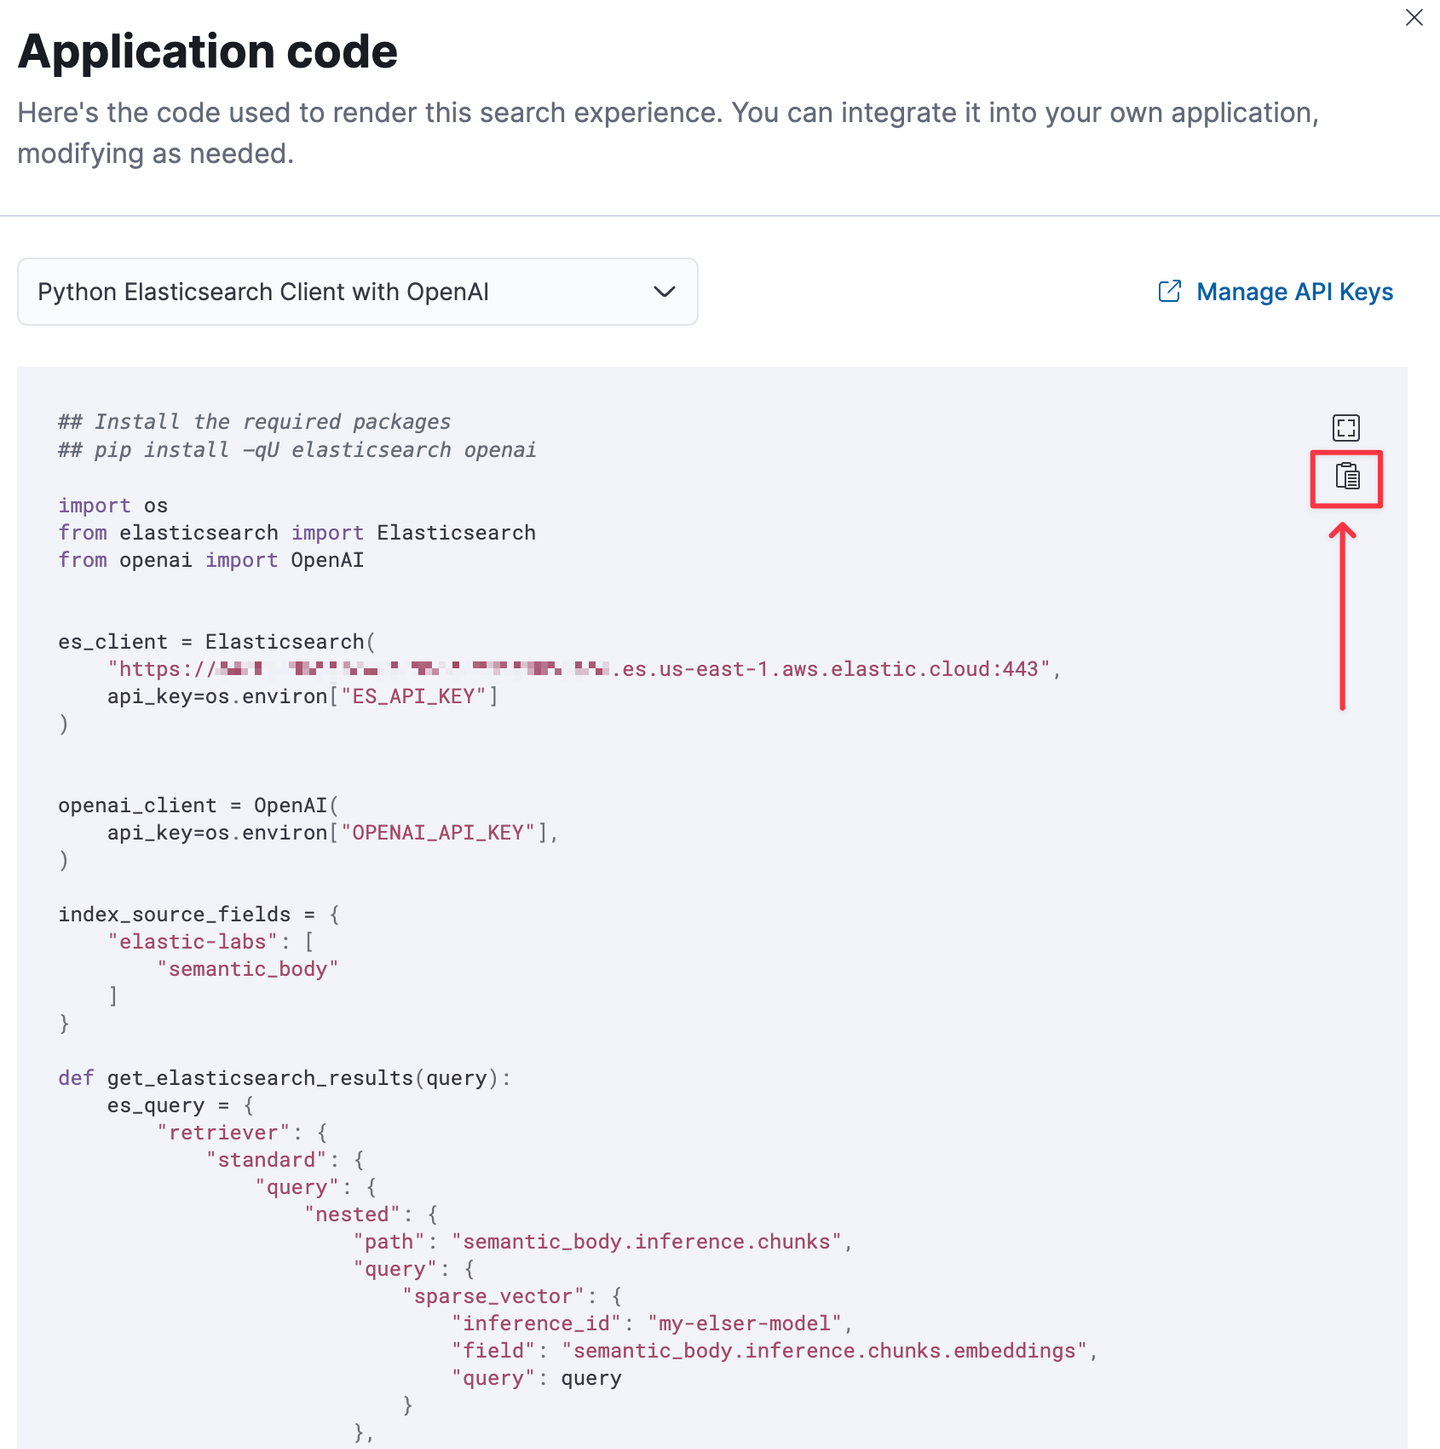
You can now incorporate the code into your own chat application!
Wrapup
A lot has changed since the first iteration of this blog over a year ago, and we covered a lot in this blog. You started from a cloud API key, created an Elasticsearch Serverless project, generated a cloud API key, configured the Open Web Crawler, crawled three Elastic Lab sites, chunked the long text, generated embeddings, tested out the optimal chat settings for a RAG application, and exported the code!
Where’s the UI, Vestal?
Be on the lookout for part two where we will integrate the playground code into a python backend with a React frontend. We will also look at deploying the full chat application.
For a complete set of code for everything above, see the accompanying Jypyter notebook
Ready to try this out on your own? Start a free trial.
Want to get Elastic certified? Find out when the next Elasticsearch Engineer training is running!
Related content

October 30, 2025
Context engineering using Mistral Chat completions in Elasticsearch
Learn how to utilize context engineering with Mistral Chat completions in Elasticsearch to ground LLM responses in domain-specific knowledge for accurate outputs.
October 27, 2025
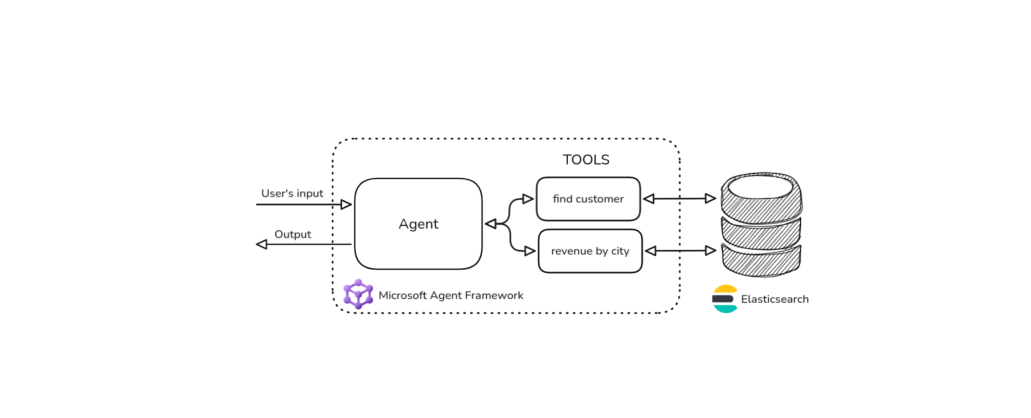
Building agentic applications with Elasticsearch and Microsoft’s Agent Framework
Learn how to use Microsoft Agent Framework with Elasticsearch to build an agentic application that extracts ecommerce data from Elasticsearch client libraries using ES|QL.
October 21, 2025
Introducing Elastic’s Agent Builder
Introducing Elastic Agent Builder, a framework to easily build reliable, context-driven AI agents in Elasticsearch with your data.

October 20, 2025
Elastic MCP server: Expose Agent Builder tools to any AI agent
Discover how to use the built-in Elastic MCP server in Agent Builder to securely extend any AI agent with access to your private data and custom tools.
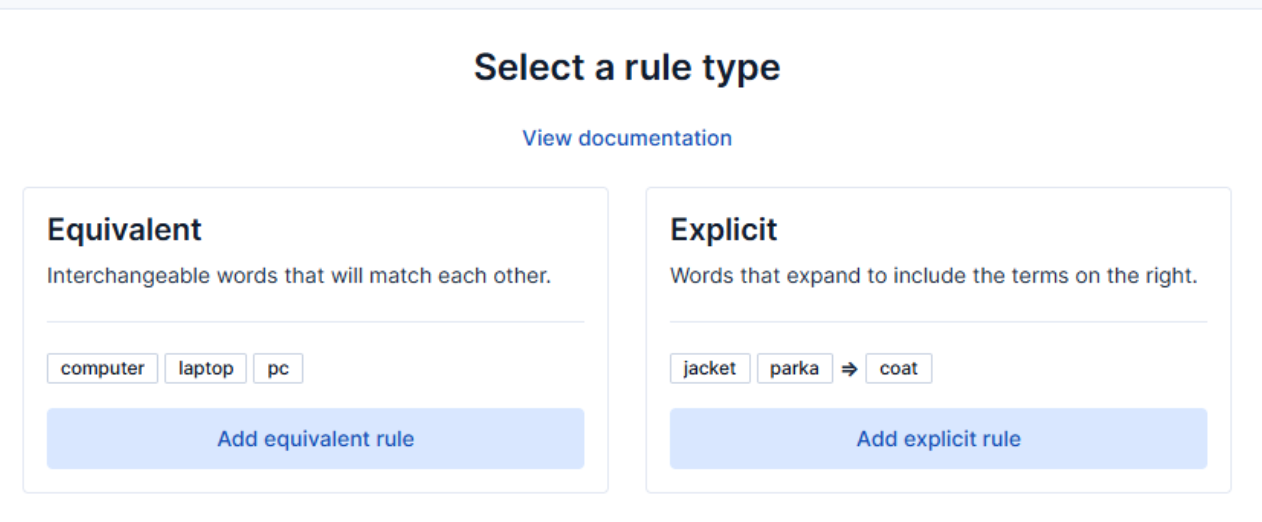
How to use the Synonyms UI to upload and manage Elasticsearch synonyms
Learn how to use the Synonyms UI in Kibana to create synonym sets and assign them to indices.