This article is part of a series where we will learn how to use Elasticsearch with Azure. In this part of the series, you’ll learn how to set up an Azure virtual machine instance and install both Elasticsearch and Kibana on it. In the other articles, you’ll learn how to deploy Elasticsearch using Azure AKS Automatic and Azure Marketplace.
Installing Elasticsearch on an Azure virtual machine is a good starting point for its simplicity and resource transparency over other solutions like Elastic Cloud Kubernetes (ECK), which provides tools to scale with ease but also a steeper learning curve.
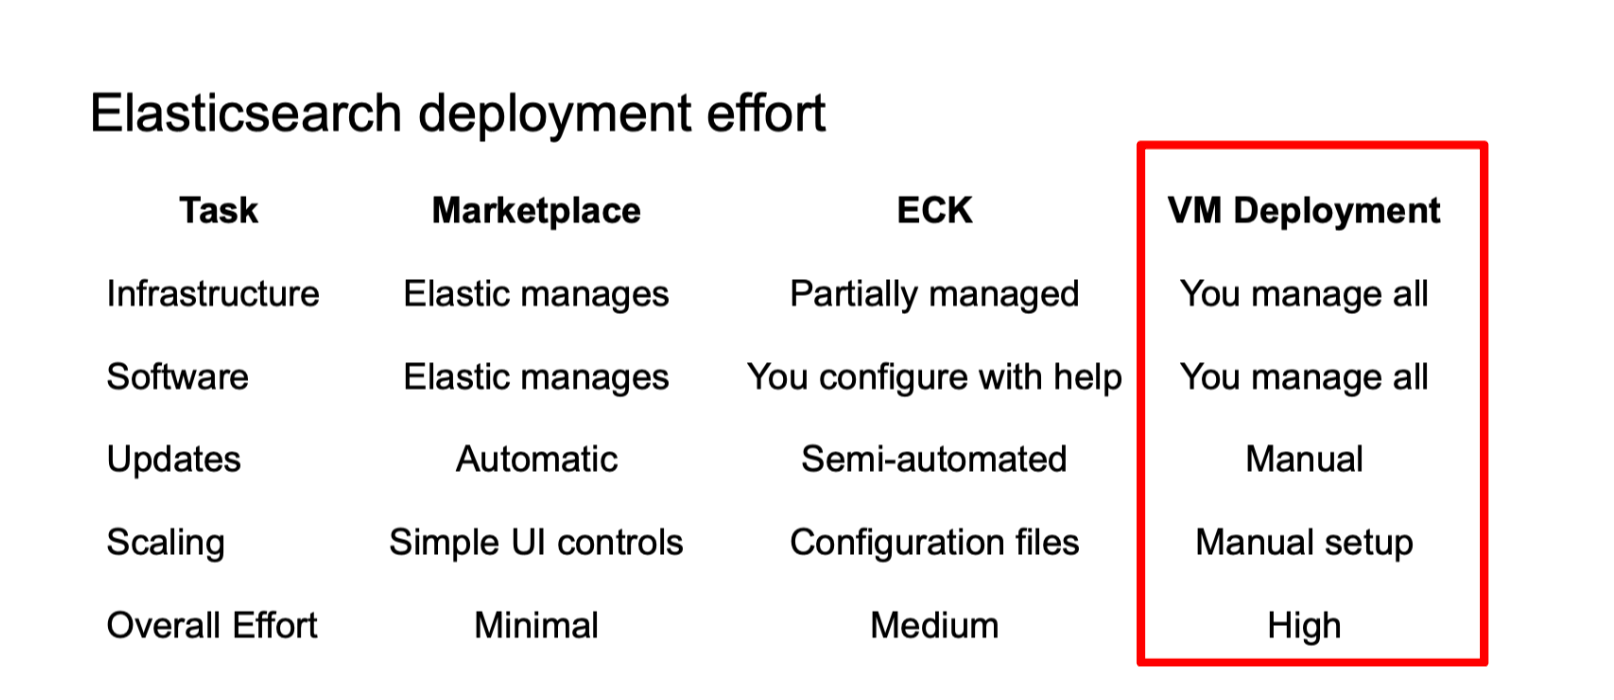
What is an Azure Virtual Machine?
Azure Virtual Machine provides on-demand, scalable compute resources with pre-configured or custom OS images, enabling rapid infrastructure deployment while Azure manages the underlying hardware.
When to use Azure Virtual Machine?
This option is best for organizations requiring full control over their Elasticsearch configuration, custom plugins, and specific version requirements. It’s also ideal to integrate with existing VM-based infrastructure while needing granular performance tuning and cost optimization through reserved instances.
Setting up a Virtual machine
1. Log in to the Azure portal
2. In the search bar at the top, type "Virtual machines" as shown in the image below. Azure will display search suggestions, then click on "Virtual machines" from the Services section
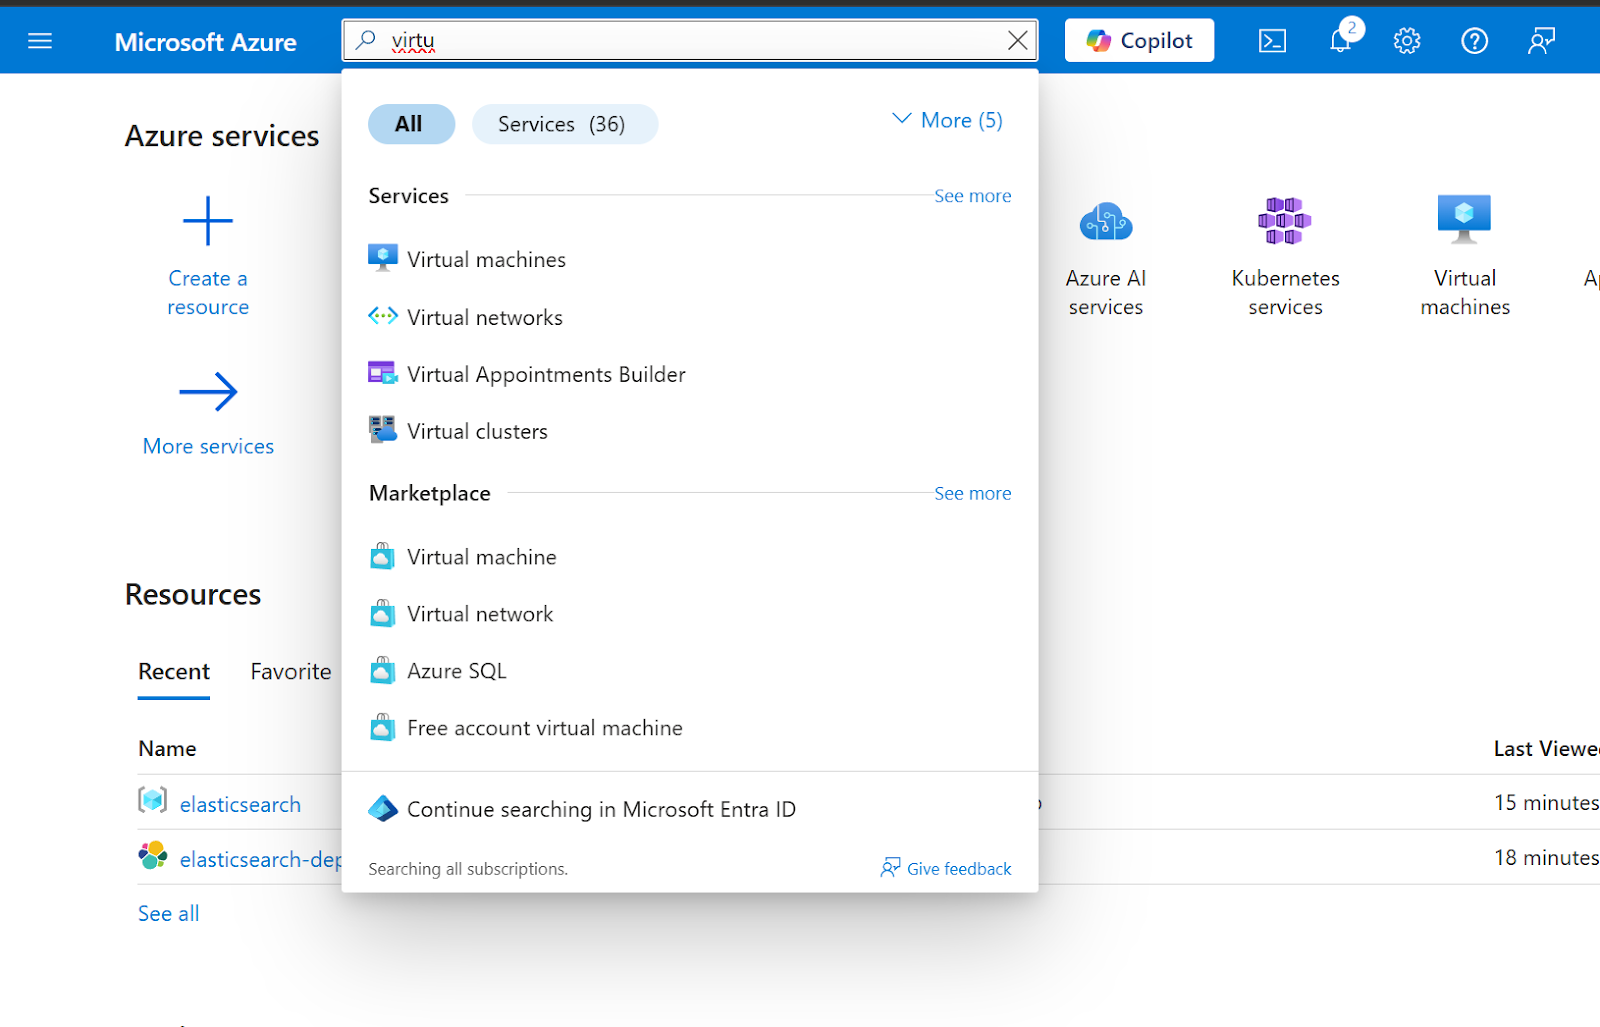
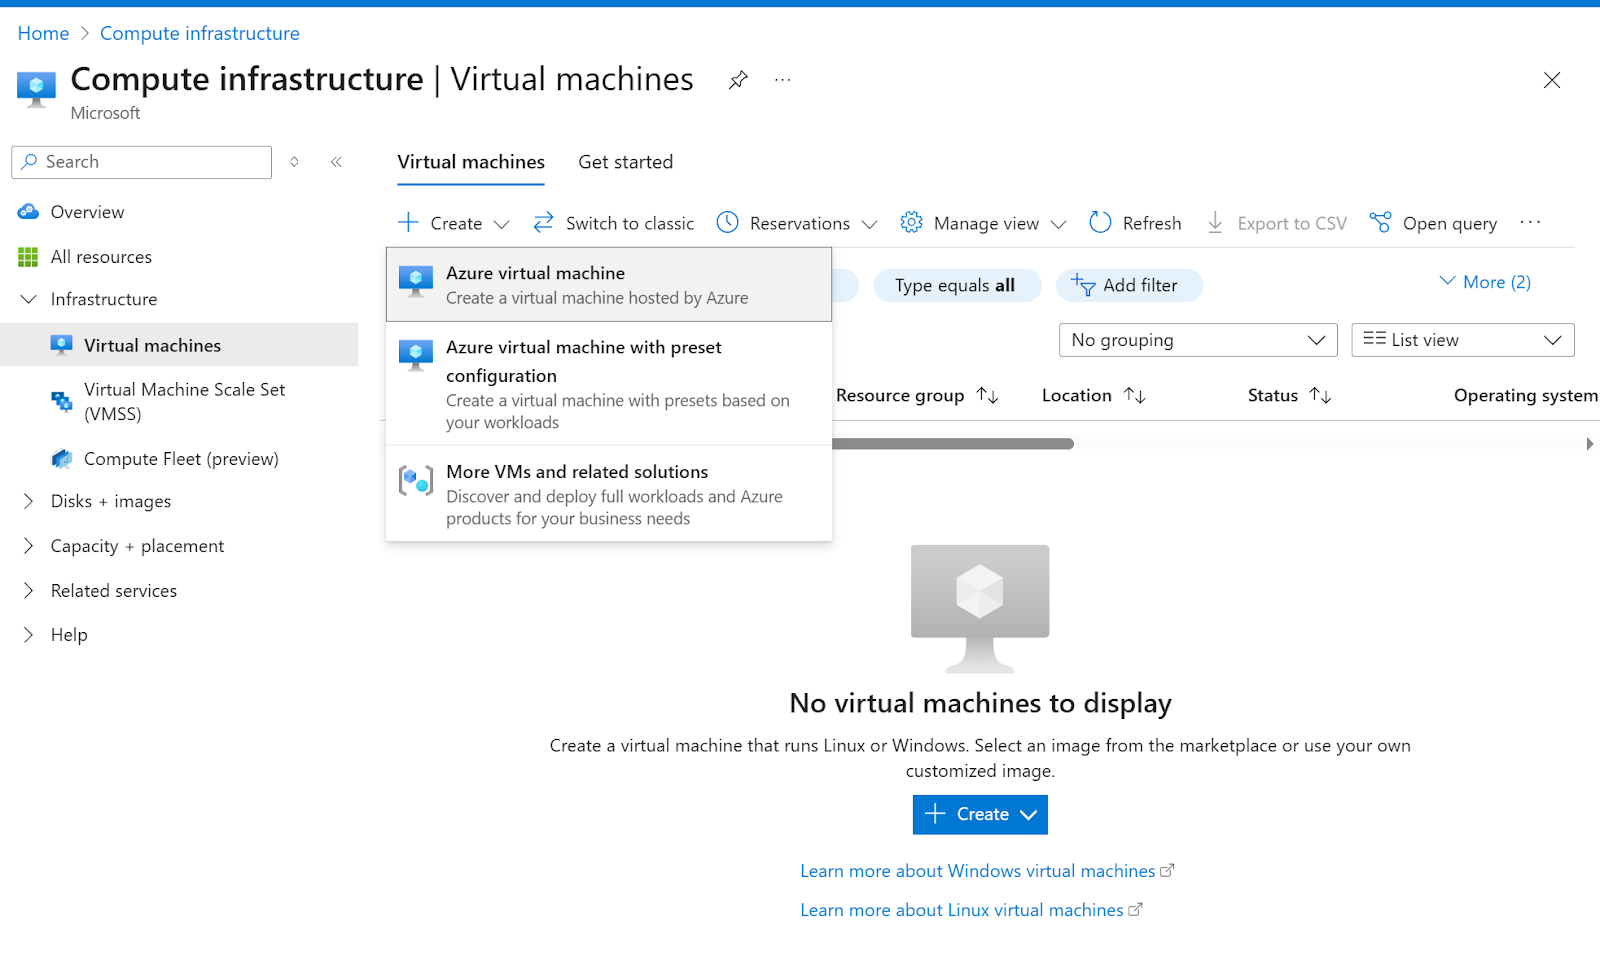
3. You'll see the Virtual machines page (Image 2) showing "No virtual machines to display". Click on the Create button, then select Azure virtual machine from the dropdown menu options
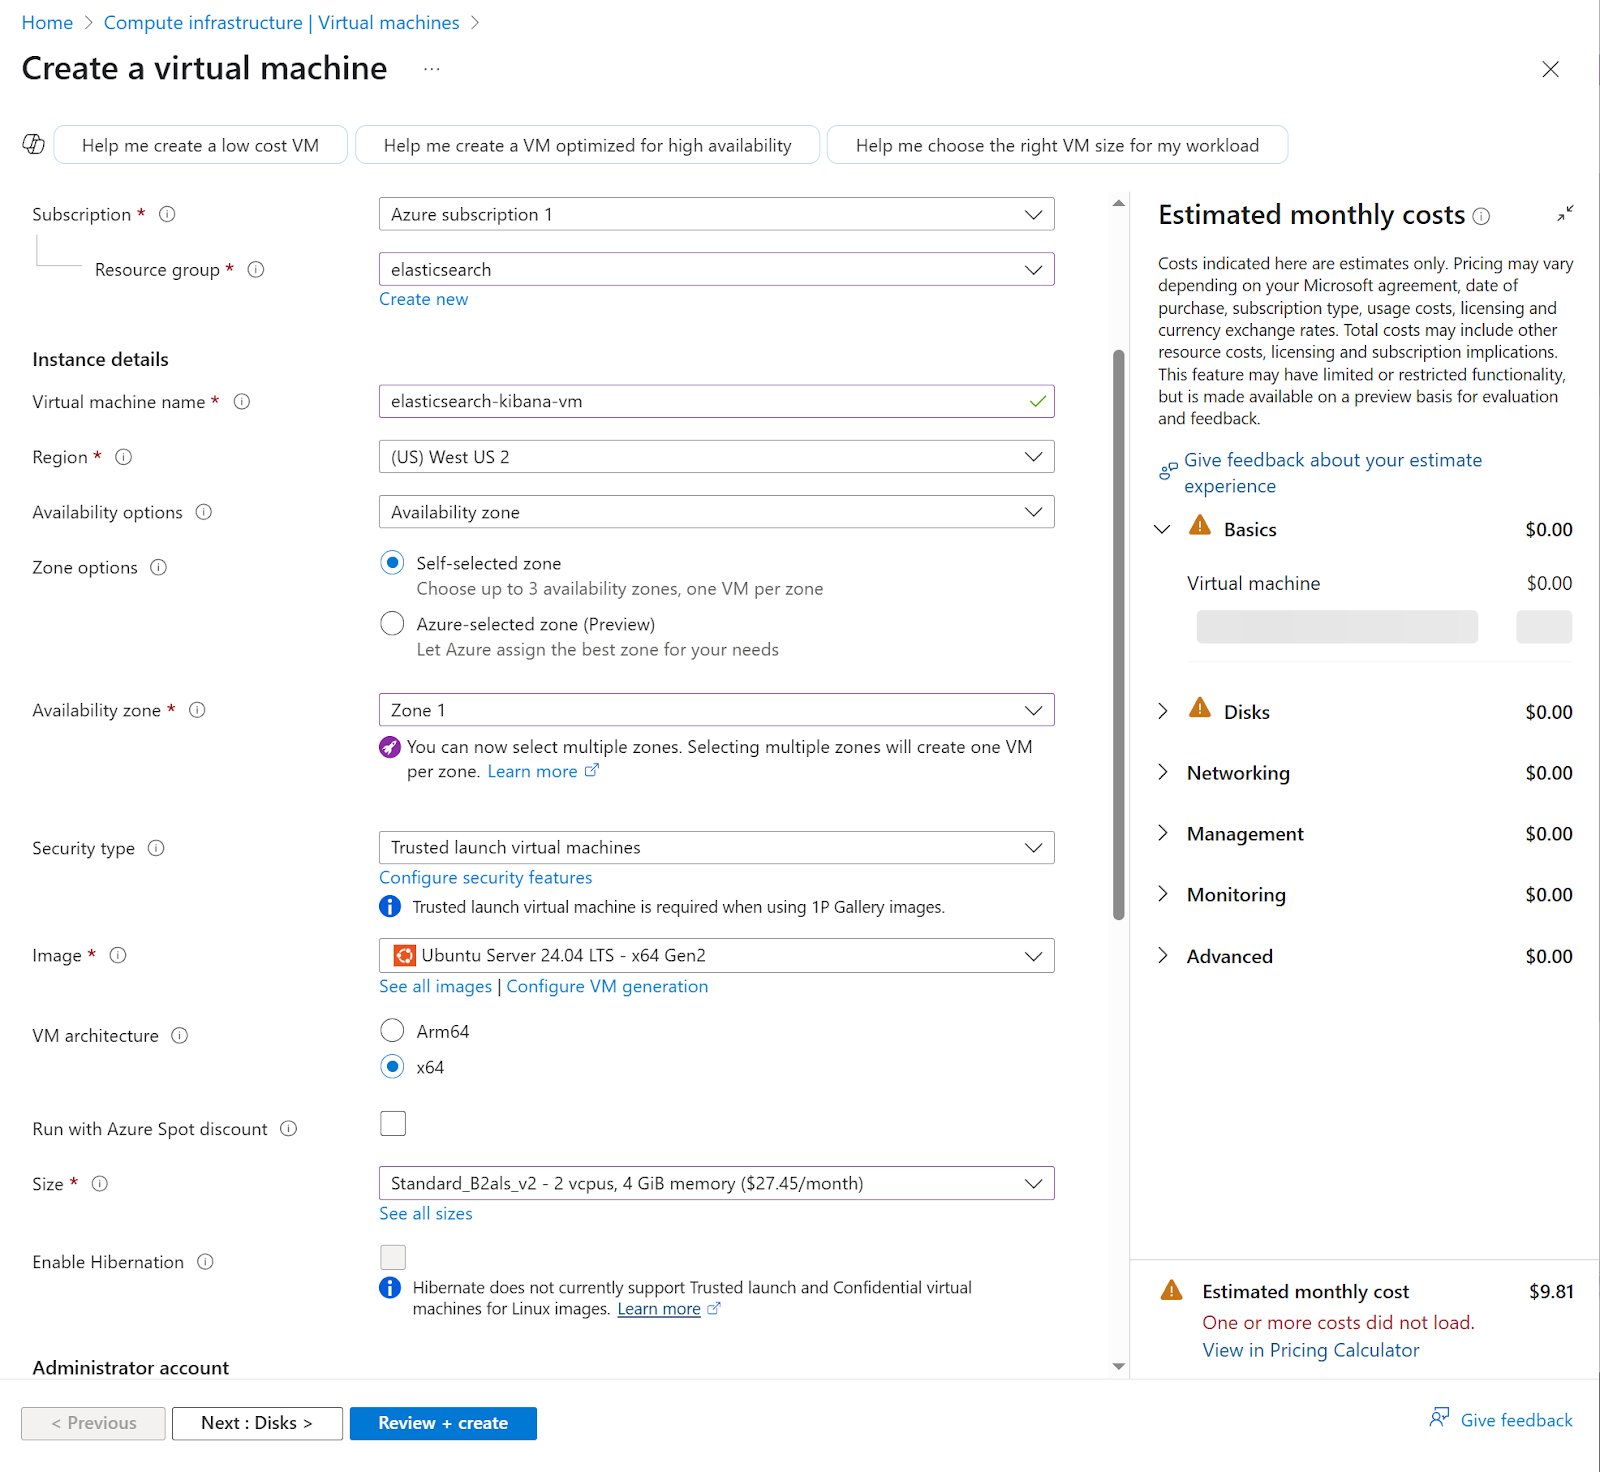
4. Complete the following fields in the "Create a virtual machine" form:
a. Select subscription and resource group
b. Input a Virtual machine name
c. Select Region
d. Availability options
e. Zone options. In this case, leave the Self-selected zone by default
f. For Availability Zone, select Zone 1 by default. You can include up to 3 zones
g. For Security type, select default Trusted launch virtual machines
h. The image we’re using is Ubuntu server 24.04 LTS - x64 Gen2
i. Select VM architecture x64
j. Size: For this example we use Standard_B2als_v2- 2vcpus, 4 GB memory
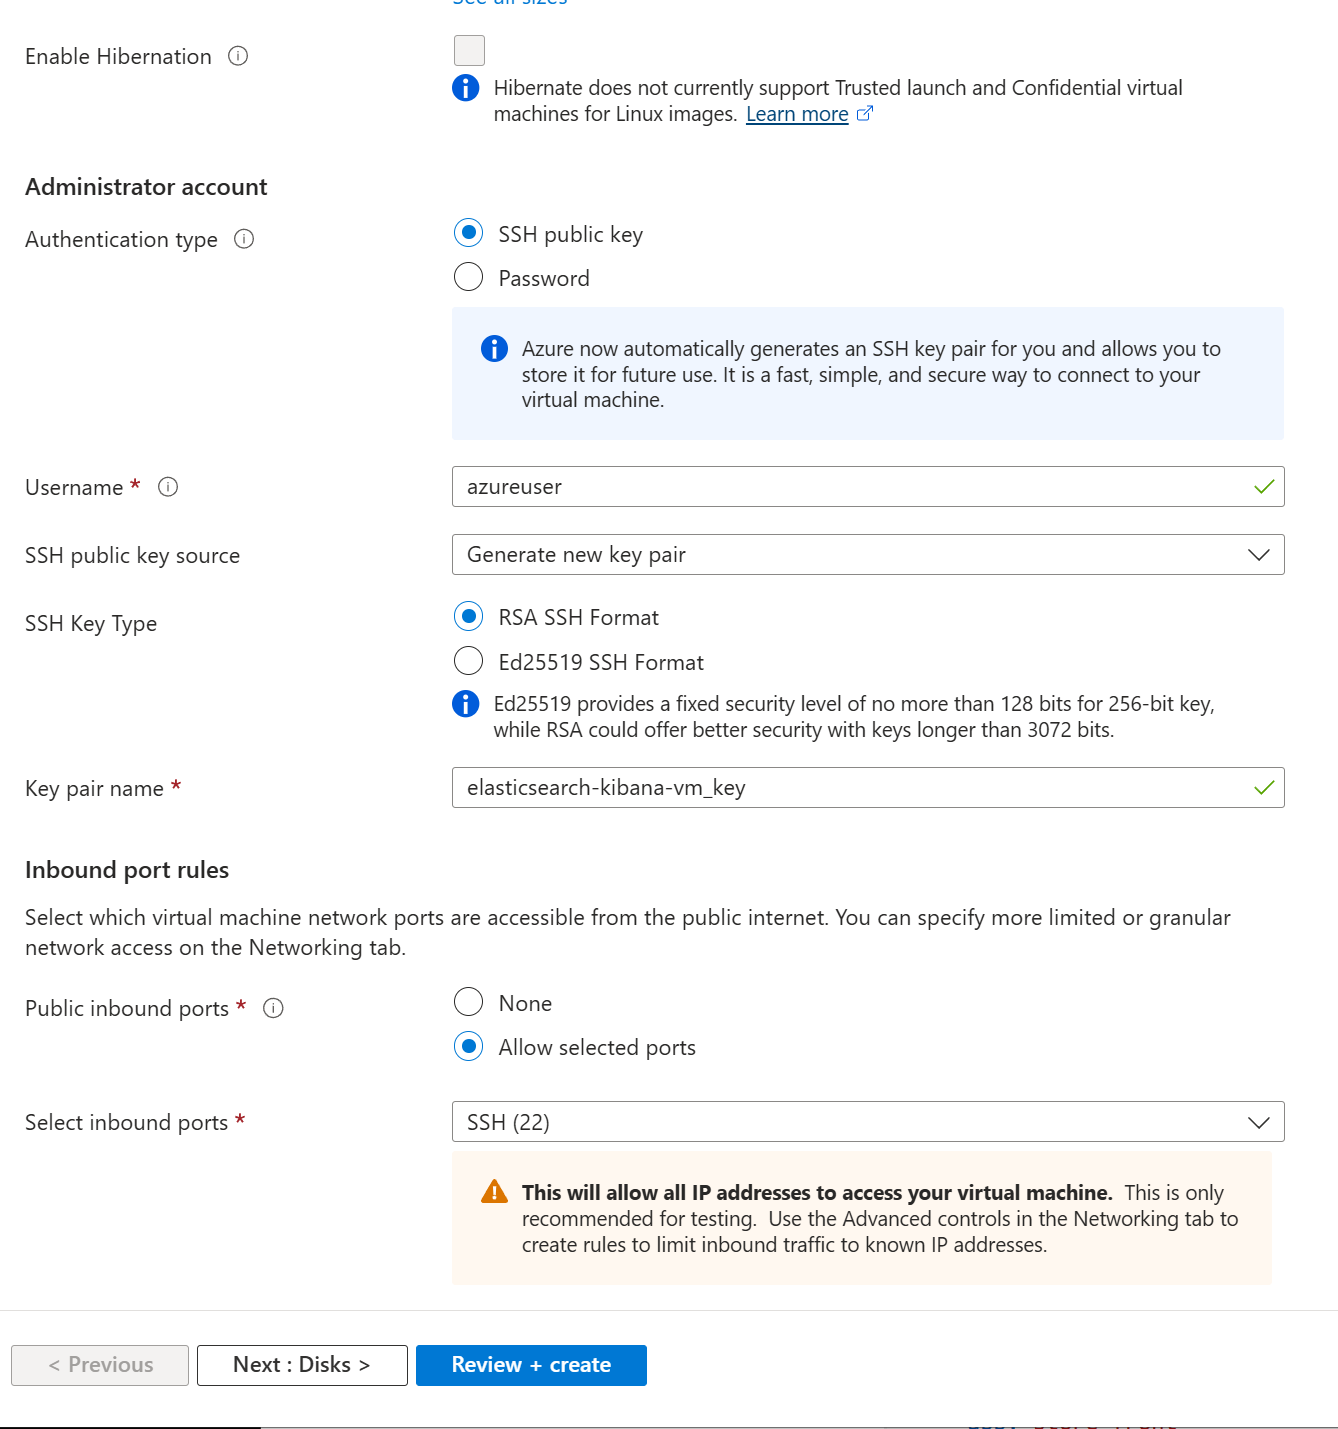
5. Disks: Default configuration
6. Networking: Default configuration
7. Management: Default configuration
8. Monitoring: Default configuration
9. Advanced: Default configuration
10. Tags: Default configuration
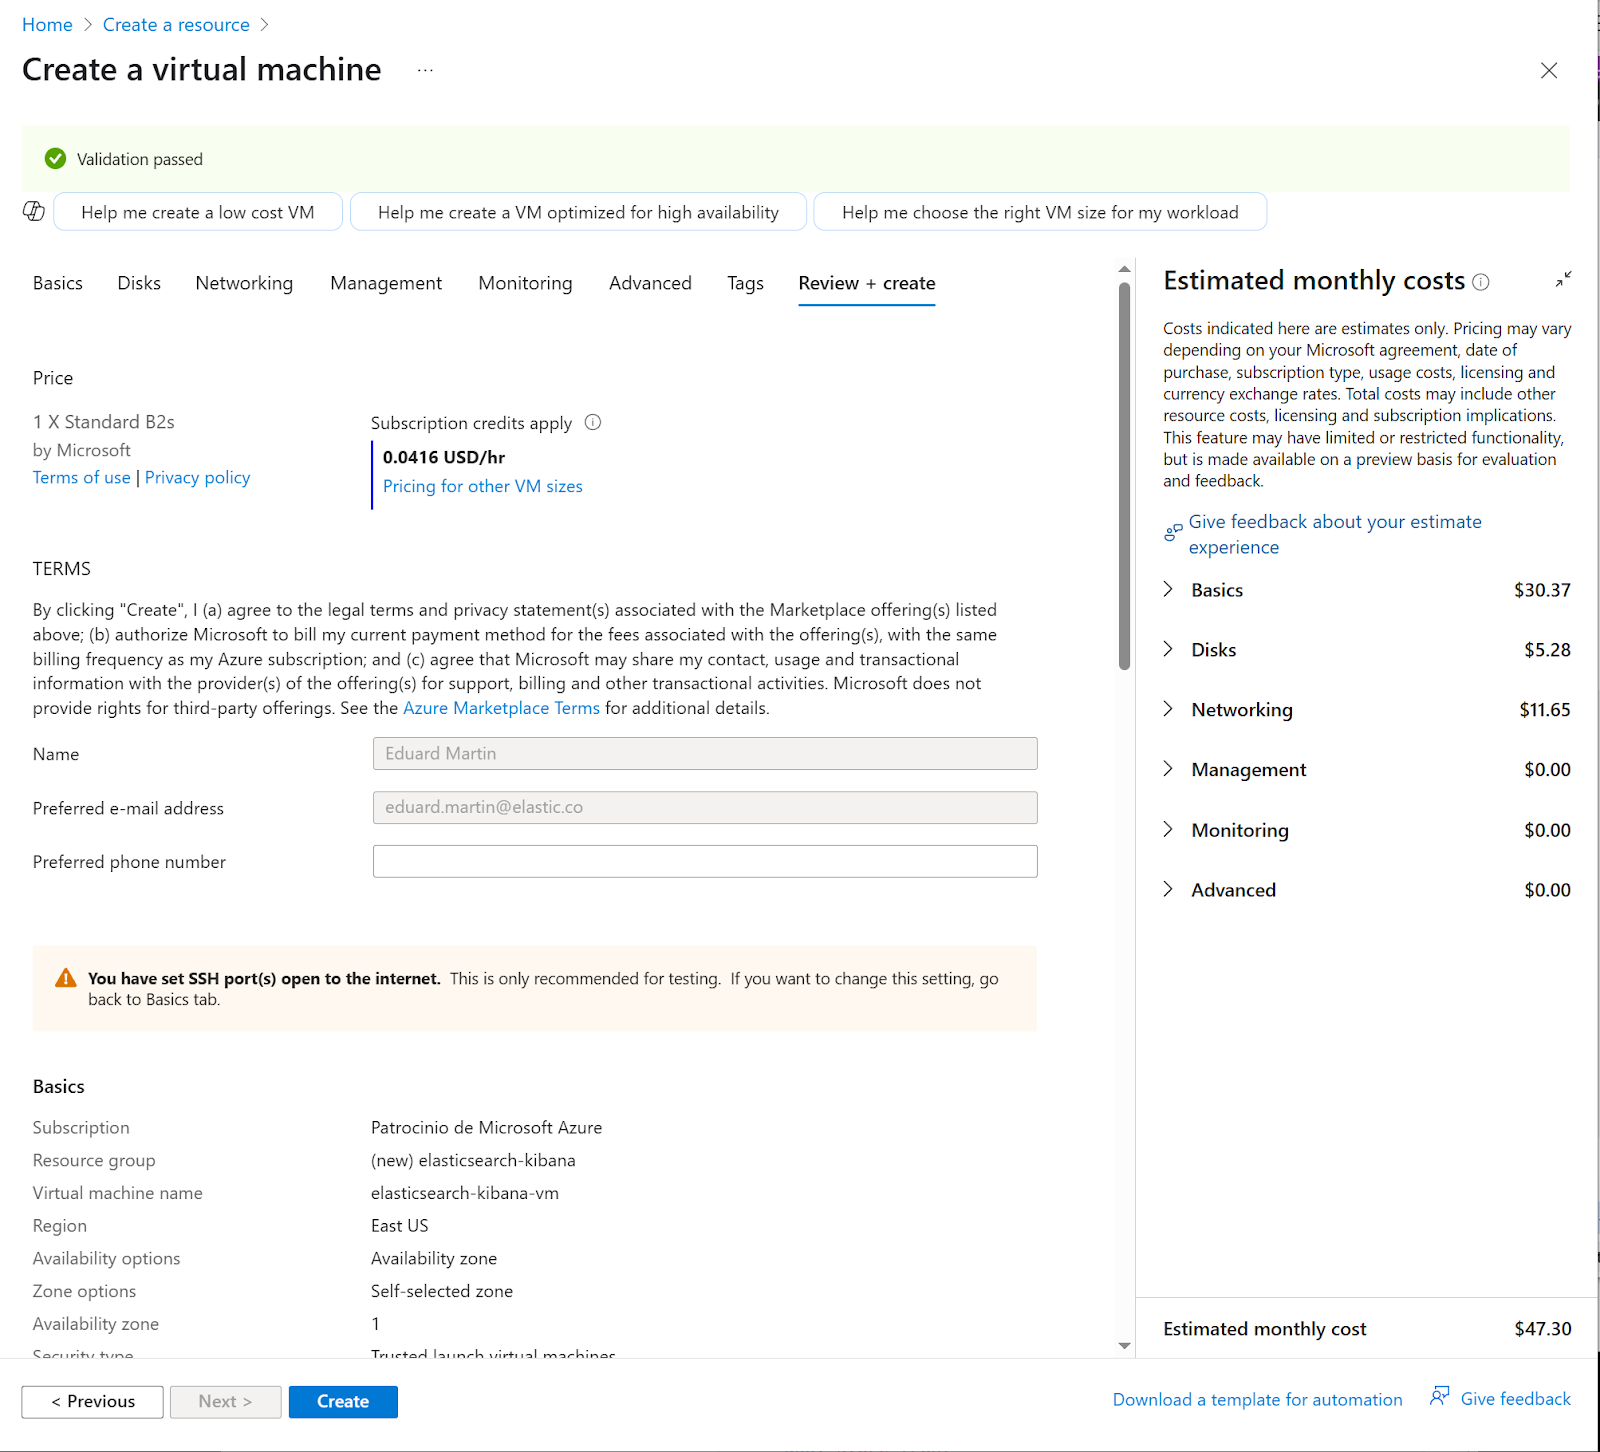
11. Click on review then create. Review the Terms, costs, and configurations, and then click on the Create button
12. Ensure "Validation passed" appears (green checkmark), review terms, costs, and configurations,
13. Click on the Create button
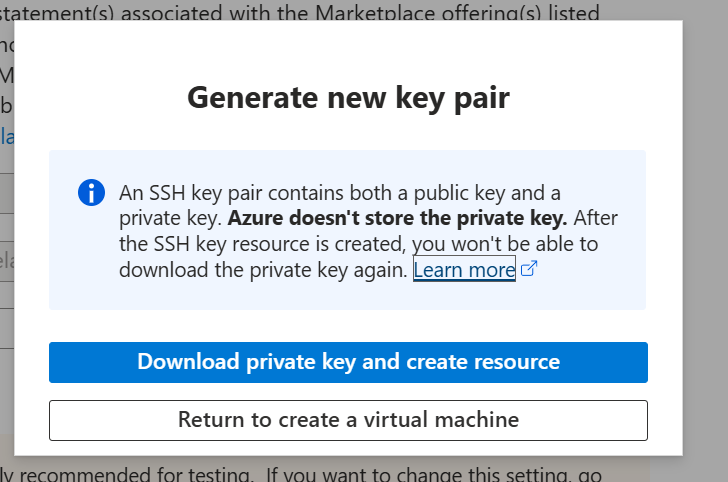
14. Download a newly generated key pair
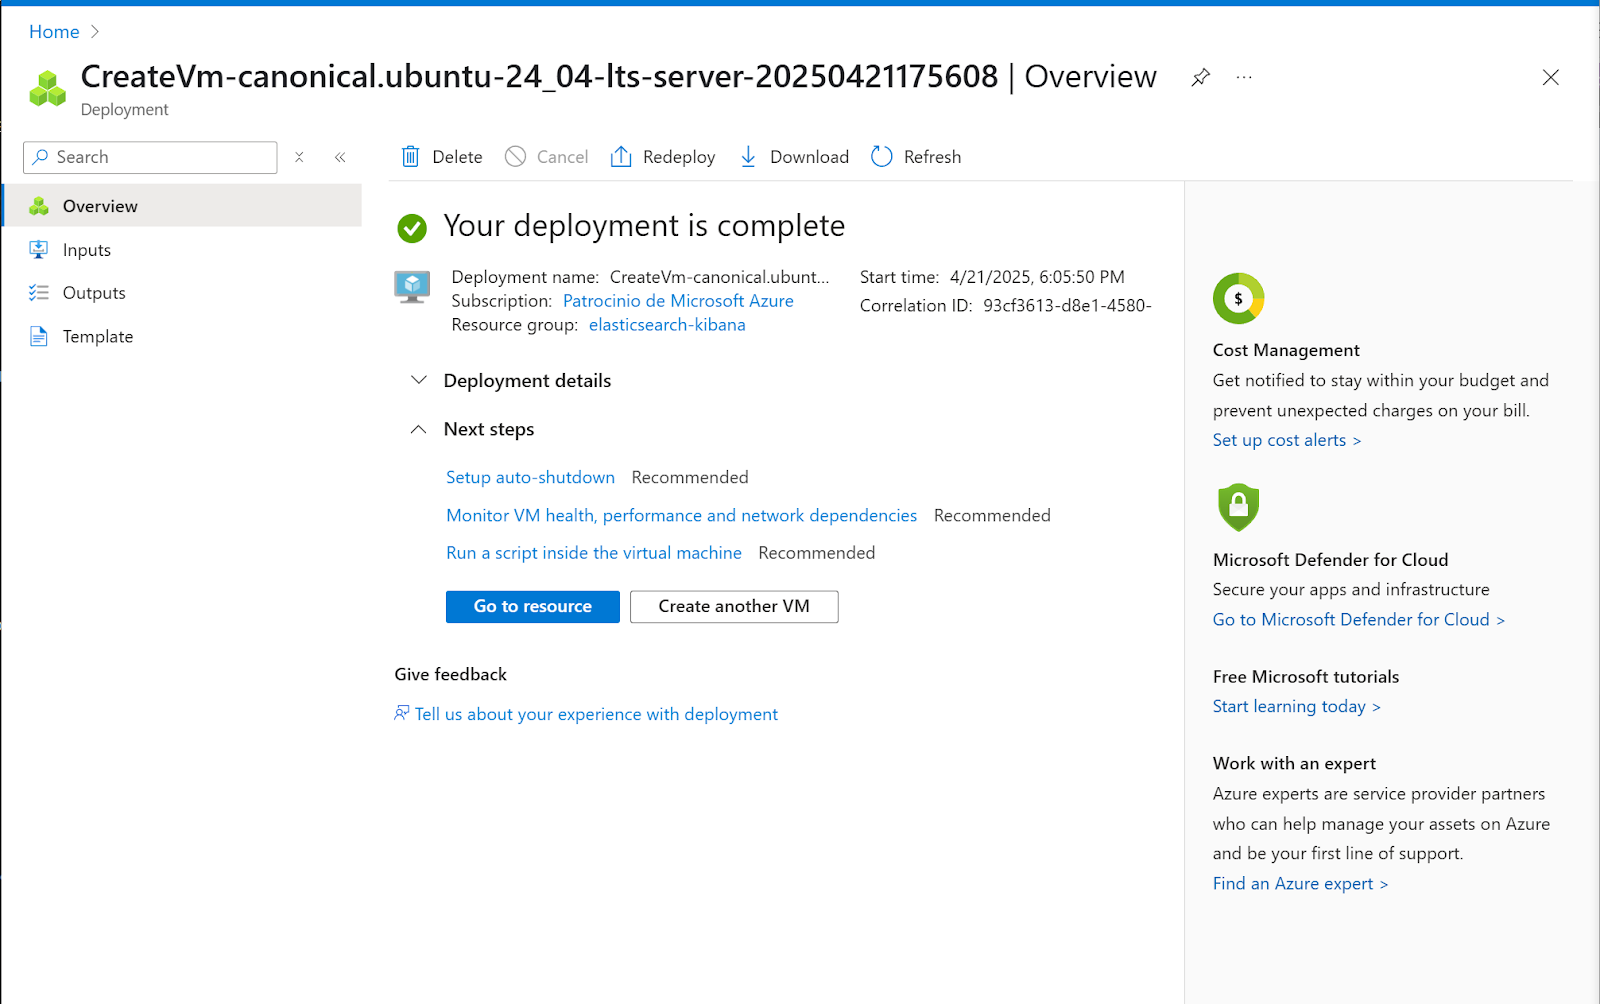
15. Click on Go to resource
16. Here you can connect to the instance by SSH to the public IP address or directly from the Azure UI
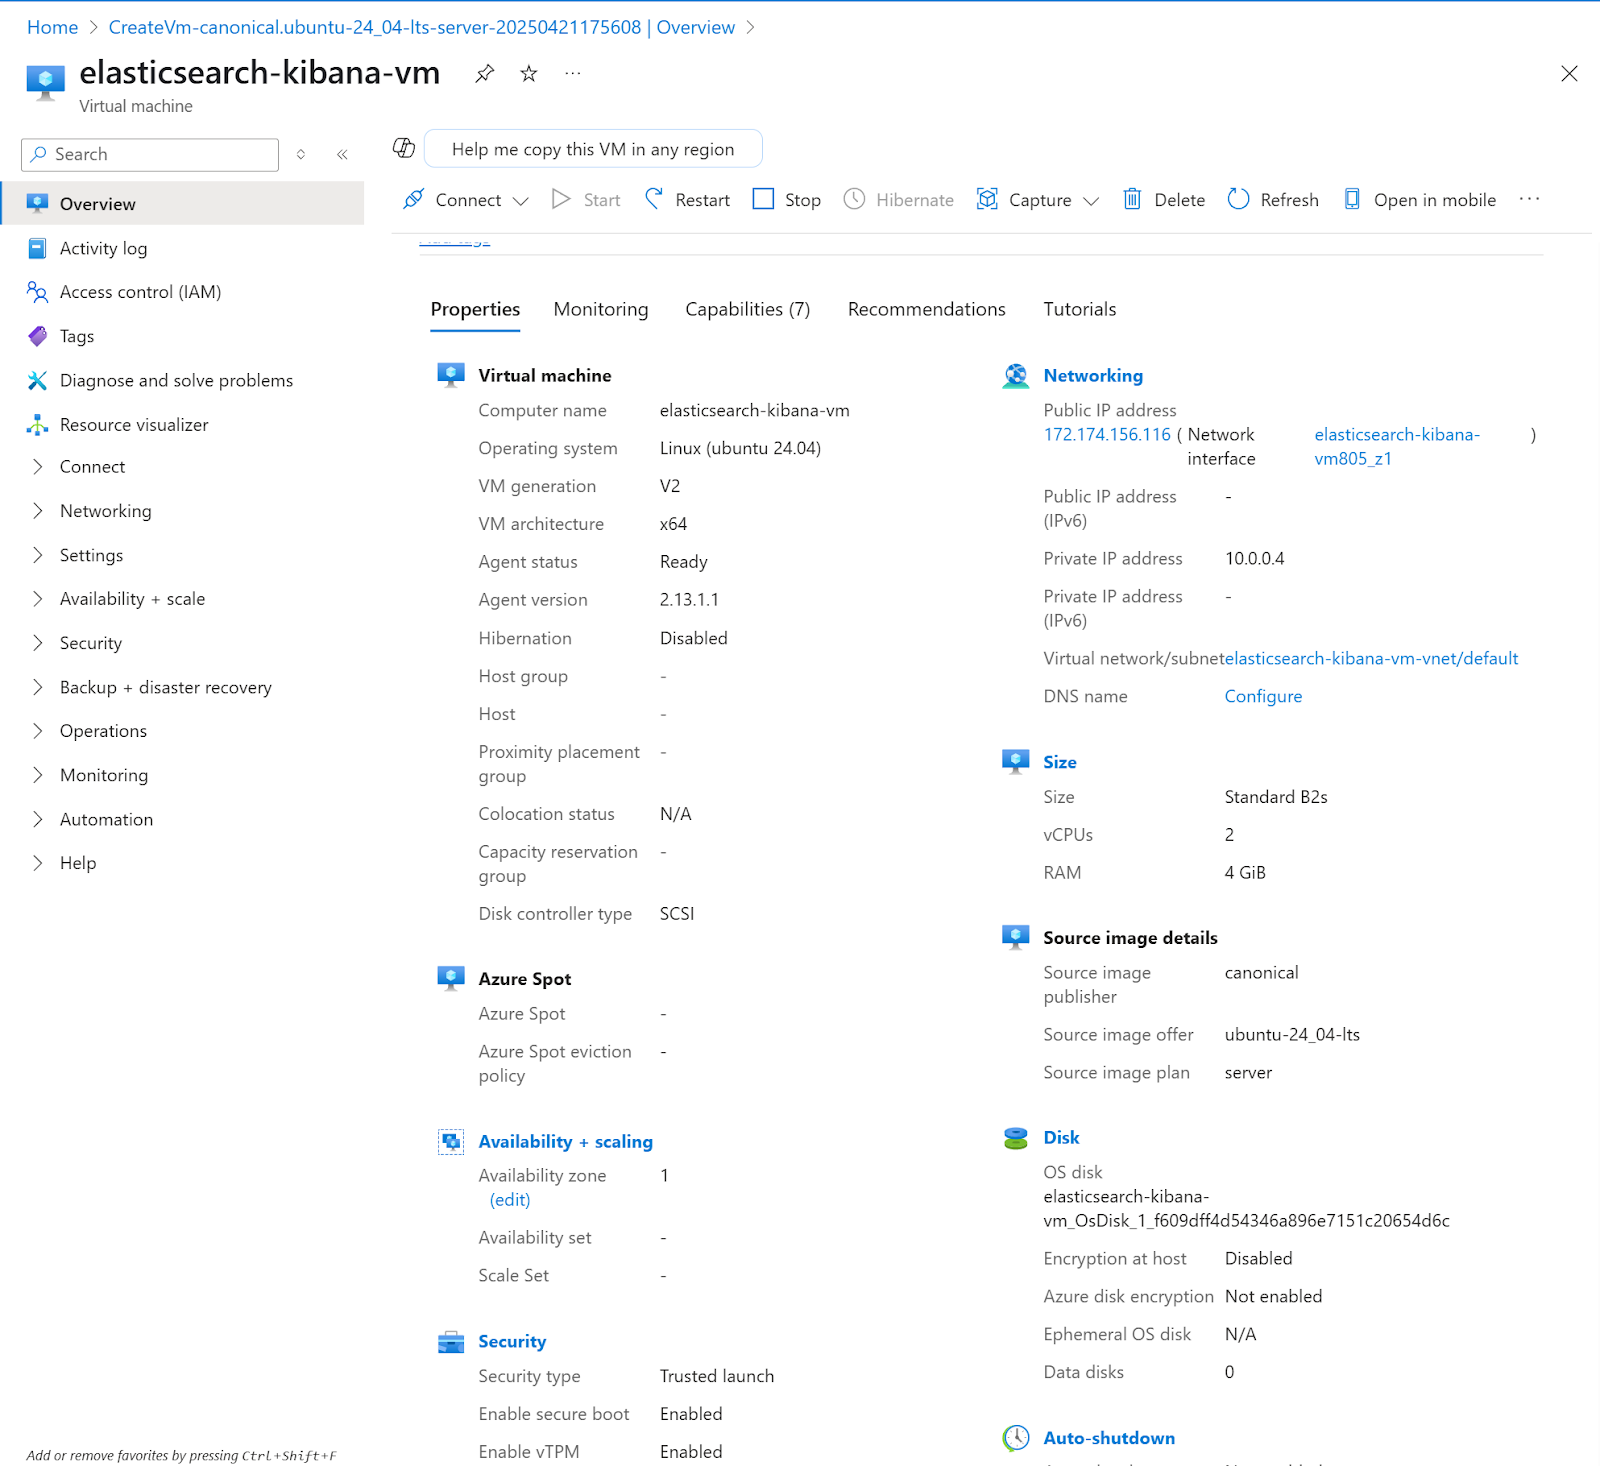
Configure internet access to Kibana
In order to connect to Kibana from the internet, we need to open the port in the recently created instance
1. In the instance detail page, click on Networking> Network settings
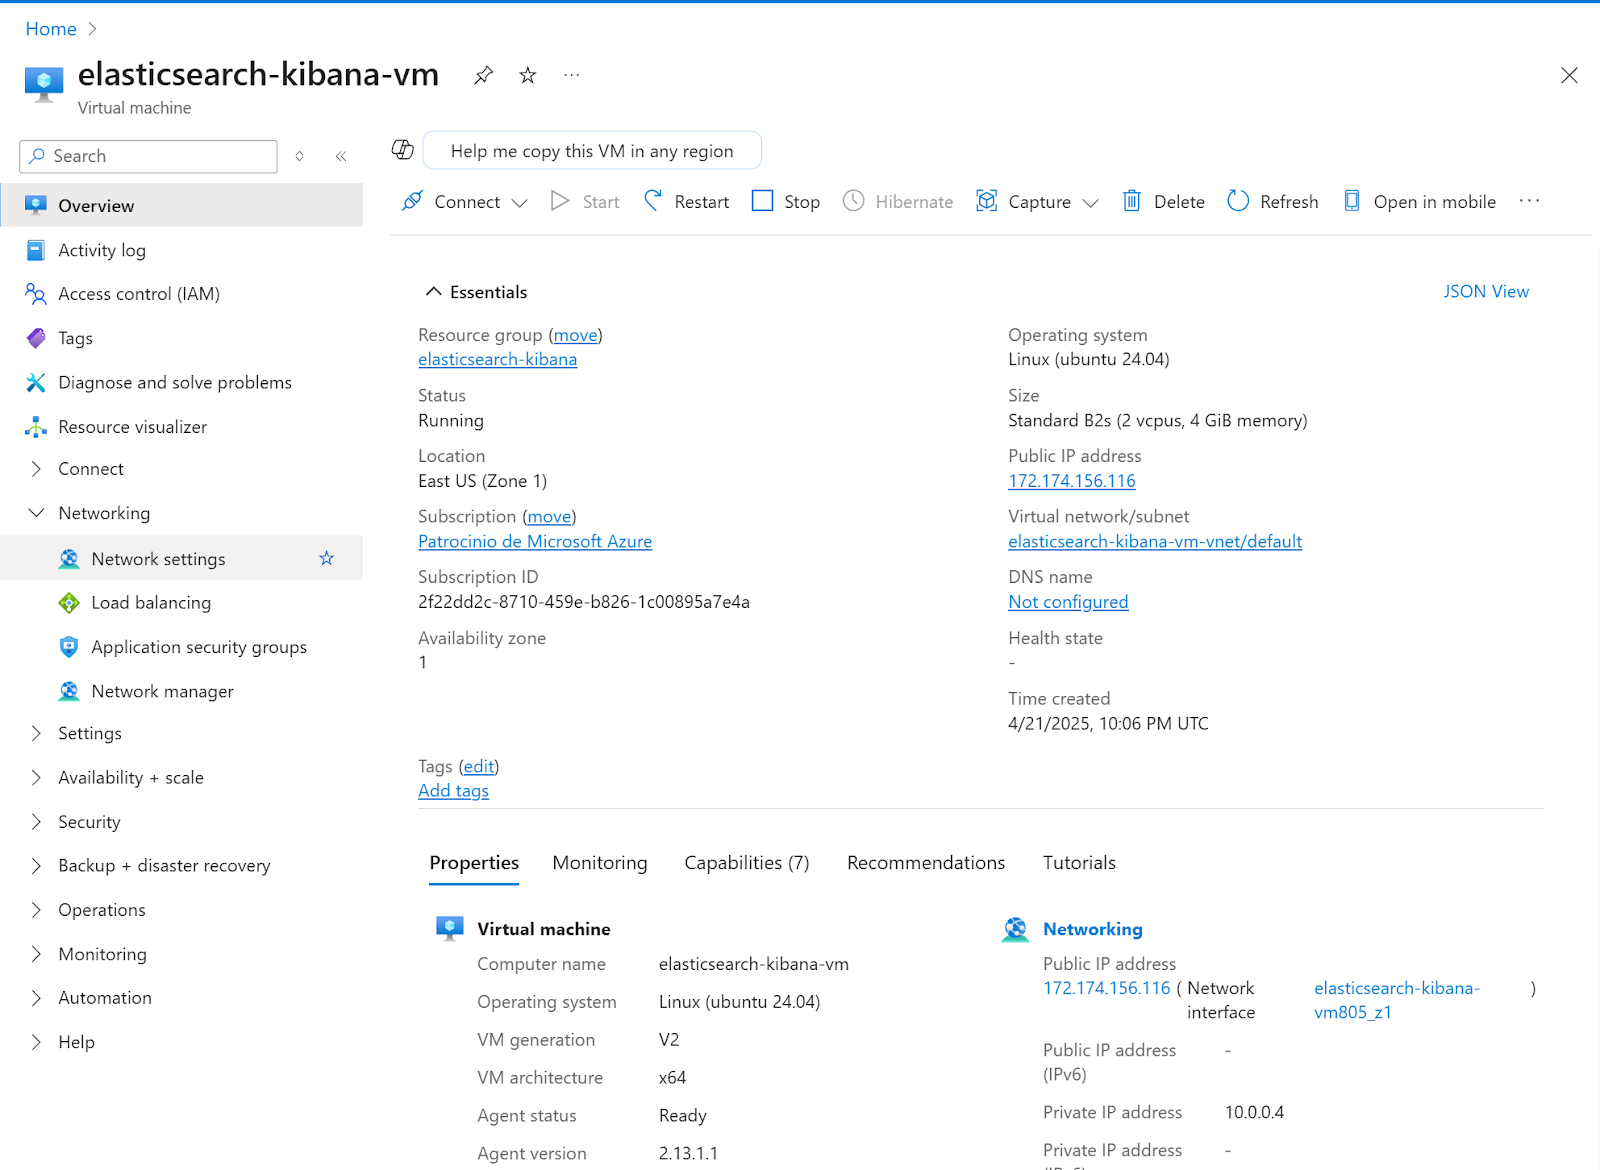
2. In the network settings page, we’re going to create an inbound port rule. Click Create port rule, then click on Inbound port rule
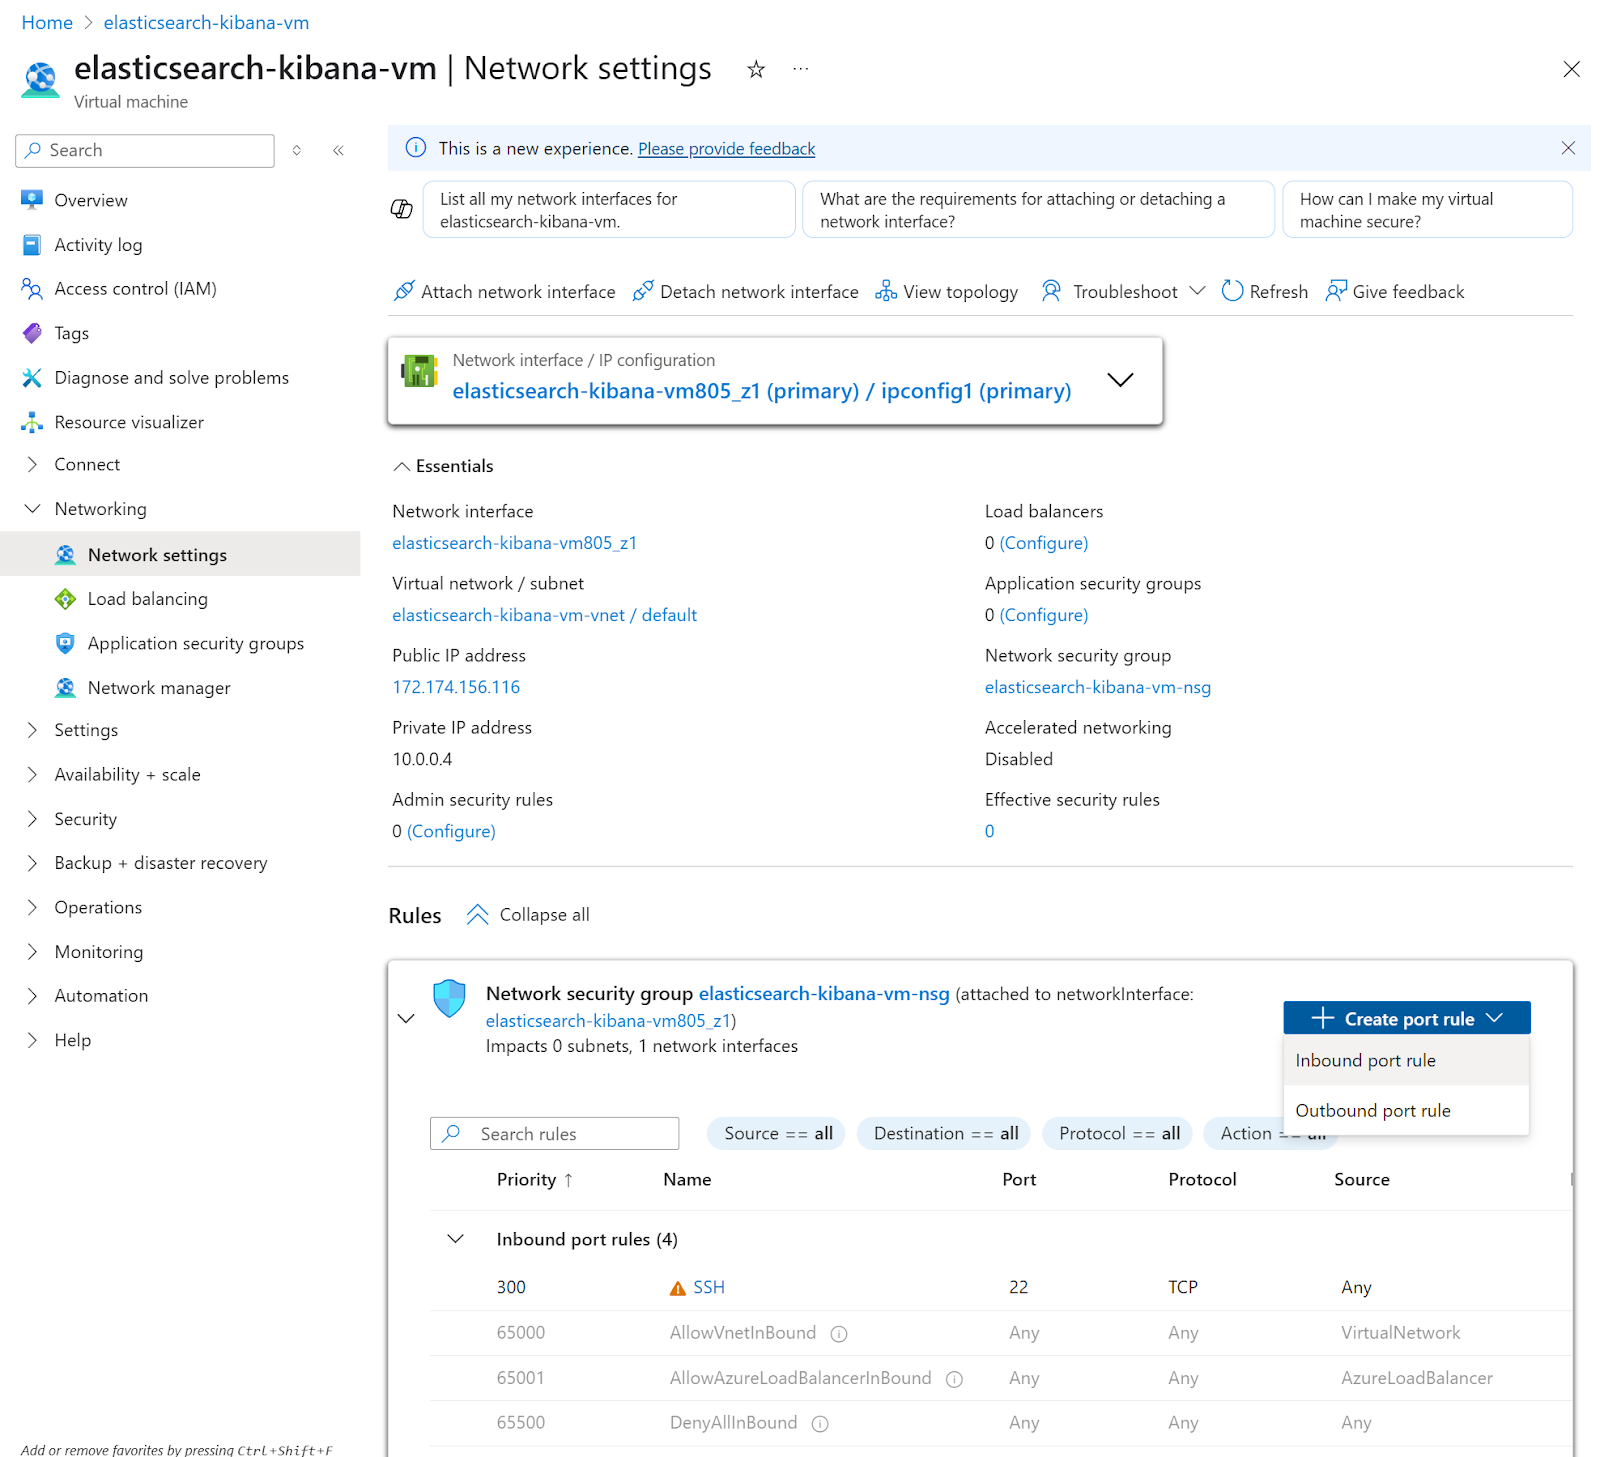
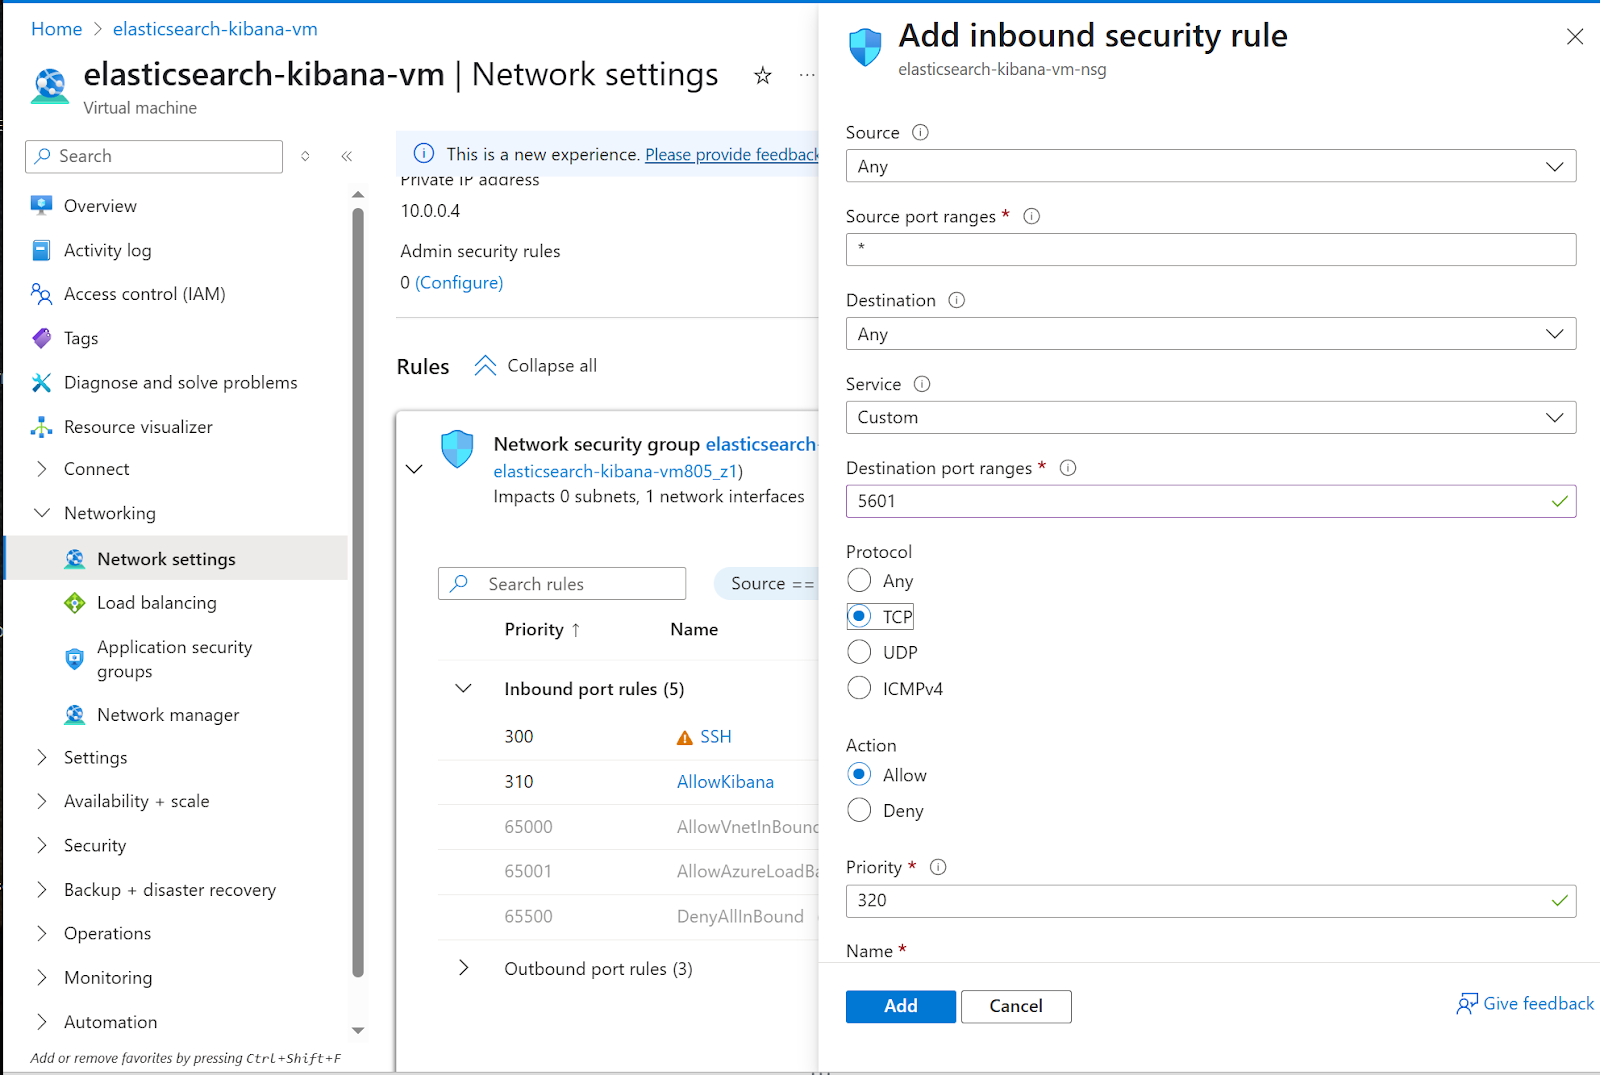
3. The new inbound rule to open Kibana to the internet
a. Source: Any
b. Source port ranges: *
c. Destination: Any
d. Service: Custom
e. Destination port ranges: 5601
f. Protocol: TCP
g. Priority: 310 (default)
h. Name: AllowKibana
Then click the Add button
Connect to Virtual Machine
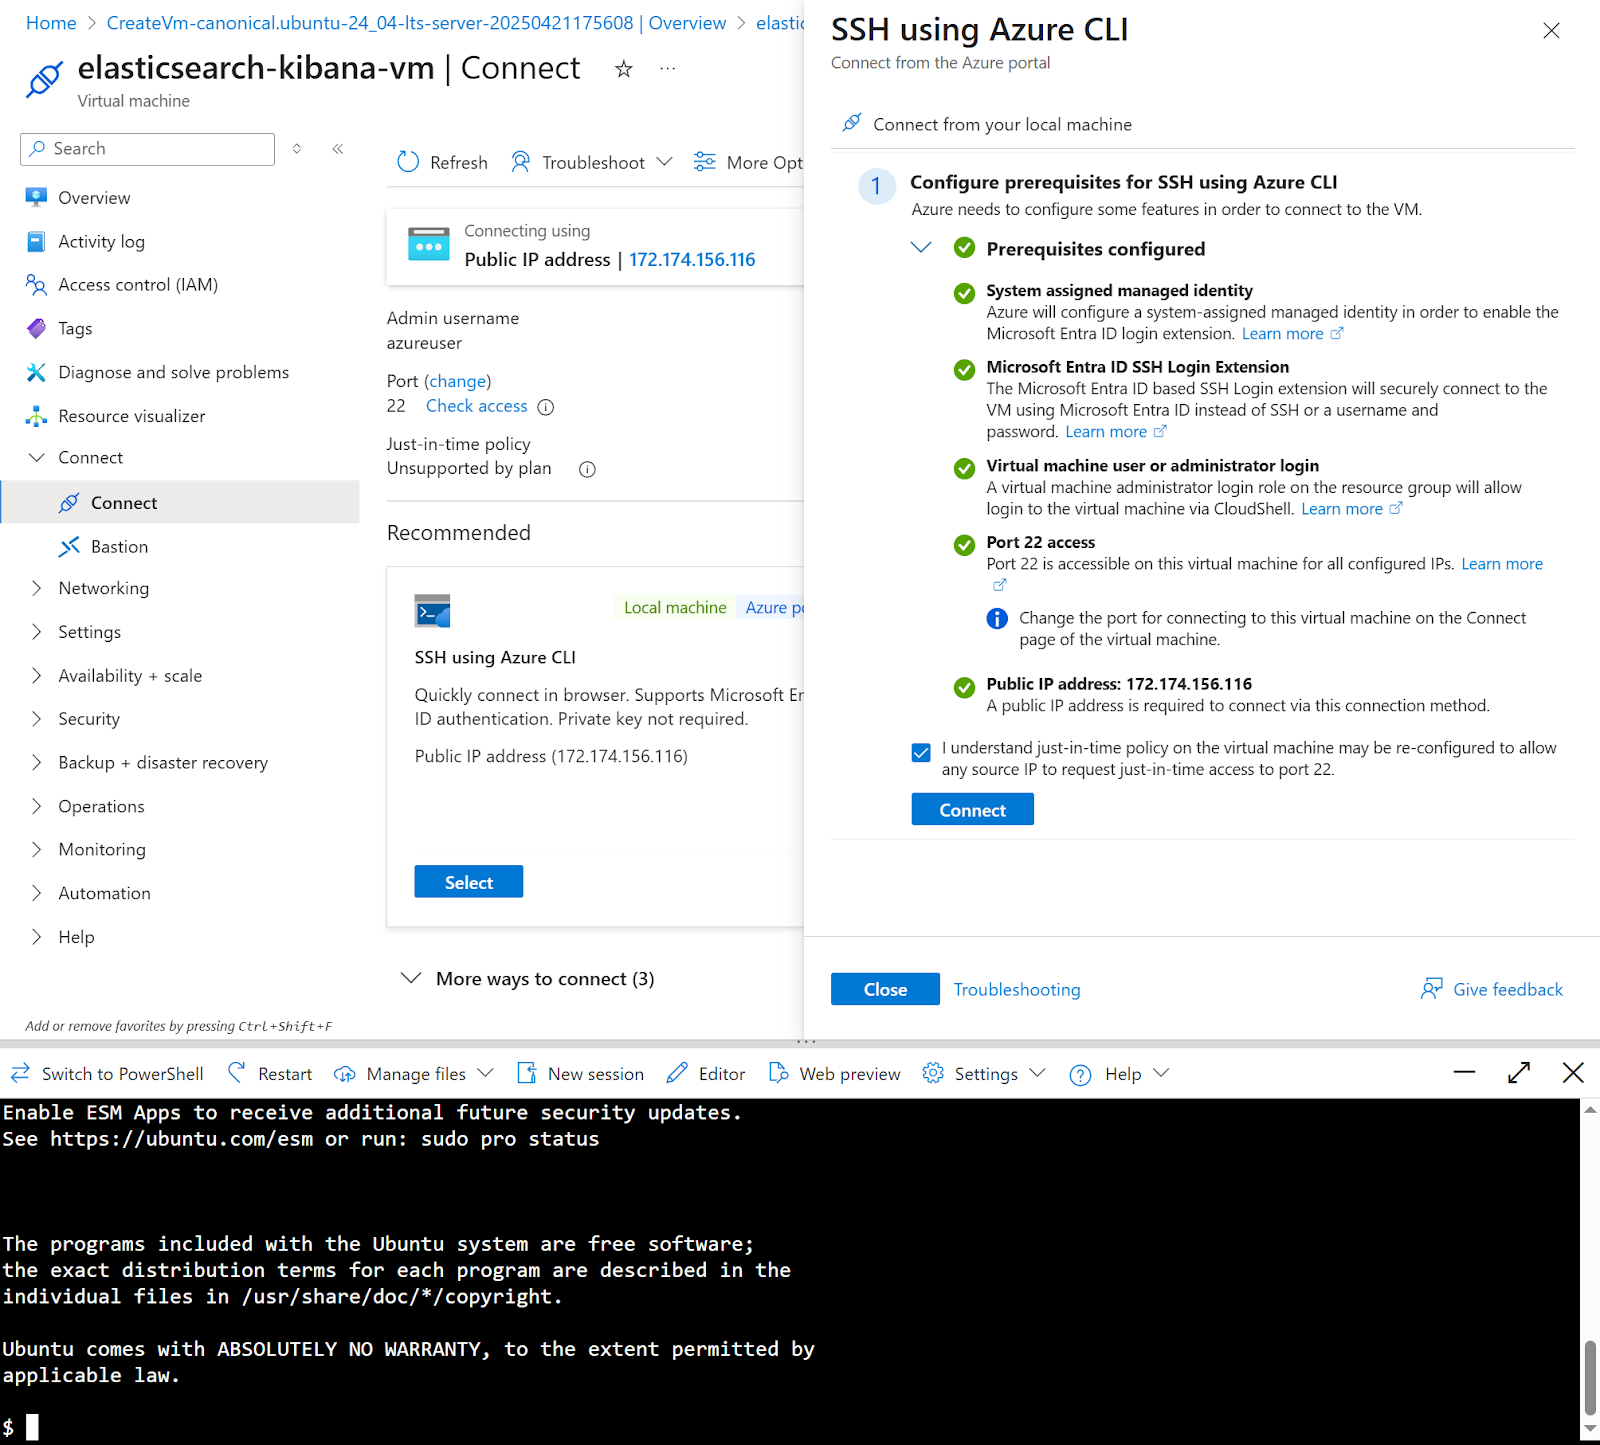
17. To connect to the instance, click the Connect menu, then Connect
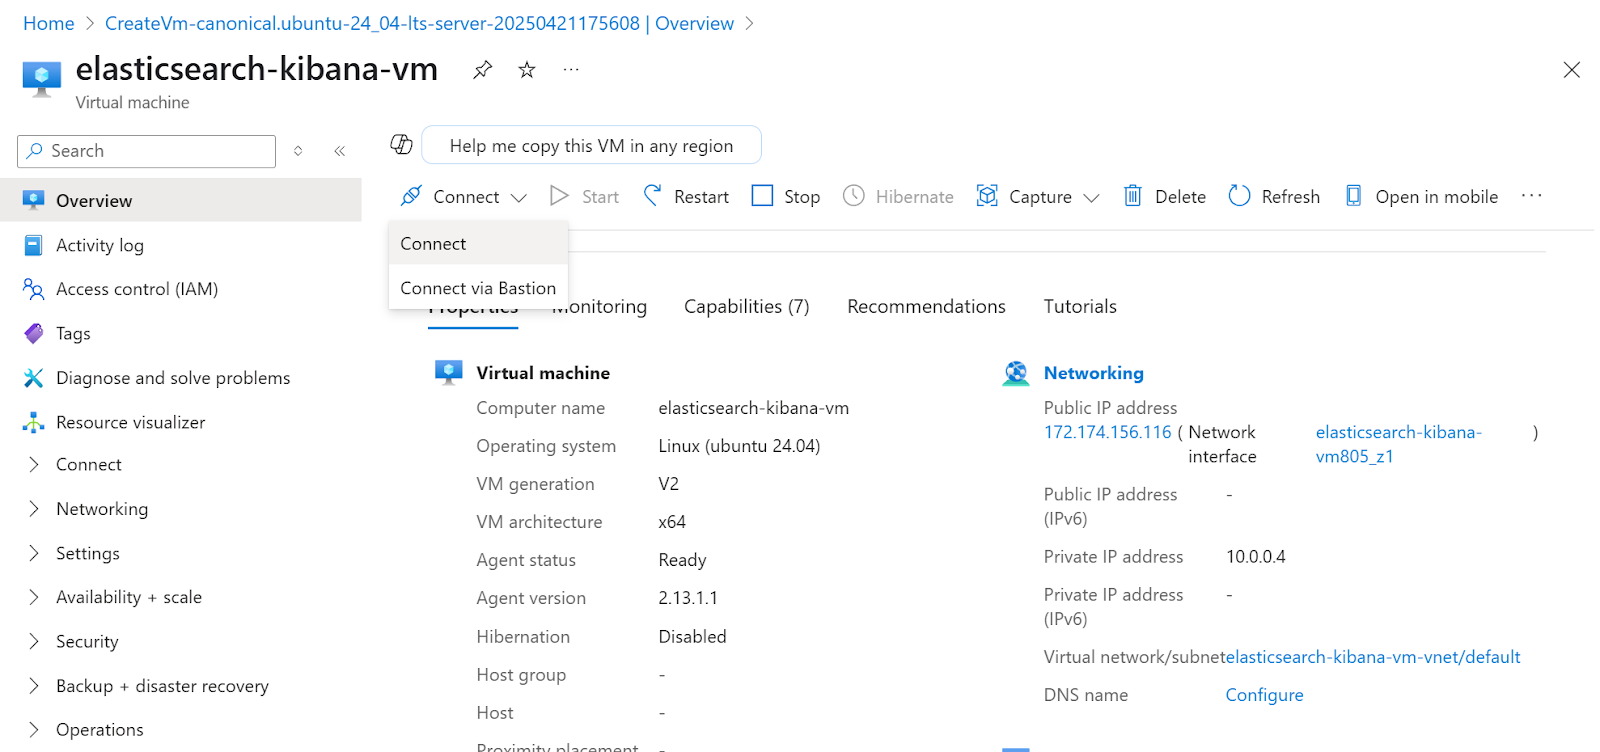
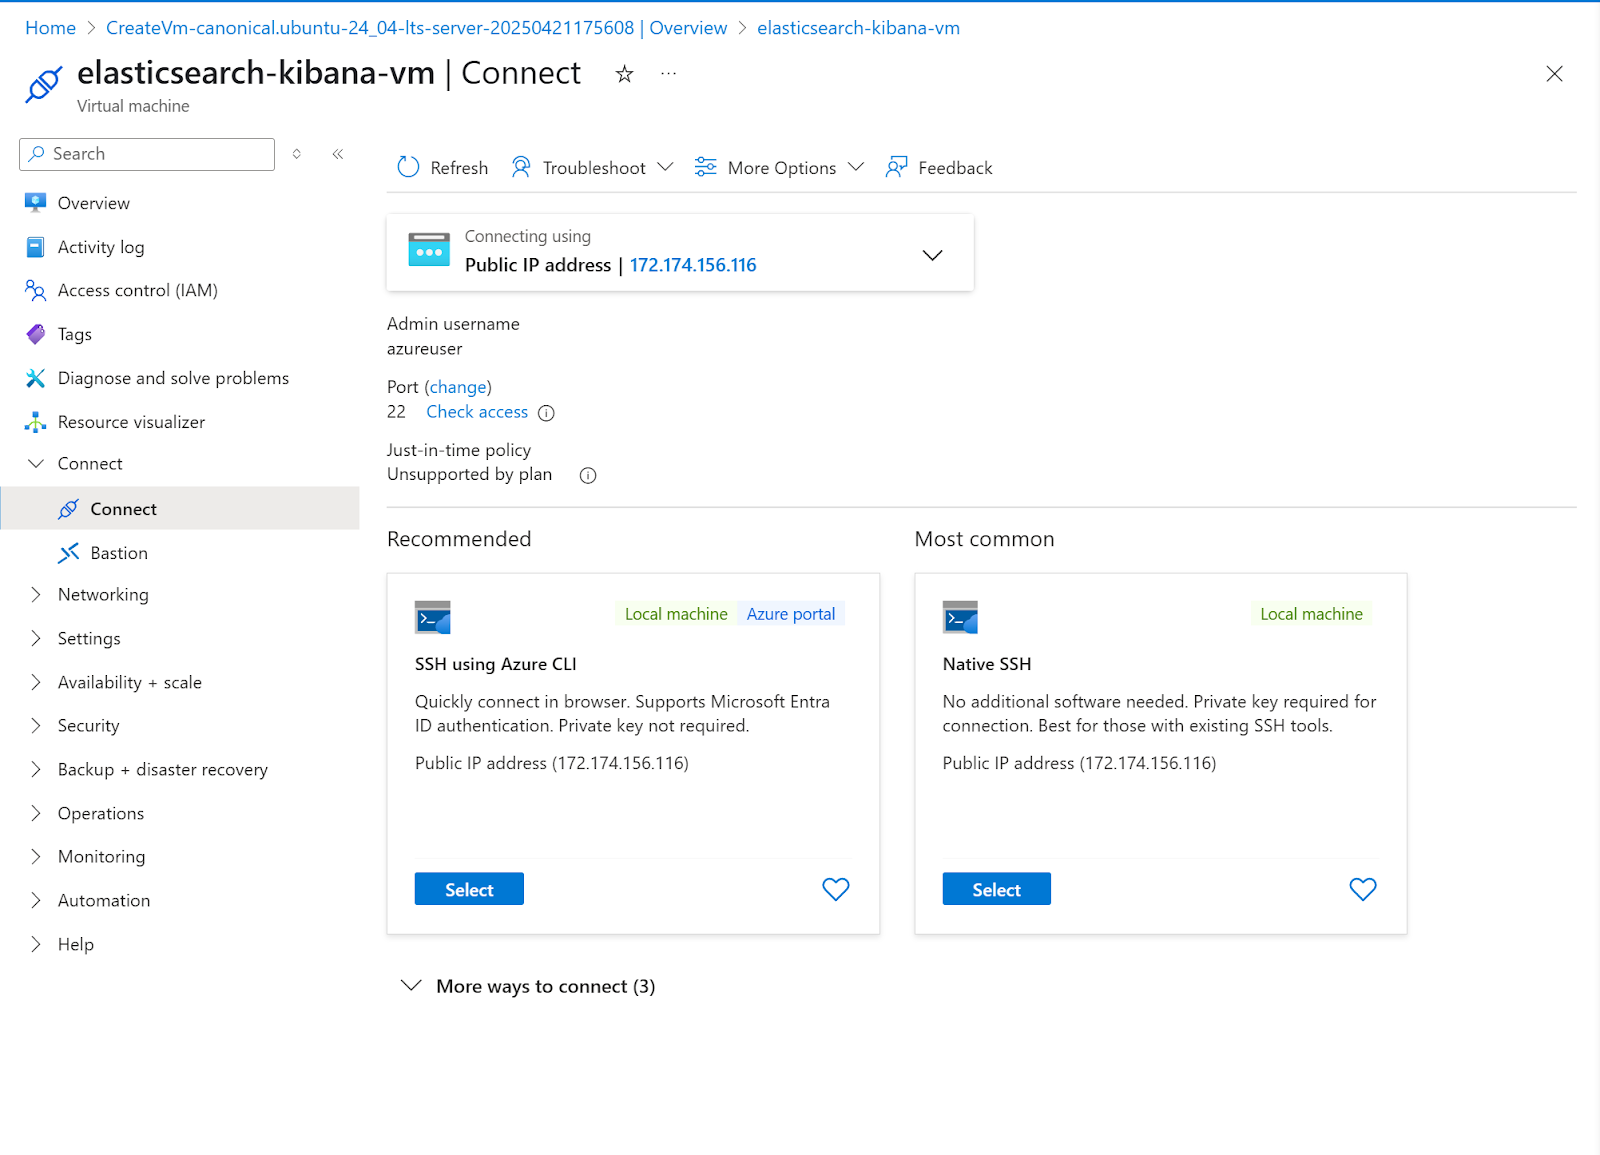
18. For this example, we’re going to use SSH using Azure CLI. Click Select under SSH using Azure CLI
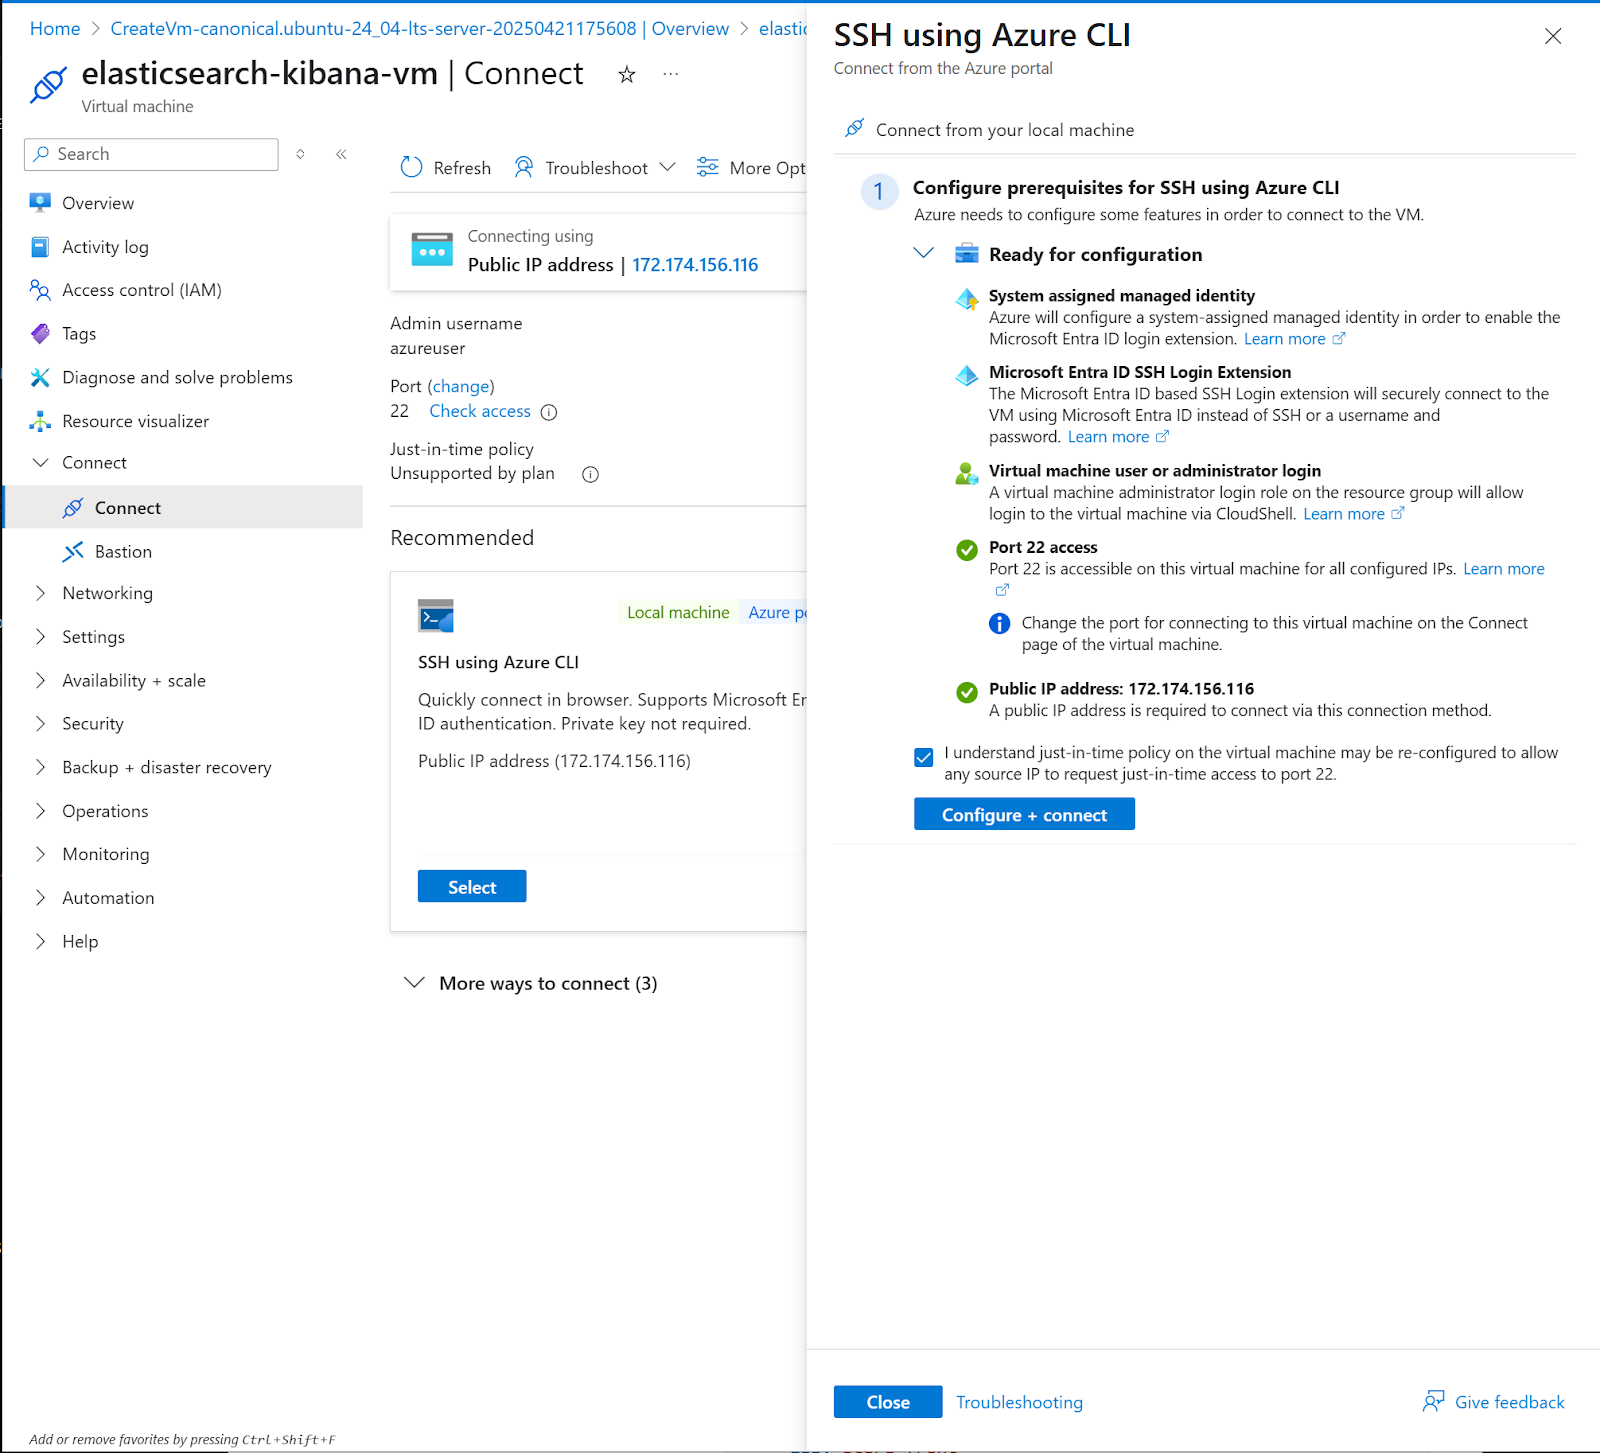
19. A slide menu will show. Check consent and click the Configure + connect button
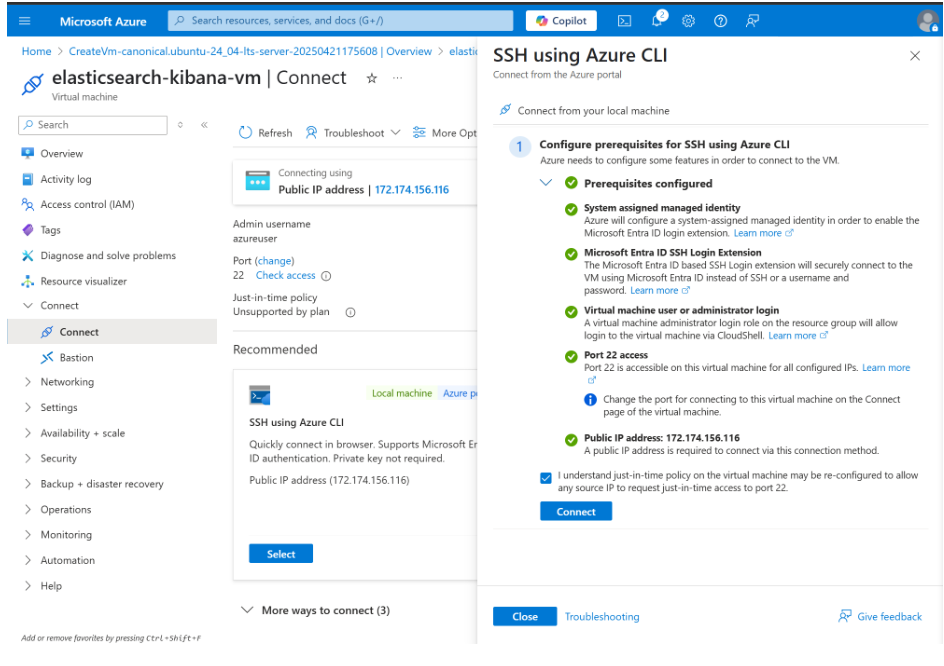
20. After the prerequisite configuration. Click Connect
21. A terminal to the instance will show up at the bottom of the page
Installing Elasticsearch
1. Download the latest Elasticsearch version and verify integrity
wget https://artifacts.elastic.co/downloads/elasticsearch/elasticsearch-9.0.0-linux-x86_64.tar.gz
wget https://artifacts.elastic.co/downloads/elasticsearch/elasticsearch-9.0.0-linux-x86_64.tar.gz.sha512
shasum -a 512 -c elasticsearch-9.0.0-linux-x86_64.tar.gz.sha512
Verifying file integrity is a crucial security step. Always check the downloaded files to match the official checksums.
Note: If the shasum command is not found, install it:
-bash: shasum: command not foundInstall perl-Digest
sudo yum install perl-Digest-SHA2. Extract files
tar -xzf elasticsearch-9.0.0-linux-x86_64.tar.gz
cd elasticsearch-9.0.0/
3. Run Elasticsearch
./bin/elasticsearchThe first time you run Elasticsearch, it generates security certificates and credentials. Make sure to save these for future use.
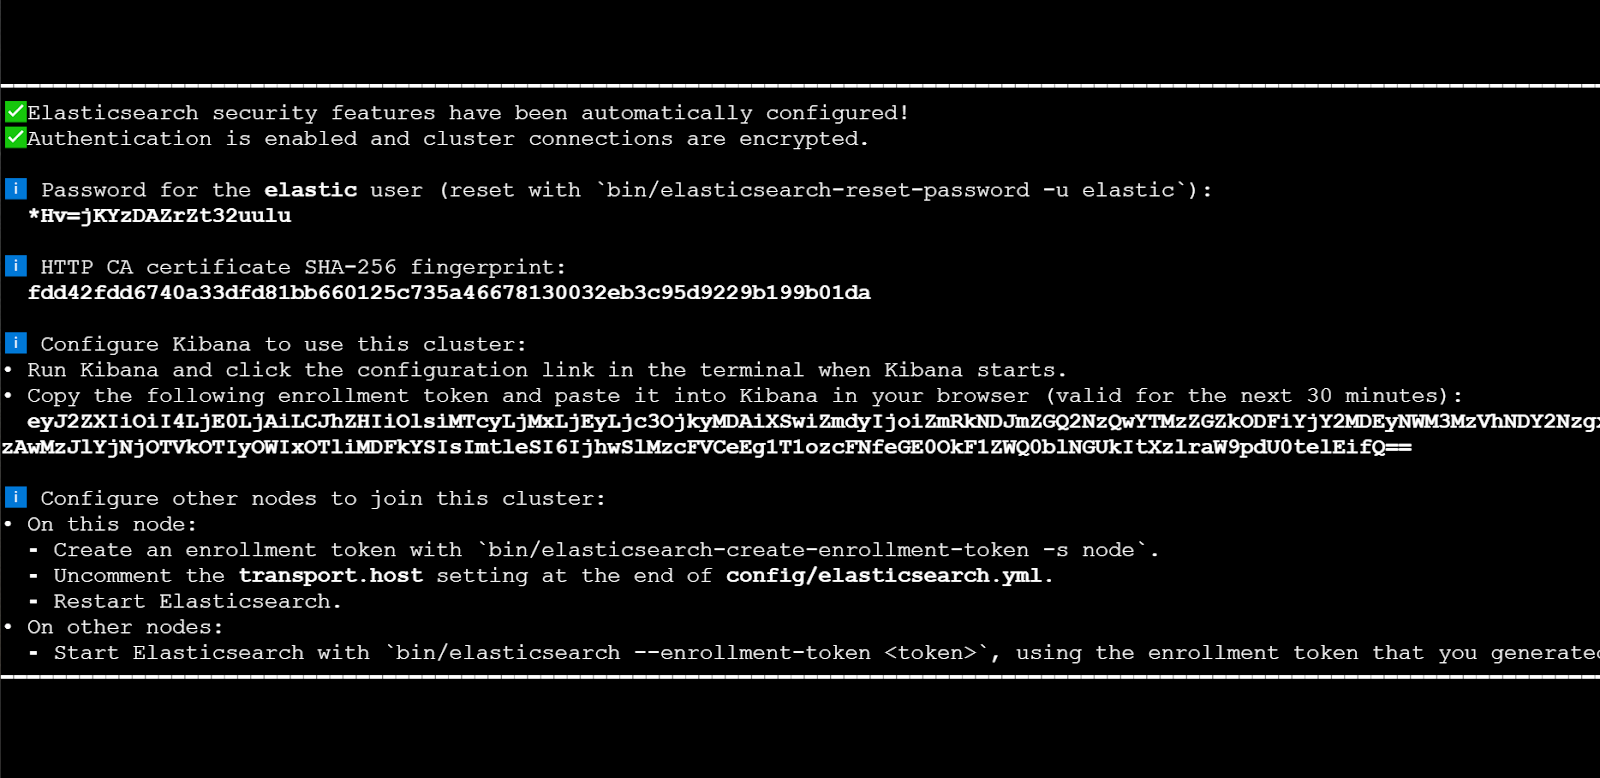
4. Copy the generated password, fingerprint, and enrollment token
5. In a separate terminal from where Elasticsearch is running, navigate to the directory where you installed Elasticsearch and run the elasticsearch-create-enrollment-token tool to generate an enrollment token for your new nodes
./bin/elasticsearch-create-enrollment-token -s nodeIn case you want to add new nodes, follow this guide.
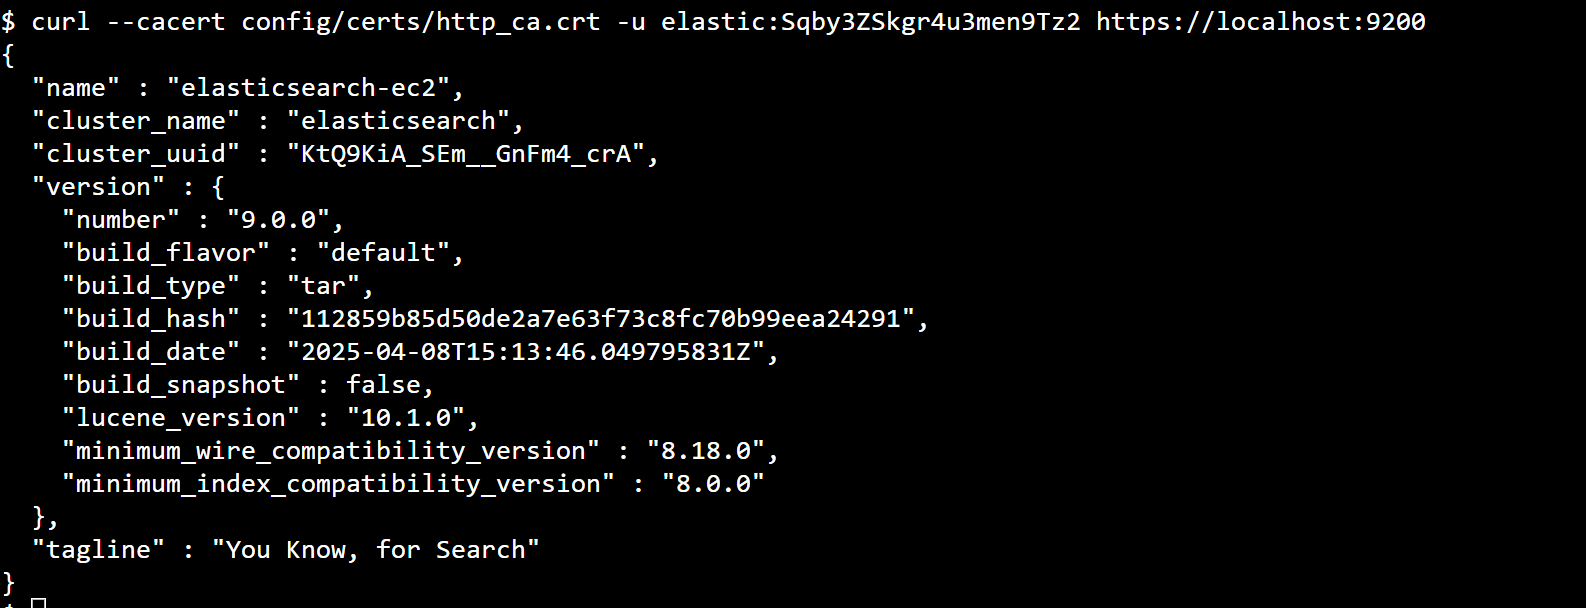
6. Let’s verify that Elasticsearch is running
cd elasticsearch-9.0.0/
curl --cacert config/certs/http_ca.crt -u elastic:$ELASTIC_PASSWORD https://localhost:9200
Replace $ELASTIC_PASSWORD with the generated password from step 3
Installing Kibana
1. Download and extract Kibana:
curl -O https://artifacts.elastic.co/downloads/kibana/kibana-9.0.0-linux-x86_64.tar.gz
curl https://artifacts.elastic.co/downloads/kibana/kibana-9.0.0-linux-x86_64.tar.gz.sha512 | shasum -a 512 -c -
tar -xzf kibana-9.0.0-linux-x86_64.tar.gz
cd kibana-9.0.0/
For production environments, consider installing Kibana on a separate instance. Here we're installing it on the same instance for simplicity.
2. In order to access Kibana from the internet, we’re going to configure a kibana.yaml file
nano ./config/kibana.ymlLook for the server.host setting and set it to:
server.host: "0.0.0.0"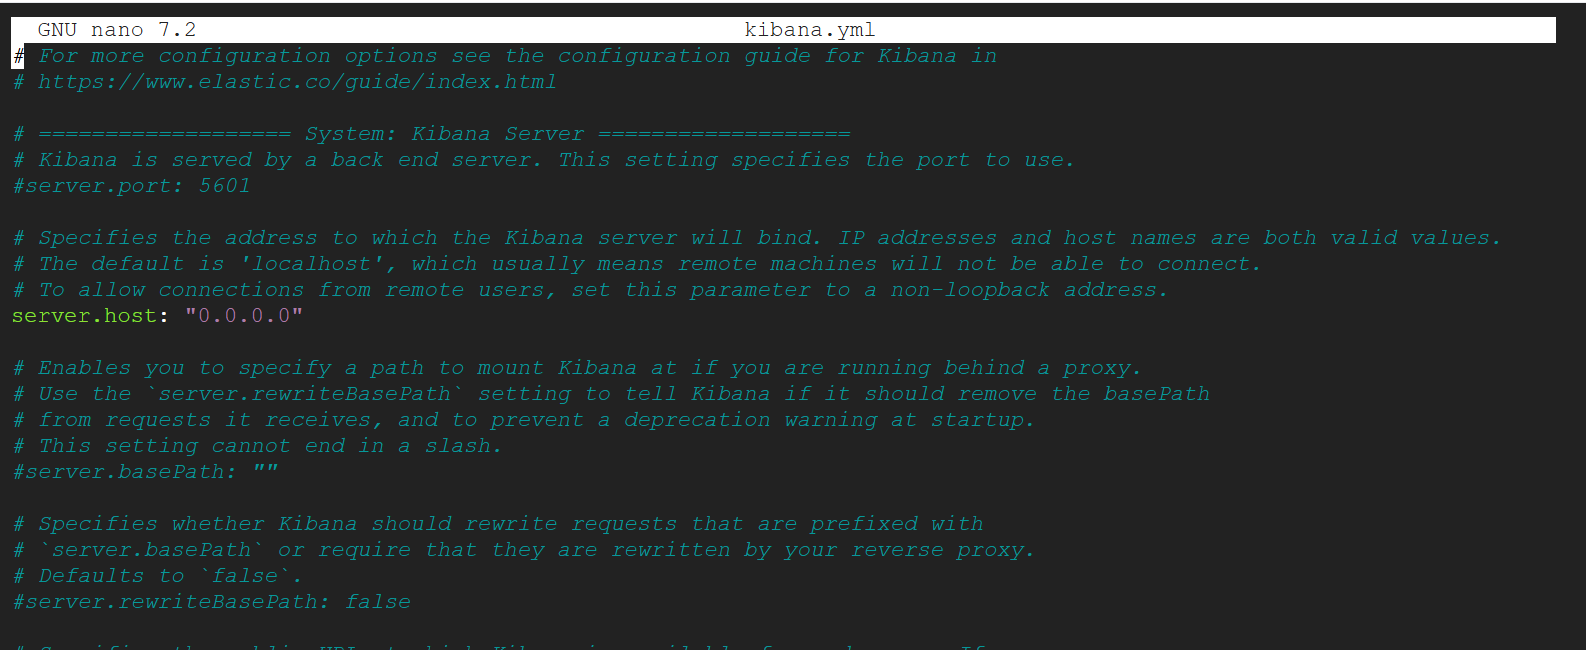
Exit and save
3. Run Kibana
./bin/kibana
4. Access from a browser to a virtual machine using a public IP address with this format:. Public IP Address can be found on step 14 of Setting up a Virtual machine
http://{VM-IP-ADDR}:5601/?code=567892Now, access the Virtual machine's Public IP Address and add the code shown
5. Paste the Kibana enrollment token from step 3 when prompted
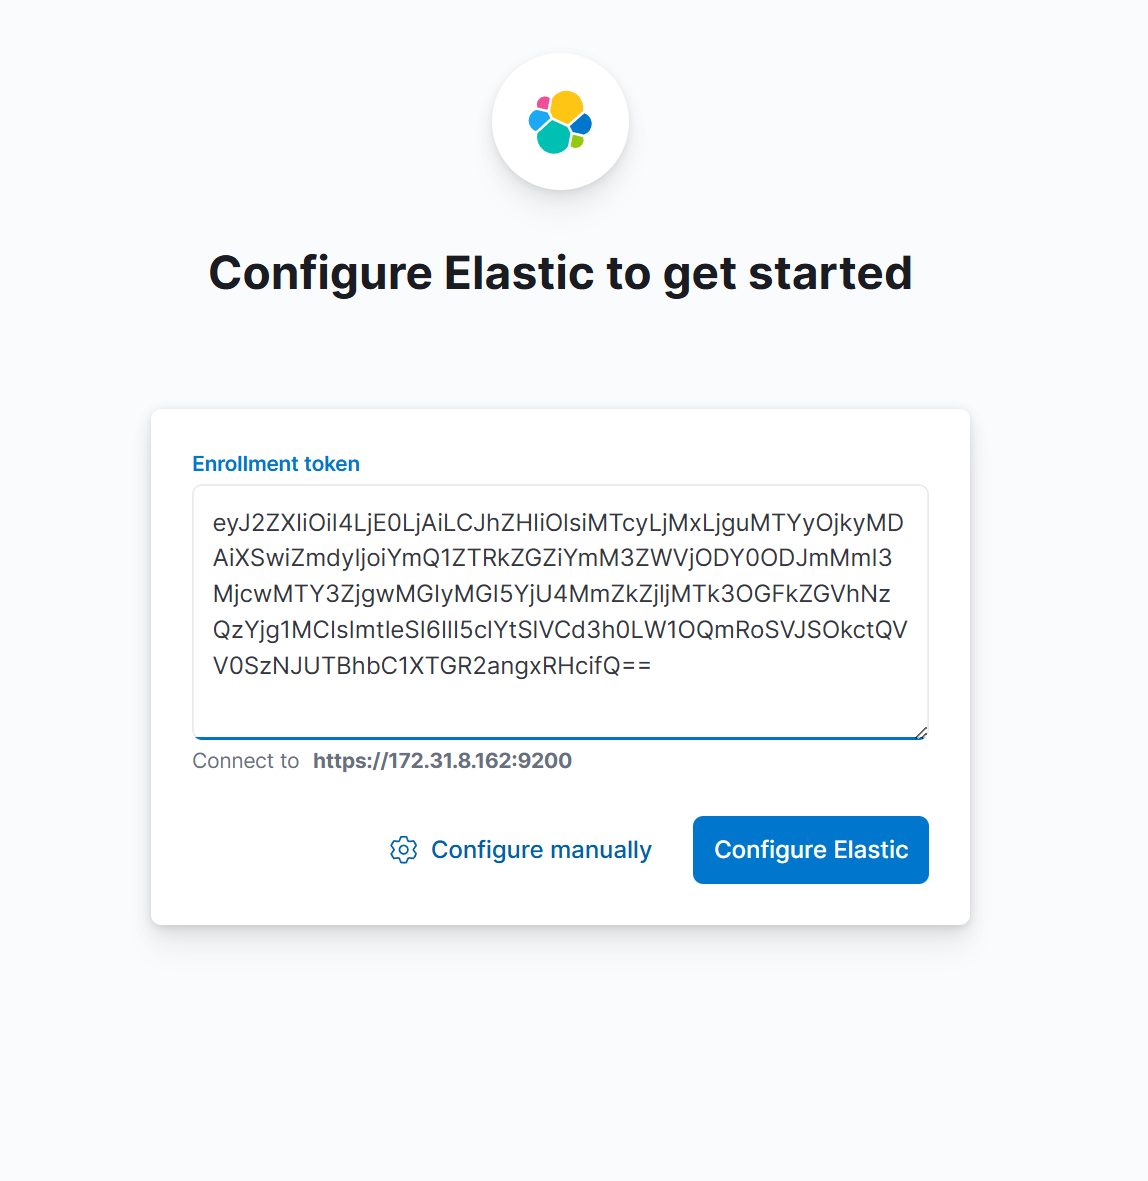
6. Enter the Elasticsearch username and password
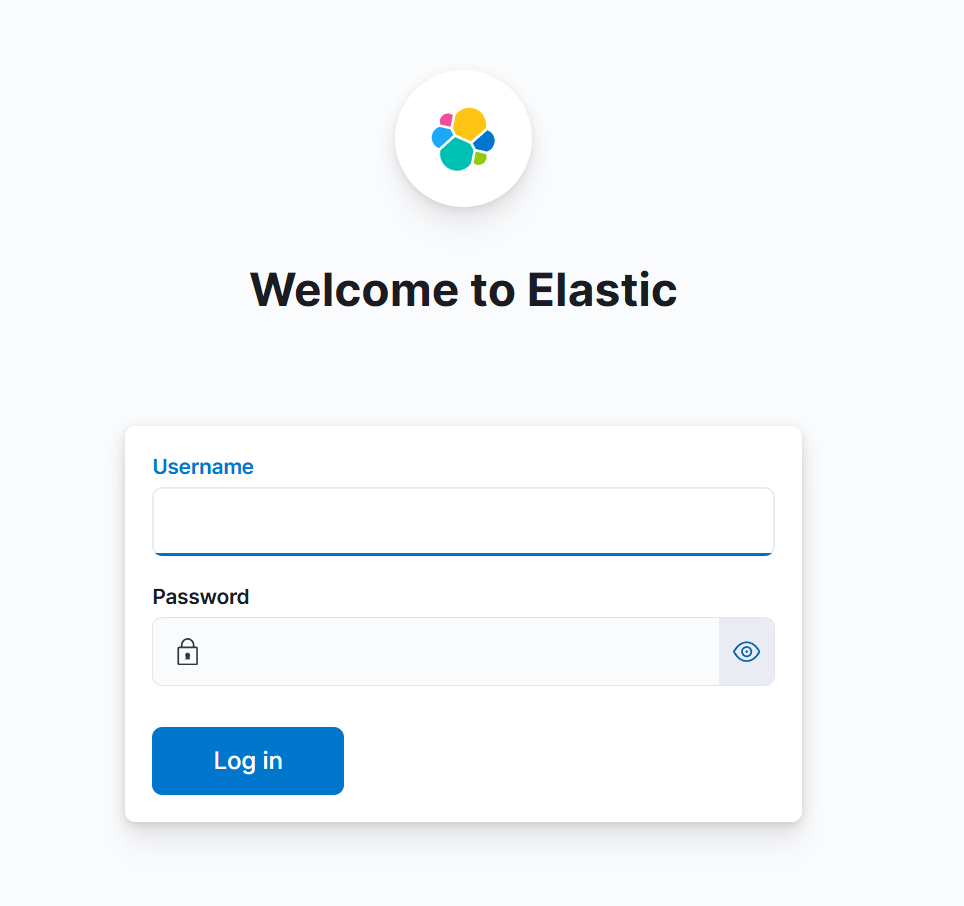
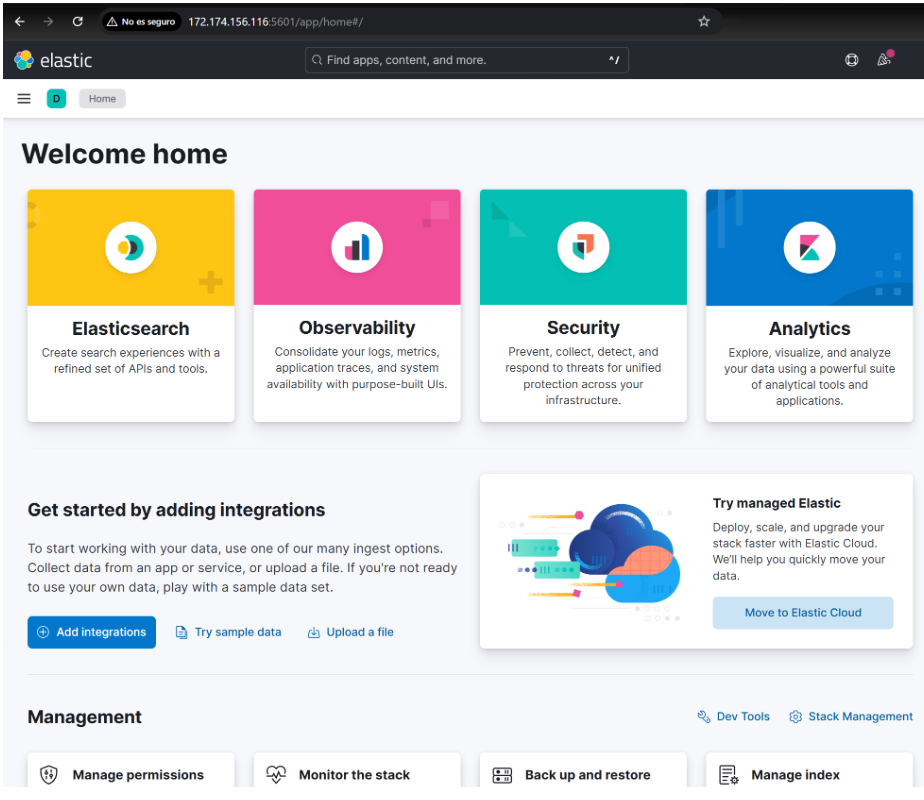
Kibana installation is complete!
After completing these steps, you'll have a working Elasticsearch deployment with Kibana running on an Azure virtual machine. This setup gives you full control over your environment while leveraging the Azure infrastructure.
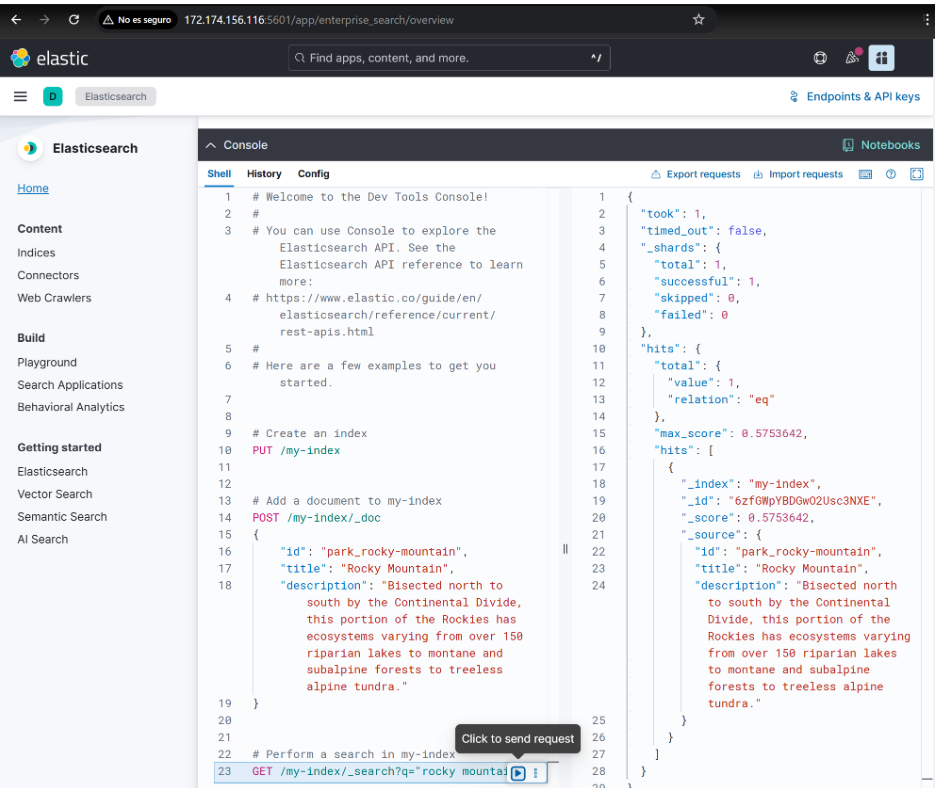
For production environments, you can consider configuring systemd services for automatic startup, implementing a multi-node cluster for high availability, or creating snapshot repositories as a backup.
Next Steps
Access the Azure Portal, select Elasticsearch VM images from Azure, choose VM size and storage, then deploy. Start with pay-as-you-go pricing or use free Azure credits for immediate access to a fully customizable Elasticsearch environment.
Ready to try this out on your own? Start a free trial.
Want to get Elastic certified? Find out when the next Elasticsearch Engineer training is running!
Related content
How to use the Synonyms UI to upload and manage Elasticsearch synonyms
Learn how to use the Synonyms UI in Kibana to create synonym sets and assign them to indices.

October 8, 2025
How to reduce the number of shards in an Elasticsearch Cluster
Learn how Elasticsearch shards affect cluster performance in this comprehensive guide, including how to get the shard count, change it from default, and reduce it if needed.
October 3, 2025
How to deploy Elasticsearch on AWS Marketplace
Learn how to set up and run Elasticsearch using Elastic Cloud Service on AWS Marketplace in this step-by-step guide.

September 29, 2025
HNSW graph: How to improve Elasticsearch performance
Learn how to use the HNSW graph M and ef_construction parameters to improve search performance.
September 26, 2025
Elasticsearch plugin for UBI: Analyze user data in Kibana
Discover how to capture user behavior data using the Elasticsearch plugin for UBI and build a custom dashboard in Kibana to analyze it.