Data ingestion usually involves managing complex infrastructure such as scheduling, retries, logging, and monitoring. Elastic’s Connector Framework simplifies all that: you just focus on extracting data, and it handles the rest.
With AI tools like Cursor or Claude Code, even writing a connector is easy. You need to define a configuration schema, describe your requirements, and let AI handle the heavy lifting. You can go from idea to a working connector in minutes.
In this post, we’ll walk through how easy it is to build a new custom Elastic connector. Our practical example will involve building an LLM-friendly crawler using the popular crawl4ai library. You’ll see how to go from requirements to working code using a structured prompt and AI code editors that understand your project context.
Why building new connectors has never been easier
Connector interface: Each connector follows a clear structure: define configuration, implement sync logic, and yield documents for Elasticsearch ingestion. Once you've built one, you can build ten more. Plus, AI assistants can even reference existing tutorials or other connector implementations to make this process more robust.
Open code: Elastic's connectors and most libraries are open code. LLMs are familiar with these open libraries and can generate code that aligns with their structure and conventions. Even if a library is just updated, modern AI code assistants can look up online docs in real-time to keep things compatible.
AI code editors are your superpower: Tools like Cursor or Claude Code link up your local codebase with the AI, giving it real-time access to your code, file layout, and overall context. It goes beyond autocomplete; these tools understand your project layout and can generate code with improved context.
Building a Crawl4AI connector
Let's build a new connector. We'll create a crawler using the crawl4ai library.
You don’t need to be a crawling guru. All it takes is a clear description of what the connector should do, how it should be configured, and what kind of documents it should produce. With that in place, tools like Cursor and an LLM can handle most of the heavy lifting.
Prerequisites
You’ll need to clone the elastic/connectors repo, and have Python 3.10 or 3.11 available on your machine.
git clone git@github.com:elastic/connectors.git
cd connectors
You also need access to a running Elasticsearch instance (local or cloud). The easiest way to start Elasticsearch locally is by using the one-liner command start-local.
For development, use an AI-powered code editor connected to a powerful LLM (like Cursor, Claude Code, or Windsurf). Make sure you open the connectors project in your editor.
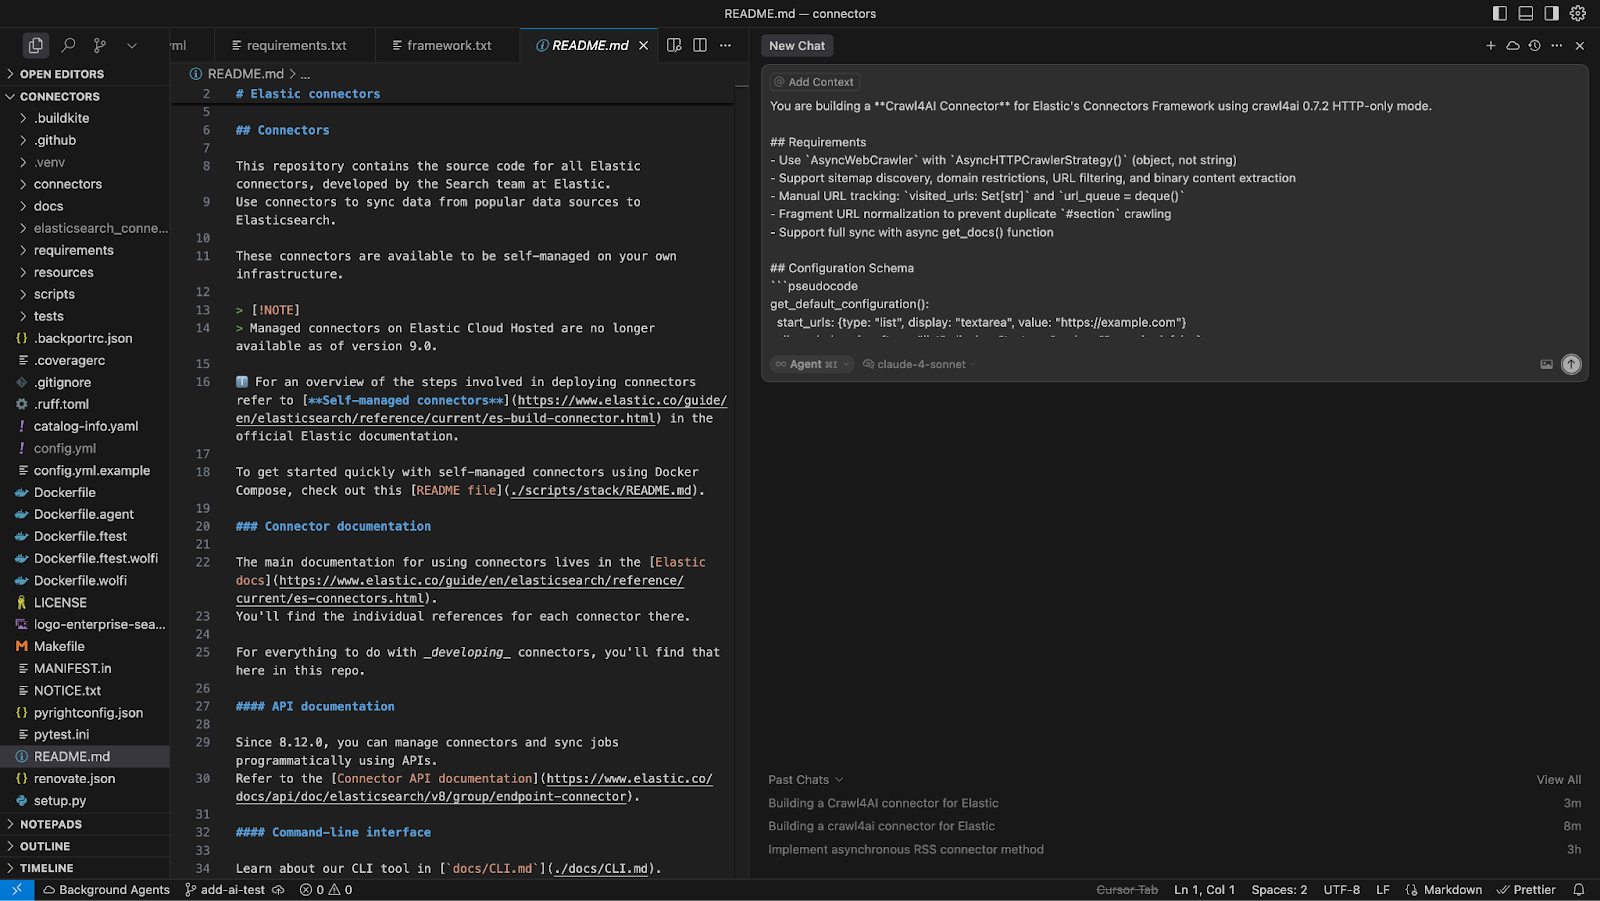
You should now see, for example, the README.md file in your top-level project structure.
Let’s build a good prompt
To make sure AI delivers something that works right out of the box, your prompt should include three key ingredients:
- Context, so it knows the specifics of the Elastic Connector Framework.
- Functional requirements, so it understands what the connector must achieve.
- Technical details, so it generates code compatible with your setup.
With those elements in place, the model isn’t just guessing, it’s building exactly what you need. Now, let’s look at the actual prompt we used and how we structured it for the best results.
Let’s start with:
You are building a Crawl4AI Connector for Elastic's Connector Framework, using the latest available version of Crawl4AI. Check the latest Crawl4AI version online.This sets the scene. Be explicit about the Connector Framework and the data source library being used. Mentioning the exact version helps the model generate compatible code, especially if it was trained on earlier releases.
Functional requirements
This section defines what the connector should do and the expectations it must meet to work properly.
In this case, I already have a rough understanding of the key concepts in the Crawl4Ai library, so I’m explicitly asking the LLM to use them instead of reinventing the wheel.
A common issue with AI-generated code is the tendency to write custom logic for things already handled by the underlying library. To avoid that, I’m keeping the model on a tight leash, steering it toward existing abstractions wherever possible. The less code we own, the better.
One of Crawl4AI’s core features is generating clean, structured markdown from web pages, so I’m including that as a requirement. Markdown content works well with LLMs to power conversational experiences.
## Requirements
- Support sitemap discovery, domain restrictions, URL filtering, and binary content extraction
- Run crawler in HTTP mode for speed and simplicity, don't use headless browser mode
- Normalize URL fragments to prevent duplicate `#section` crawling
- Support full sync with async get_docs() function
- Use `AsyncWebCrawler` with http only crawling, use  crawl4ai `BFSDeepCrawlStrategy` for link discovery, BFS crawl strategy should keep track of link discovery
- If `allowed_domains` empty, extract domains from `start_urls`
- Support include and exclude patterns with crawl4ai URLPatternFilter
- Ingest LLM-friendly markdown output
Configuration schema
Elastic connectors define user-facing configuration via a Python method. This block maps the configuration fields to the Elastic UI: labels, tooltips, input types, defaults, and dependencies.
get_default_configuration():
  start_urls: {type: "list", display: "textarea", value: "https://example.com"}
  allowed_domains: {type: "list", value: "", required: false}
  sitemap_urls: {type: "list", value: "", required: false}
  ...
From what I've seen, it's best to define this part early on. That way, the LLM can tweak the code to fit the configuration interface perfectly.
You could get away with leaving it loosely defined and relying on the LLM to infer the connector configuration schema based on other implementations. But for the purpose of this blog, this approach is more robust.
Output format
Tell the model exactly what your connector should yield. The Elastic Connector Framework expects a tuple: a document (doc) and a download coroutine. Since we’re only crawling web content, we can skip the coroutine, as text extraction is already handled by the crawl4ai library.
doc = {
  "_id": hash_id(url),
  "url": url,
  "title": title,
  "content": content,
  "depth": depth
}
yield doc, None  # No download coroutine needed
Where to wire it in
Tell the model where to place the new connector and what to modify:
## Files
- `connectors/sources/crawl4ai.py` - Main connector
- Add `crawl4ai=={most recent version}` to `requirements/framework.txt`
- Register in `connectors/config.py`
Last but not least
At the end of the prompt, it’s neat to include a brief nudge that encourages the model to think before coding. This lightweight instruction can improve results more than you'd expect. It helps the LLM switch into planning mode, break down the problem, and generate cleaner, more coherent code. For structured connectors like this one, that small pause often leads to gains in code quality.
Reference `connectors/sources/directory.py` for Elastic connector patterns. Use built-in crawl4ai features wherever possible, the less logic we own the better. Create yourself a task-list for tracking action items, lookup information online if needed. When trying to execute console scripts you need to activate .venv.Final prompt
Paste this structured prompt into e.g., Cursor to generate a complete connector implementation aligned with the interface expected by Elastic Connector Framework. From there, you’ll only need to validate, test, and tweak.
You are building a Crawl4AI Connector for Elastic's Connector Framework, using the latest available version of Crawl4AI. Check the latest Crawl4AI version online.

## Requirements
- Support sitemap discovery, domain restrictions, URL filtering, and binary content extraction
- Run crawler in HTTP mode for speed and simplicity, don't use headless browser mode
- Normalize URL fragments to prevent duplicate `#section` crawling
- Support full sync with async get_docs() function
- Use `AsyncWebCrawler` with http only crawling, use  crawl4ai `BFSDeepCrawlStrategy` for link discovery, BFS crawl strategy should keep track of link discovery
- If `allowed_domains` empty, extract domains from `start_urls`
- Support include and exclude url filtering patterns with crawl4ai URLPatternFilter
- Ingest LLM-friendly markdown output

## Connector Configuration

```
get_default_configuration():
  start_urls: {type: "list", display: "textarea", value: "https://example.com"}
  allowed_domains: {type: "list", display: "textarea", value: "", required: false}
  sitemap_urls: {type: "list", display: "textarea", value: "", required: false}
  url_include_patterns: {type: "list", display: "textarea", value: "*", required: false}
  url_exclude_patterns: {type: "list", display: "textarea", value: "", required: false}
  max_crawl_depth: {type: "int", display: "numeric", value: 2}
  extract_full_content: {type: "bool", display: "toggle", value: true}
  extract_binary_content: {type: "bool", display: "toggle", value: false}
  binary_file_extensions: {type: "list", depends_on: [{"field": "extract_binary_content", "value": True}], value: "pdf,docx,pptx"}
```

Note, list elements are comma-separated, Connector framework will take care of parsing all config values, we don't need extra logic.

## Document Output
```
doc = {
  "_id": hash_id(url),
  "url": url,
  "title": title,
  "content": content,
  "depth": depth,
}
yield doc, None  # No download coroutine needed
```

## Required Structure
- Inherit from `BaseDataSource`
- implement `get_docs()` and `ping()`


## Files
- `connectors/sources/crawl4ai.py` - connector implementation
- Add `crawl4ai=={most recent version}` to `requirements/framework.txt`
- Register in `connectors/config.py`

Reference `connectors/sources/directory.py` for Elastic connector patterns. Use built-in crawl4ai features wherever possible, the less logic we own the better. Create yourself a task list for tracking action items, lookup information online if needed. When trying to execute console scripts you need to activate .venv.
Side note: you can find this and other prompts that unlock more powerful ways to use Elasticsearch in our Elasticsearch Labs Prompt library.
Generate the code
I'm using Cursor to generate the connector code. For this task, I chose the highly capable Claude Sonnet 4 reasoning model.
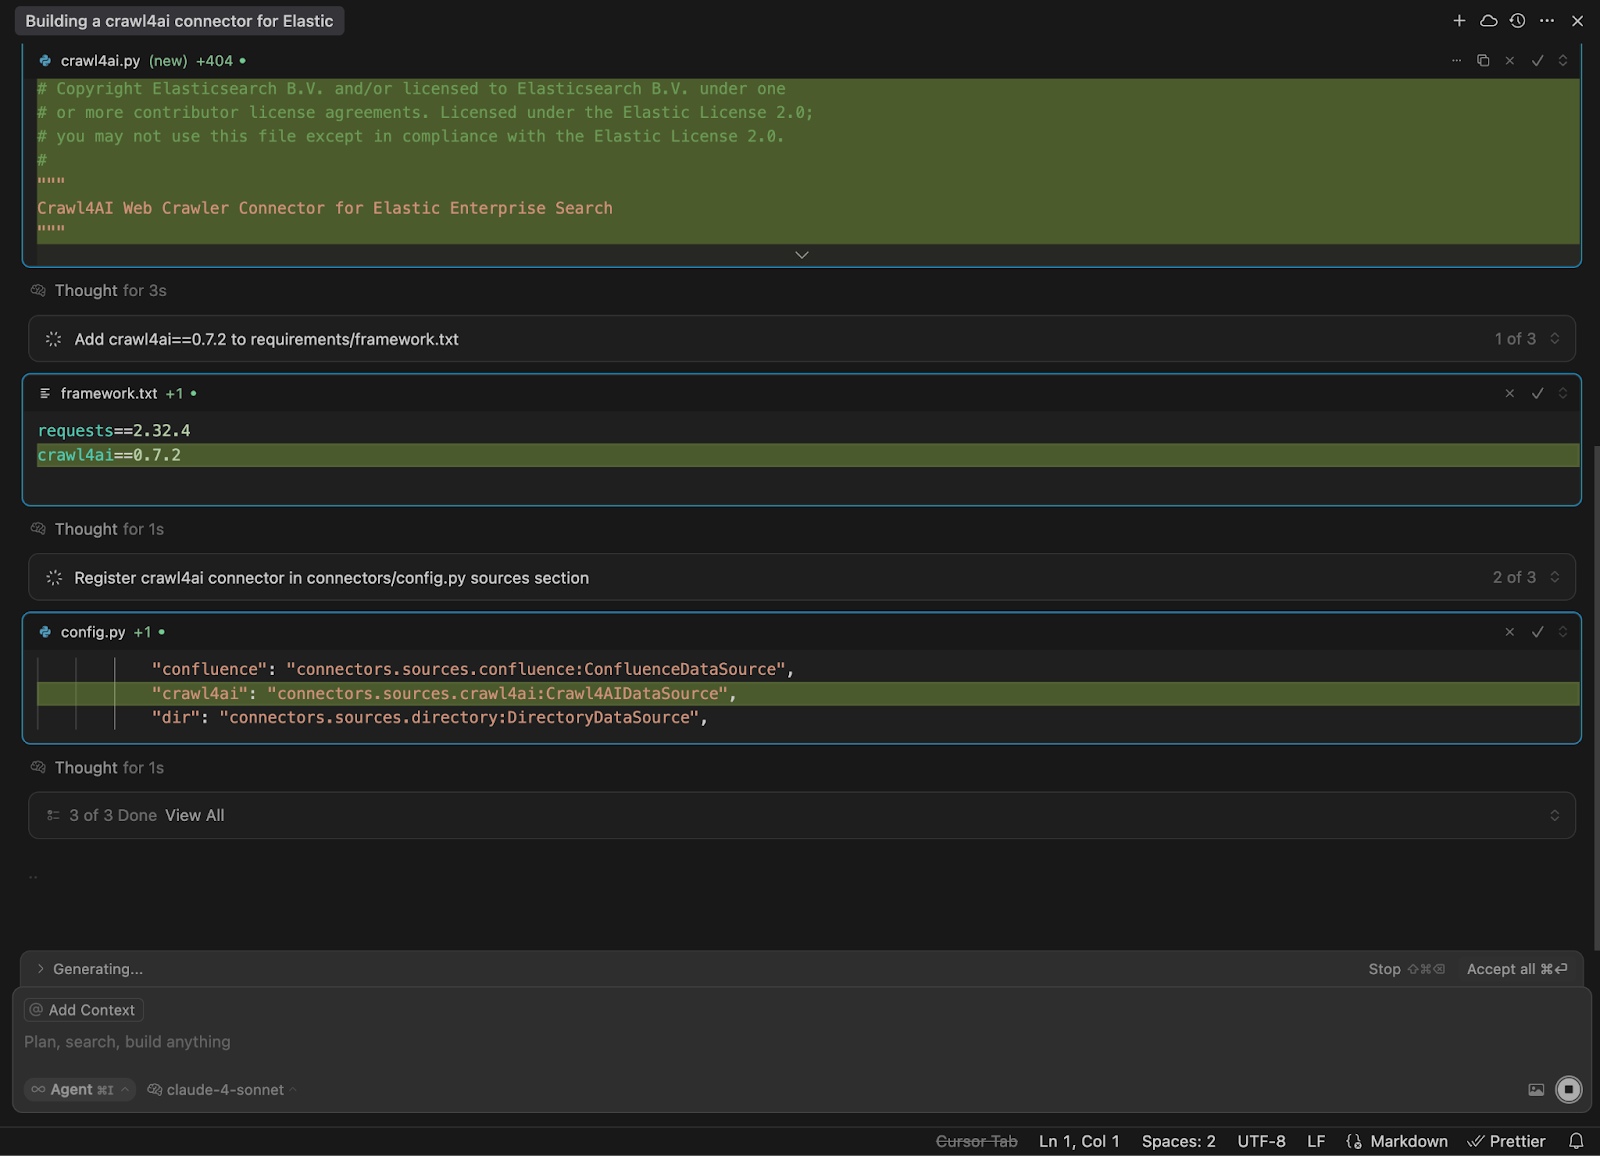
Run and test the connector
Sanity checklist
- Connector file exists:
connectors/sources/crawl4ai.pyinheritsBaseDataSourceand implementsget_docs()andping(). - Registered in framework:
connectors/config.pymapsservice_type: "crawl4ai"to your class and adds it to the registry. - Dependency added:
requirements/framework.txtincludescrawl4ai==<latest>
By now, your generated code should look roughly like this.
Connect to Elasticsearch
Once your connector code is generated, connect it to your Elastic Cloud instance using a config.yml:
You can get the connector_id by clicking “Create new connector” in Elastic and selecting “Customized connector” type:
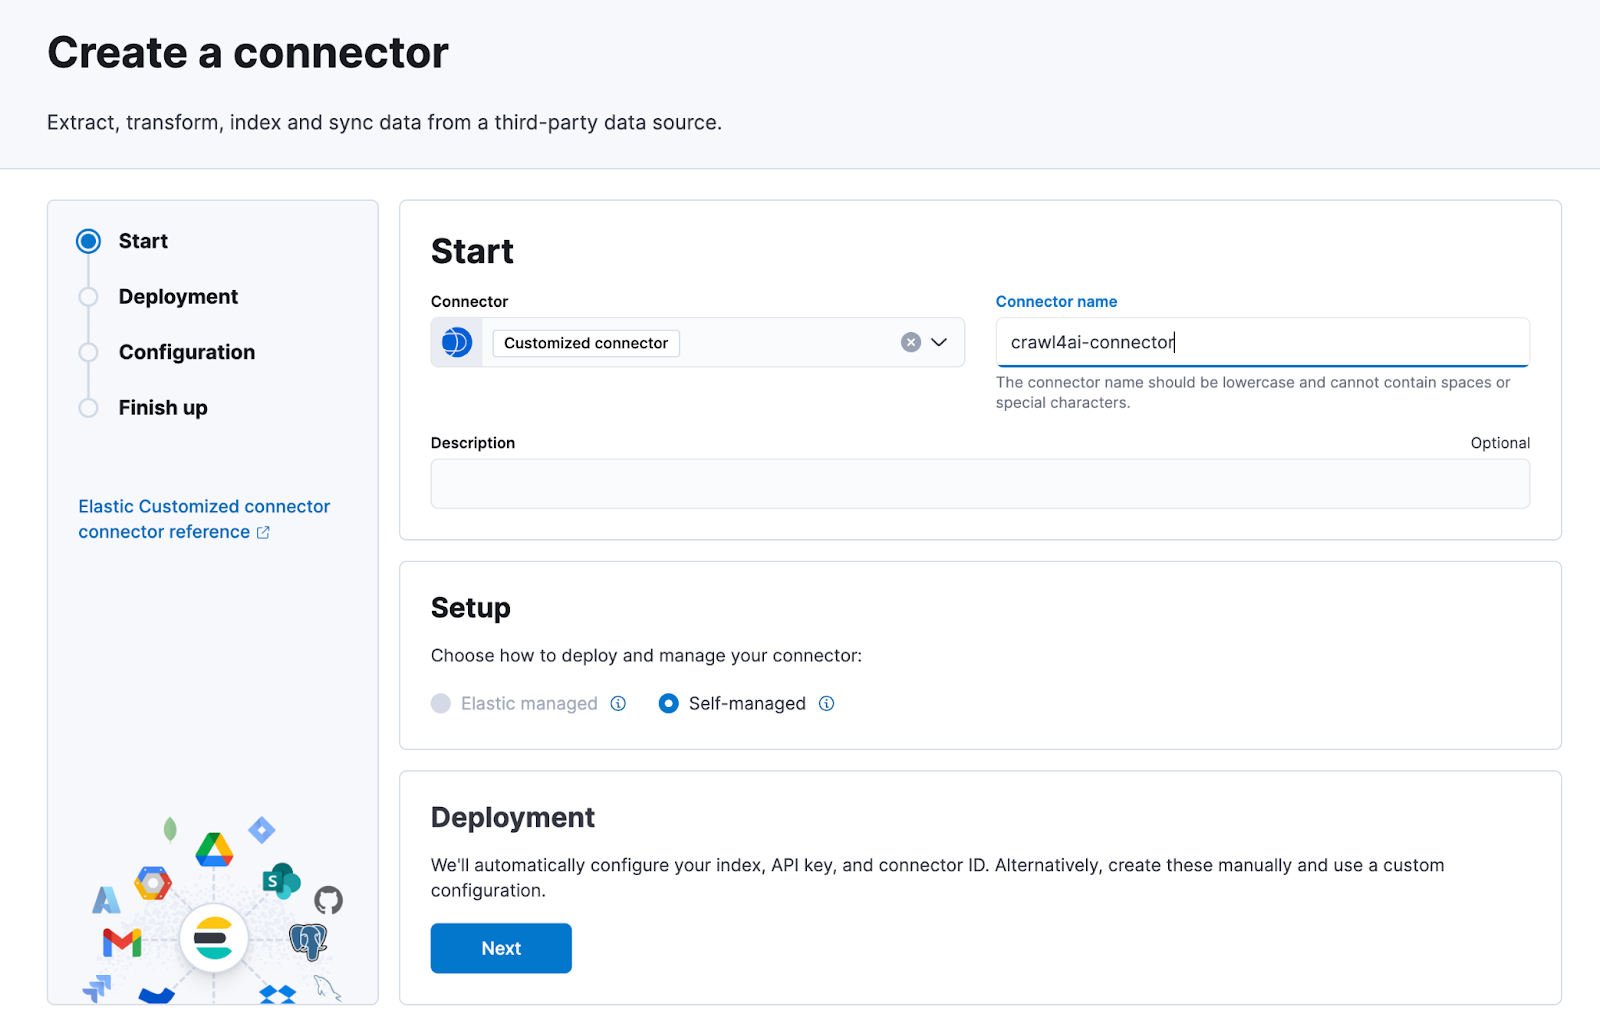
connectors:
  - connector_id: DT7OUJgB8cYukRa7-wpW
    service_type: crawl4ai
elasticsearch:
  host: https://......elastic.cloud:443
  api_key: ... (generate api key in home page)
Run the connector
Once config.yml is ready, run the Connector Framework:
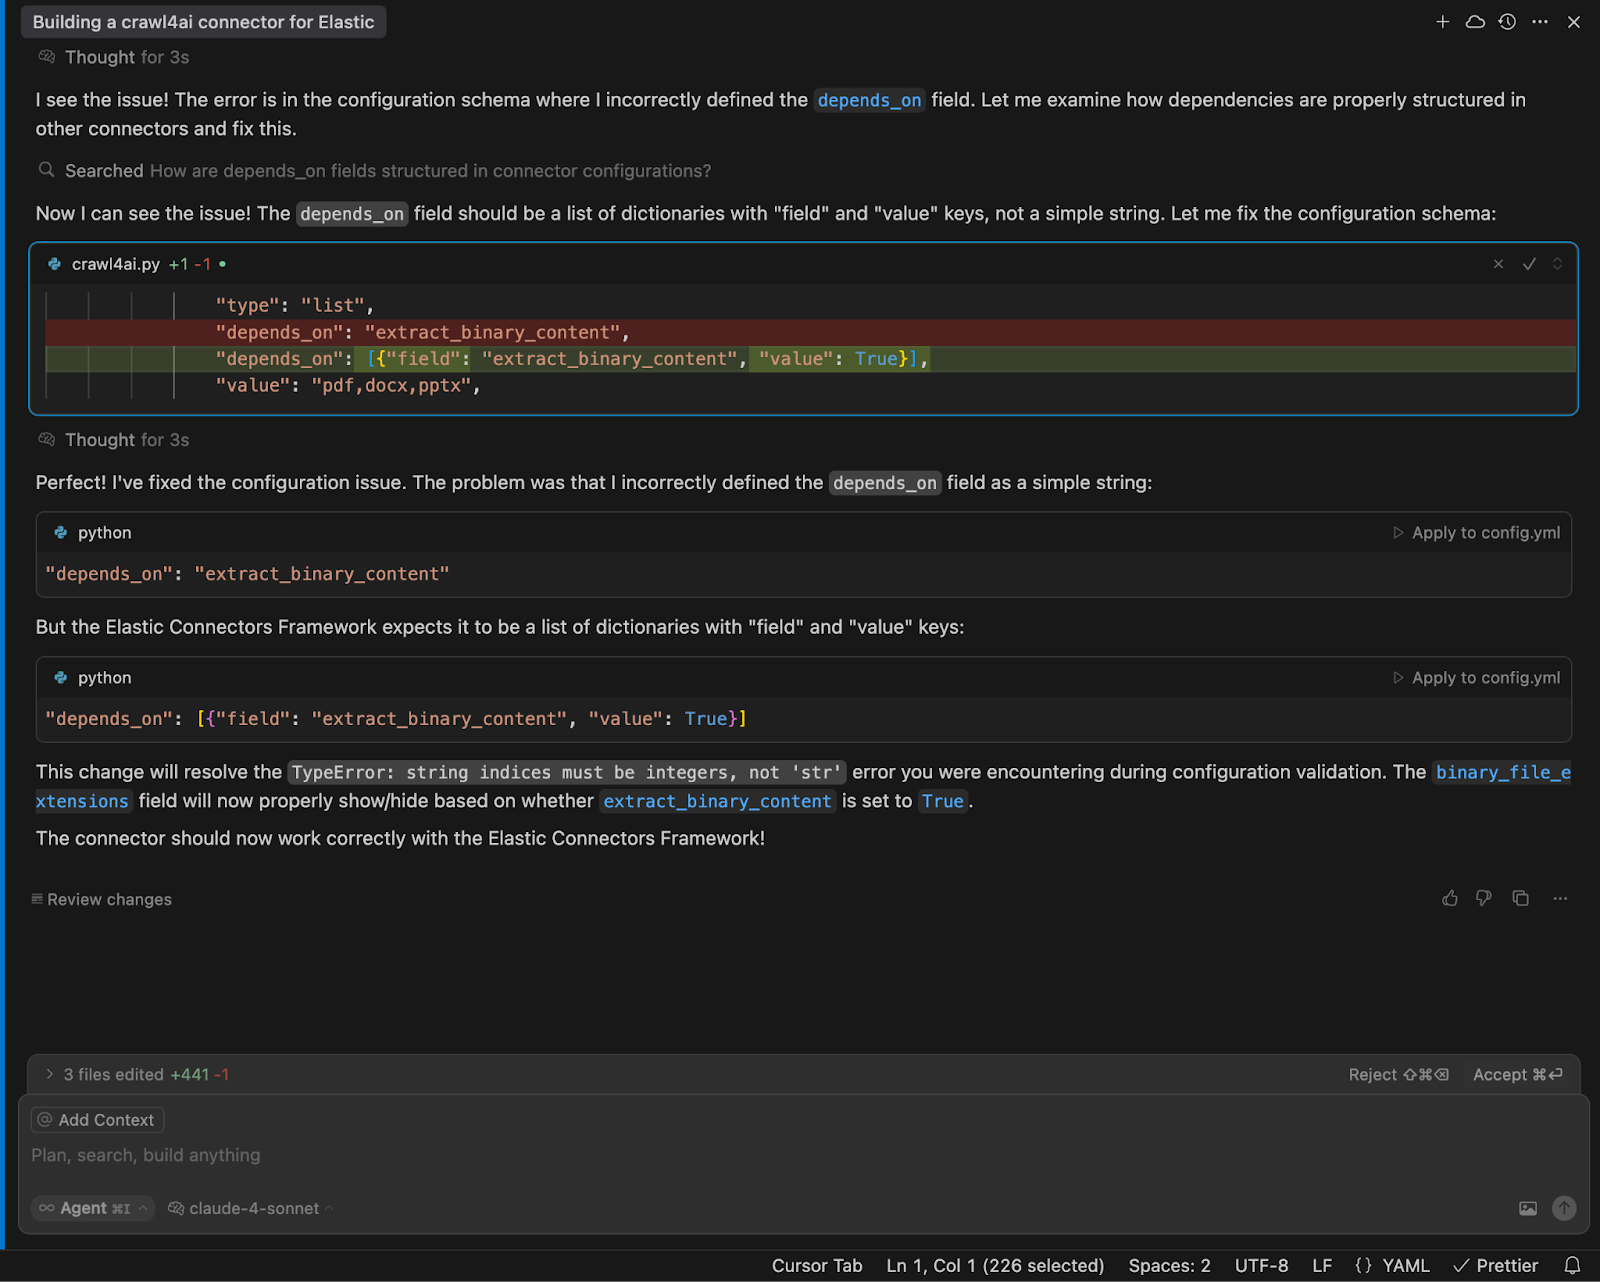
make runLet the LLM fix any issues
If you run into an error like I did in this example, just copy and paste it into Cursor, and the LLM will help you fix it.
In my case, the original prompt wasn’t clear enough about how the depends_on field works in the connector configuration. LLMs were able to look up how this property is used in other connectors to figure out the right definition.
Configure and start syncing data
In our case, we crawled Elasticsearch Labs blogs into our index. Once your connector is configured, attach it to your index and start syncing.
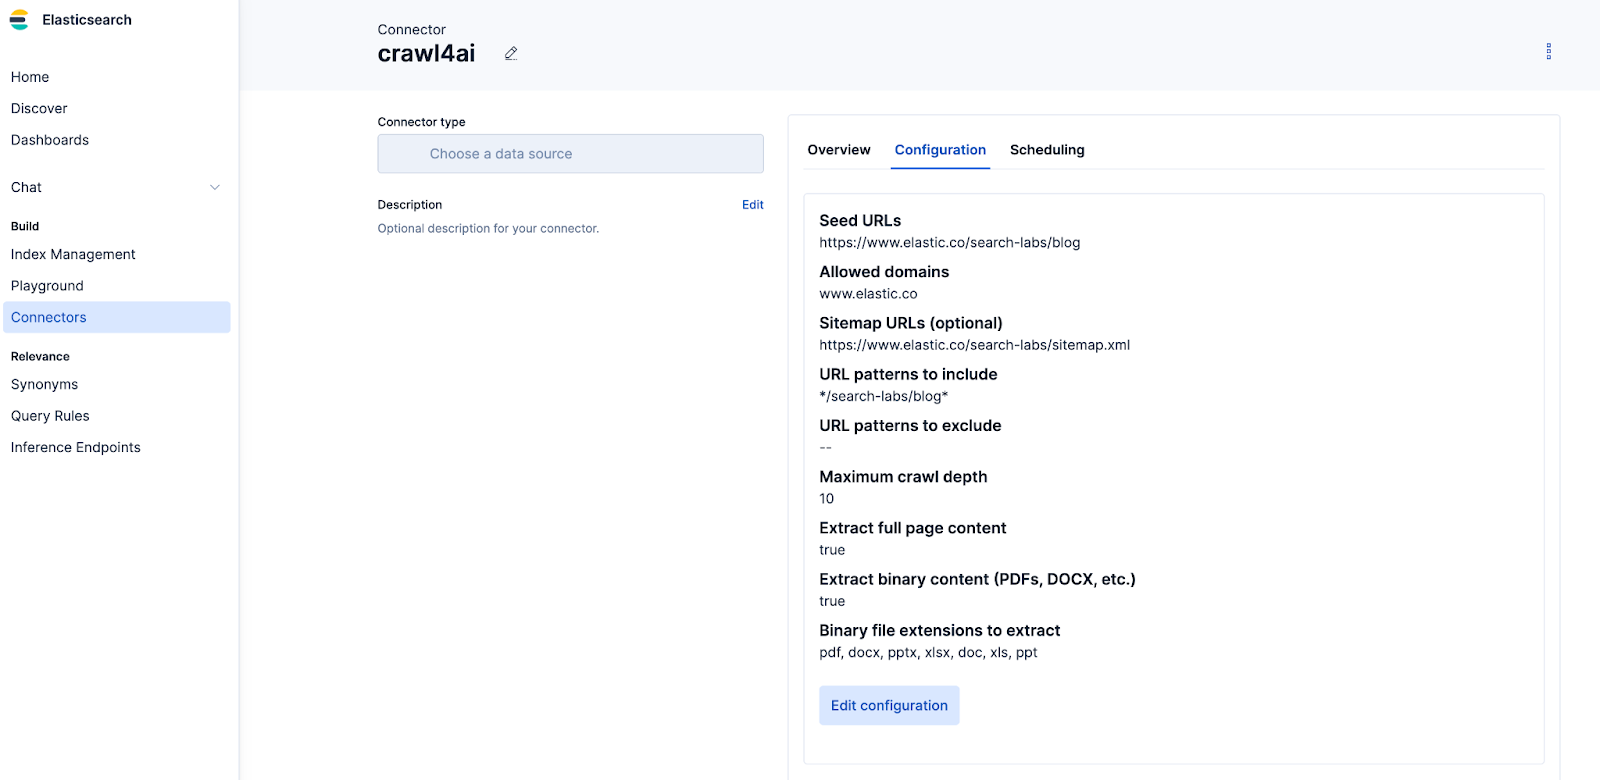
If everything’s wired up correctly, your connector will begin ingesting data. If you encounter issues, paste the errors into Cursor and re-run the framework after fixes.
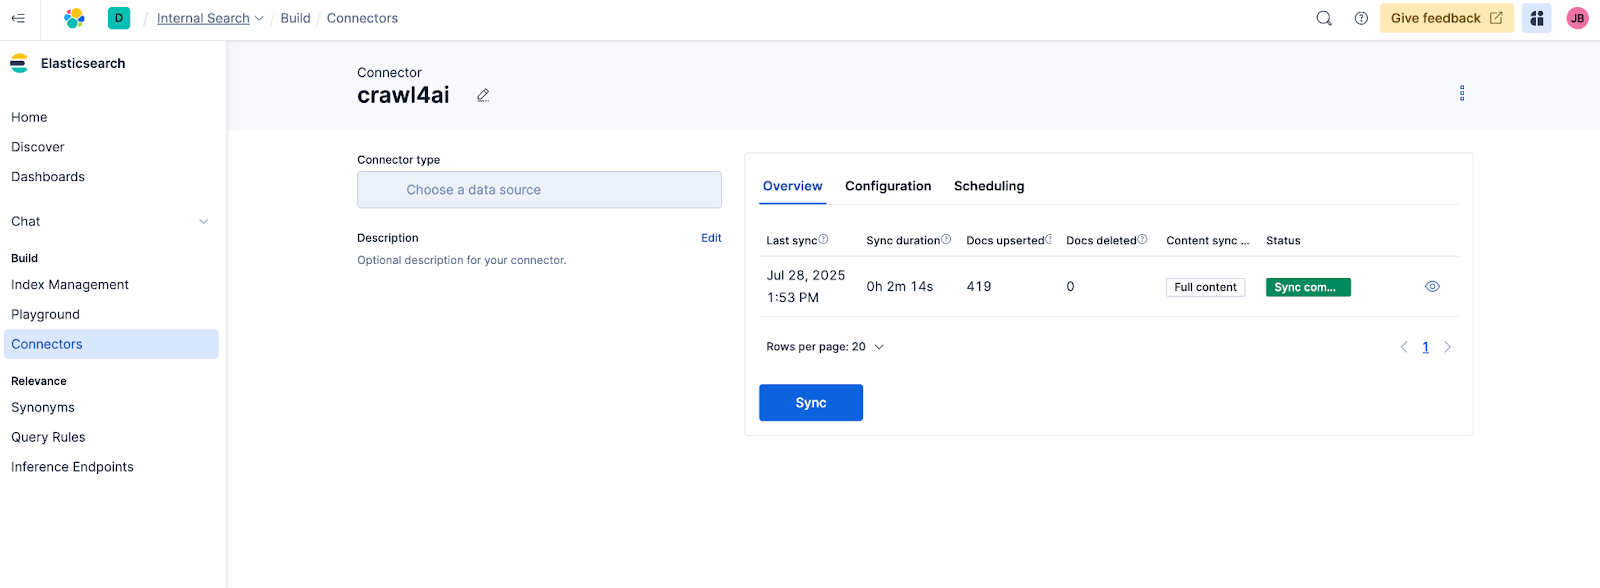
🎉 Success! Our connector crawled and synced 419 blog posts from Elasticsearch Labs.
Tests and documentation
Once the code is functional, you can begin adding unit tests, end-to-end tests, and documentation.
Support semantic search
To enhance search with semantic capabilities, use ELSER embeddings for e.g. content and title:
PUT crawler-search-labs/_mapping
{
  "properties": {
    "content": {
        "type": "text",
        "fields": {
          "keyword": {
            "type": "keyword",
            "ignore_above": 256
          }
        },
        "copy_to": [
          "semantic_text"
        ]
    },
    "title": {
      "type": "text",
      "fields": {
        "keyword": {
          "type": "keyword",
          "ignore_above": 256
        }
      },
      "copy_to": [
        "semantic_text"
      ]
    },
    "semantic_text": {
        "type": "semantic_text"
    }
  }
}
This enables semantic search over your content, which is especially useful for building conversational or question-answering experiences. It's the same process you'd follow to generate embeddings from data ingested using Elastic's Open Crawler.
Here is an example of an ES|QL natural language query:
FROM crawler-search-labs METADATA _score | WHERE semantic_text : "how semantic_text works in ES" | SORT _score DESC | LIMIT 5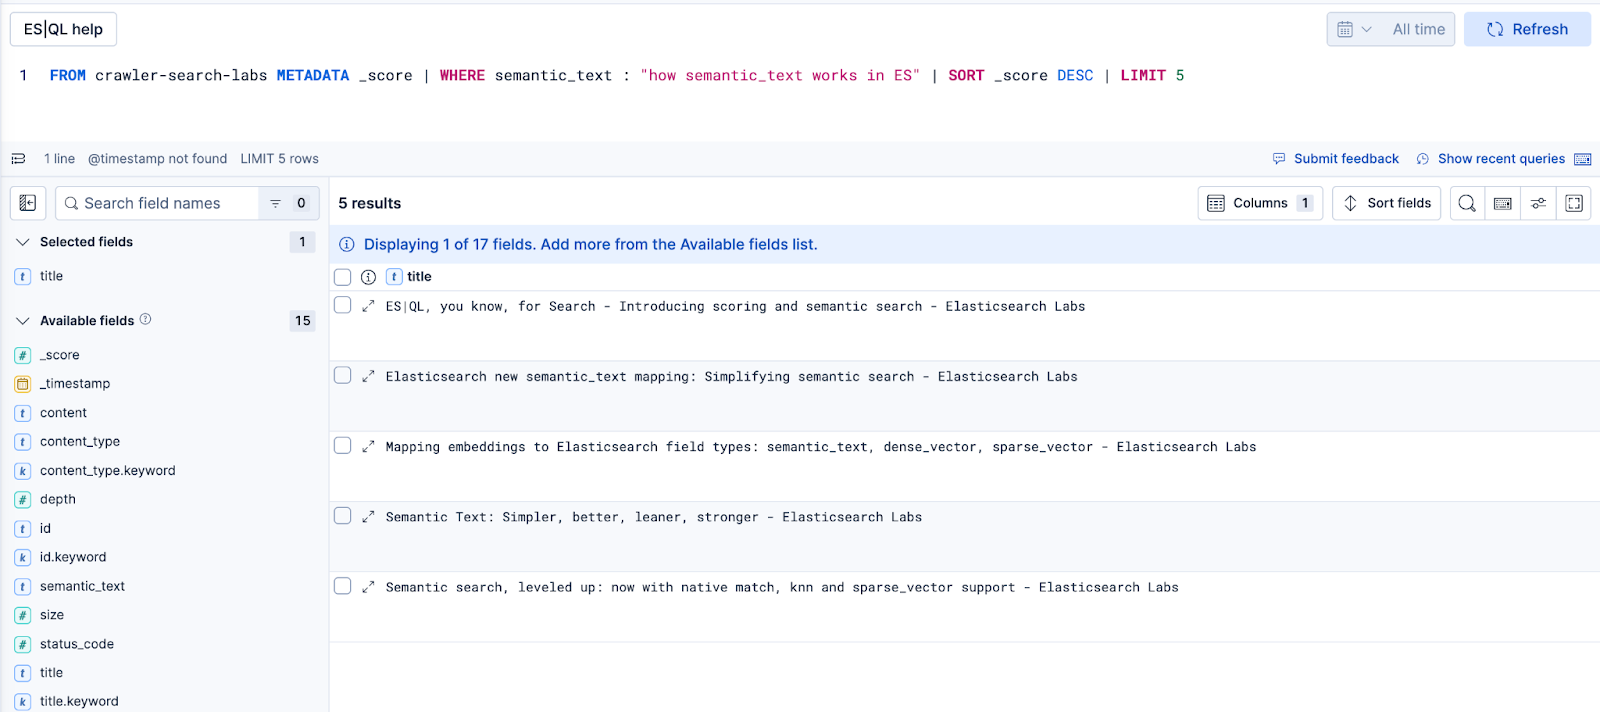
Working implementation
The result of my vibecoding session is here:
If you just want to use the crawl4ai connector without diving into the codegen part, feel free to use the source code linked above.
Why wrap Crawl4AI in an Elastic connector?
Using an Elastic connector to run Crawl4Ai keeps regular crawls simple and integrates cleanly with Elasticsearch. The Connector Framework takes care of ingestion, handles ingestion backpressure when needed, and keeps the index in sync as deleted pages are removed automatically. You also get a Kibana UI to configure connectors, monitor sync jobs, and set scheduling, without having to build that yourself.
Conclusions
This guide helped us generate a working connector that syncs semantically searchable data. We followed three main steps:
- Prompt the LLM effectively: give it context, requirements, and structure so it generates production-ready code.
- Test and validate the connector: run it, fix issues quickly with AI help, and wire it into the Elastic Connector Framework.
- Enhance with semantic search: add embeddings so your data powers richer, more conversational experiences.
As you can see, with AI-assisted tooling and Elastic’s Connector Framework, building a custom connector can go from days to minutes. A well-structured prompt enables the LLM to generate a working implementation quickly, so you can focus on figuring out your product value, not writing the boilerplate code.
Now that you’ve seen the flow, what will you connect next? 🚀
Ready to try this out on your own? Start a free trial.
Want to get Elastic certified? Find out when the next Elasticsearch Engineer training is running!
Related content

October 28, 2025
Context engineering using Mistral Chat completions in Elasticsearch
Learn how to utilize context engineering with Mistral Chat completions in Elasticsearch to ground LLM responses in domain-specific knowledge for accurate outputs.
October 27, 2025
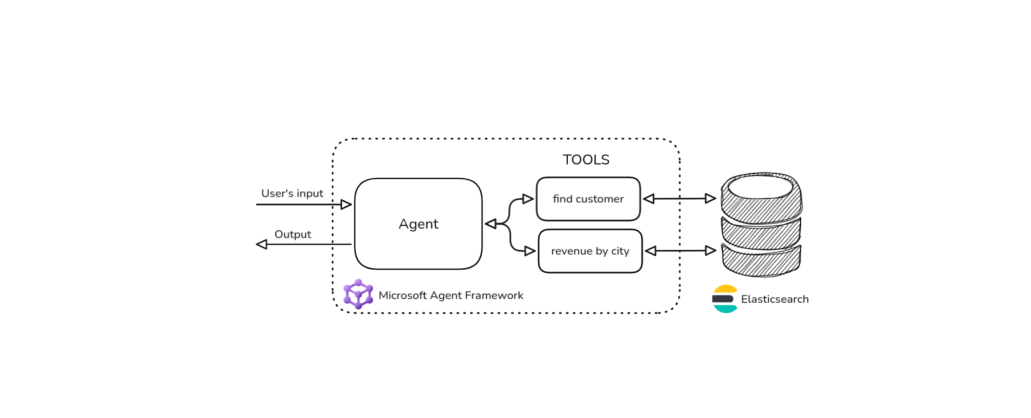
Building agentic applications with Elasticsearch and Microsoft’s Agent Framework
Learn how to use Microsoft Agent Framework with Elasticsearch to build an agentic application that extracts ecommerce data from Elasticsearch client libraries using ES|QL.
October 21, 2025
Introducing Elastic’s Agent Builder
Introducing Elastic Agent Builder, a framework to easily build reliable, context-driven AI agents in Elasticsearch with your data.

October 20, 2025
Elastic MCP server: Expose Agent Builder tools to any AI agent
Discover how to use the built-in Elastic MCP server in Agent Builder to securely extend any AI agent with access to your private data and custom tools.
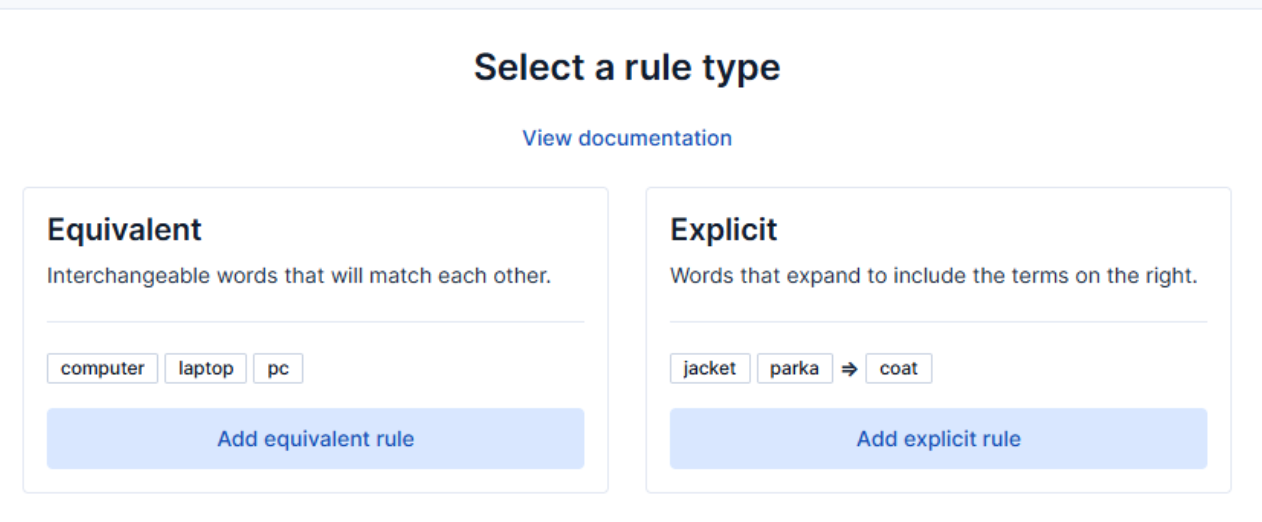
How to use the Synonyms UI to upload and manage Elasticsearch synonyms
Learn how to use the Synonyms UI in Kibana to create synonym sets and assign them to indices.