In this article, we'll cover the following topics:
- Using the Elastic Web Crawler to crawl job listings and index them to Elastic Cloud. Shoutout to my colleague Jeff Vestal for showing me how!
- Processing job listings with GPT-4o using the Elastic Azure OpenAI Inference Endpoint as part of an ingest pipeline.
- Embedding resumes and processing outputs with the
semantic_textworkflow. - Performing a double-layered hybrid search to find the most suitable jobs based on your resume.
Theoretical use case: Using LLMs and semantic_text to match resumes to jobs
Here's an idea for a use-case. Say I'm a HR department at a company like Elastic, and I've got a few job openings and a talent pool of resumes. I might want to make my job easier by automatically matching resumes in my talent pool to my available openings. I implemented this using the Elastic Platform, and put my old resume into it.
These are the job openings apparently most relevant to my resume:
Top 3 Jobs for Han

Job Title:
Principal Technical Marketing Engineer, Search

Description:
Drive technical go-to-market strategies for Elasticsearch
and generative AI, create and maintain demo environments, develop
content and training for field teams, influence product roadmaps, and
represent Elastic at industry events.
--------------------------
Job Title:
Search - Search Inference - Software Engineer II

Description:
As a Software Engineer II on the Search Inference team
at Elastic, you will develop and enhance search workflows by integrating
performant, scalable, and cost-efficient machine learning model inference
into Elasticsearch and Kibana, collaborating in a remote-first,
cross-functional team environment.
--------------------------
Job Title:
Search - Extract and Transform - Software Engineer II

Description:
As a Software Engineer II on the Search Extract and Transform team,
you will enhance search components, collaborate on scalable and
secure solutions, and optimize performance indicators while
contributing to Elasticsearch, Kibana, and other connectors.
--------------------------
You know what, they're unexpectedly good picks. The first pick sounds very similar to what I've been doing for the past couple of months (it's actually a little eerie), and the second and third choices probably derive from my resume being stuffed with search and ML usecases.
Let's dive into how this was done!
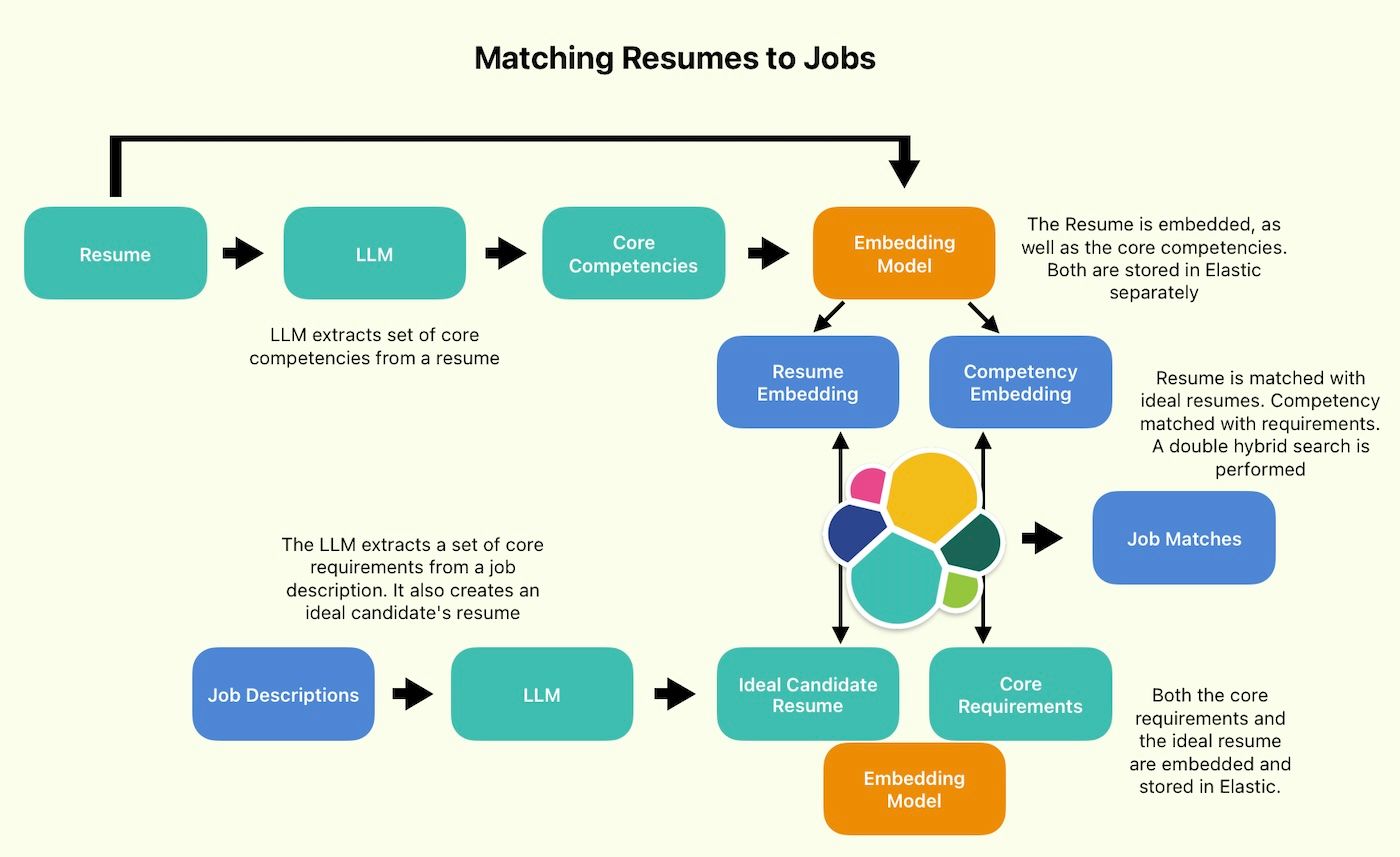
The double hybrid search implemented in this article. Resumes and job descriptions are turned into two types of data using LLMs - A set of core competencies and requirements respectively, which are matched. Simultaneously, resumes are matched with ideal candidate resumes.
Prequisites
You will need an Elastic Cloud deployment and an Azure OpenAI deployment to follow along with this notebook. For more details, refer to this readme. If you are following along on your personal computer, ensure that docker desktop is installed before proceeding!
Here's what you might see upon a successful install, if you are on a Linux system:
View build details: docker-desktop://dashboard/build/desktop-linux/desktop-linux/icqfo62fhdfinlgz3swcrd8p8

What's Next?
  1. Sign in to your Docker account → docker login
  2. View a summary of image vulnerabilities and recommendations → docker scout quickview
2db5e5e71b10f1cd772864c039661dfb4eadb3d116b0e95145c918b52e900a90
Scraping Elastic's job listings using Elastic crawler
The first thing to do is install the Elastic crawler. Create a new project folder, cd into it, and run the following commands to clone the repo, build the docker image, and run it.
git clone https://github.com/elastic/crawler.git
cd crawler
docker build -t crawler-image . && docker run -i -d --name crawler crawler-image
Once that's done, go to crawler/config/ and create a new file called: elastic-job.yml. Paste in the following snippet, and fill in your Elastic Cloud endpoint and API key. Change the output_index setting if you like. That's the index where the crawled web content will be stored. I've set it to elastic-job.
domains:
  - url: https://jobs.elastic.co
    seed_urls:
      - https://jobs.elastic.co/jobs/department/customer-success-group
      - https://jobs.elastic.co/jobs/department/engineering
      - https://jobs.elastic.co/jobs/department/finance-it-operations
      - https://jobs.elastic.co/jobs/department/human-resources
      - https://jobs.elastic.co/jobs/department/legal
      - https://jobs.elastic.co/jobs/department/marketing
      - https://jobs.elastic.co/jobs/department/sales-field-operations
    crawl_rules:
      - policy: allow
        type: begins
        pattern: /jobs/
output_sink: elasticsearch
output_index: elastic-job
max_crawl_depth: 2
elasticsearch:
  host: <YOUR ELASTIC CLOUD ENDPOINT>
  port: "9243"
  api_key: <YOUR ELASTIC CLOUD API KEY>
  bulk_api:
    max_items: 5
Now copy elastic-job.yml into your docker container.
cd crawler
docker cp config/elastic-job.yml crawler:/app/config/elastic-job-finder.yml
Validate the domain (The target for our webscrape):
docker exec -it crawler bin/crawler validate config/elastic-job.ymlYou should get back this message:
Domain https://jobs.elastic.co is validWith that, we are good to go. Start the crawl!
docker exec -it crawler bin/crawler crawl config/elastic-job.ymlIf all goes well, you should see 104 job descriptions in your elastic-job index on Kibana. Nice!
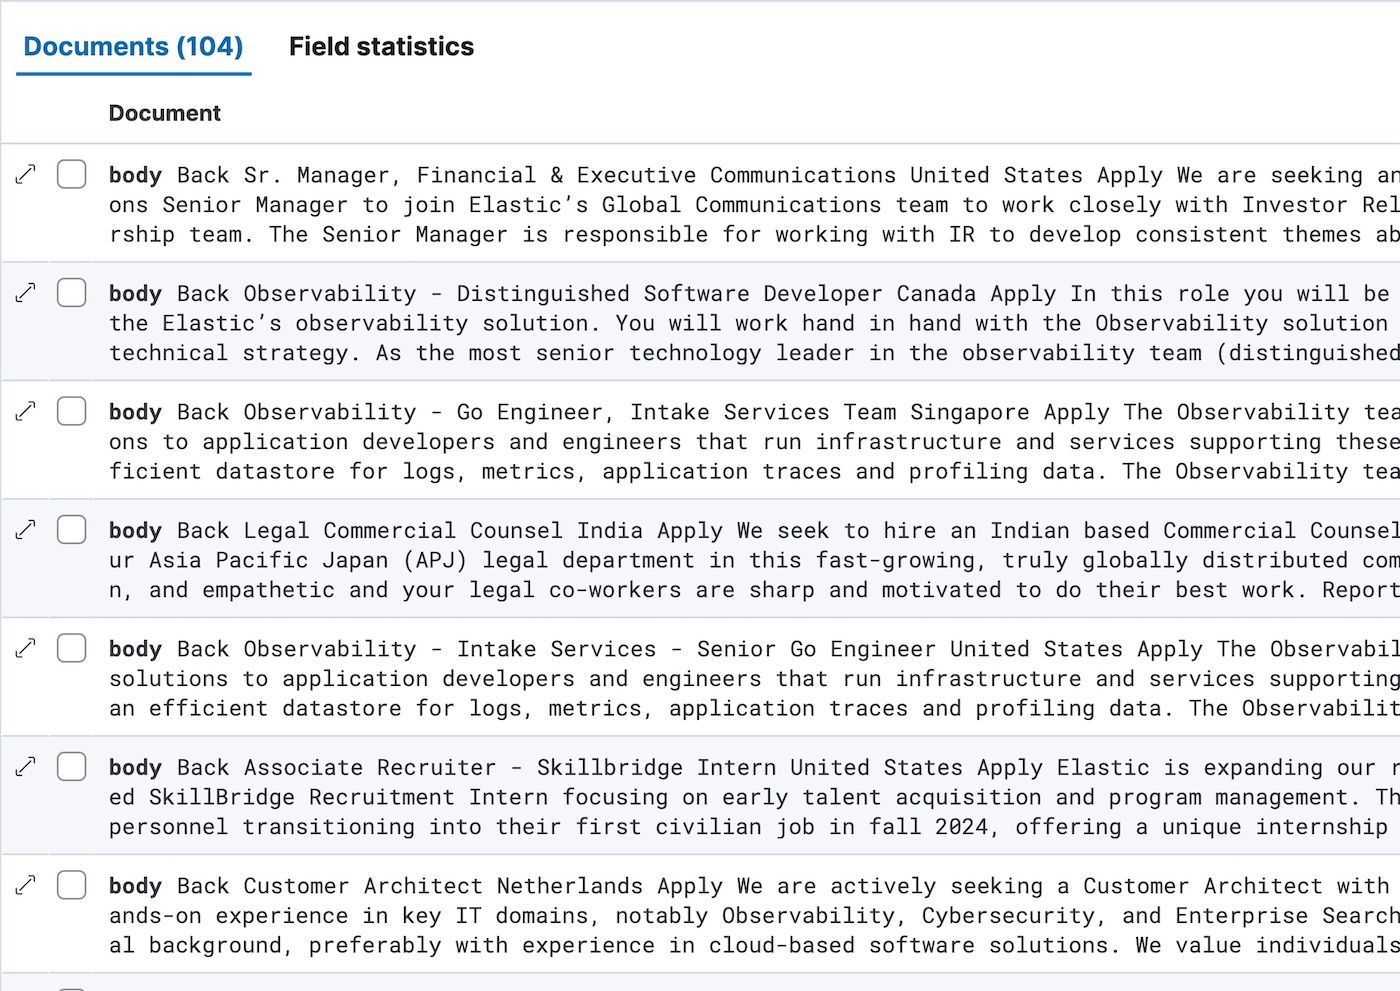
Elastic job openings as of 09/13/24, scraped content from https://jobs.elastic.co
Processing the job openings
Now that we have the job openings indexed, it's time to process them into a more useful form. Open up your Kibana Console, and create an inference endpoint for your Azure OpenAI LLM.
PUT _inference/completion/azure_openai_gpt4o_completion
{
    "service": "azureopenai",
    "service_settings": {
        "api_key": <YOUR AZURE OPENAI API KEY>,
        "resource_name": <YOUR AZURE OPENAI RESOURCE NAME>,
        "deployment_id": <YOUR AZURE OPENAI DEPLOYMENT ID>,
        "api_version": "2024-06-01"
    }
}
We can make use of this inference endpoint to create an ingestion pipeline containing LLM processing steps. Let's define that pipeline now:
PUT _ingest/pipeline/llm_gpt4o_job_processing
{
  "processors": [
    {
      "script": {
        "source": """
        ctx.requirements_prompt = 'Extract all key requirements from the job description as a list of bulleted points. Do not return notes or commentary. Do not return any text that is not a key requirement. Be as complete and comprehensive as possible: ' + ctx.body
        """
      }
    },
    {
      "inference": {
        "model_id": "azure_openai_gpt4o_completion",
        "input_output": {
          "input_field": "requirements_prompt",
          "output_field": "requirements"
        }
      }
    },
    {
      "remove": {
        "field": "requirements_prompt"
      }
    },
    {
      "script": {
        "source": """
        ctx.ideal_resume_prompt = 'Write the resume of the ideal candidate for this job role. Be concise and avoid fluff. Focus on skills and work experiences that closely align with what the job description is asking for: ' + ctx.body
        """
      }
    },
    {
      "inference": {
        "model_id": "azure_openai_gpt4o_completion",
        "input_output": {
          "input_field": "ideal_resume_prompt",
          "output_field": "ideal_resume"
        }
      }
    },
    {
      "remove": {
        "field": "ideal_resume_prompt"
      }
    },
    {
      "script": {
        "source": """
        ctx.descriptor_prompt = 'Describe the job role in no more than 1 sentence. Be concise and efficient, focusing on maximum information density: ' + ctx.body
        """
      }
    },
    {
      "inference": {
        "model_id": "azure_openai_gpt4o_completion",
        "input_output": {
          "input_field": "descriptor_prompt",
          "output_field": "descriptor"
        }
      }
    },
    {
      "remove": {
        "field": "descriptor_prompt"
      }
    }
  ]
}
We're using the LLM to create three new fields for our data.
- Requirements: This is a textual description of the core competencies and requirements for the job role in question. We're going to chunk and embed this. Later, the resume we pass as input will be processed into a set of core competencies. These core competencies will be matched with this field.
- Ideal Resume: This is the resume of a hypothetical "ideal candidate" for the position. We're also going to chunk and embed this. The resume we pass in will be matched with this Ideal Resume.
- Descriptor: This is a one sentence description of the job role and what it entails. This will allow us to quickly interpet the search results later on.
Each LLM processing step has three parts:
- A
scriptprocessor which will build the prompt using the job description, which is stored in thebodyfield. The prompt will be stored in its own field. - An
inferenceprocessor which will run the LLM over the prompt, and store the output in another field. - A
remove processor, which will delete the prompt field once LLM inference has concluded.
Once we define our processor, we'll need an embedding model. Navigate to Analytics -> Machine Learning -> Trained Models and deploy elser_model_2_linux-x86_64 by clicking the triangular Deploy button.
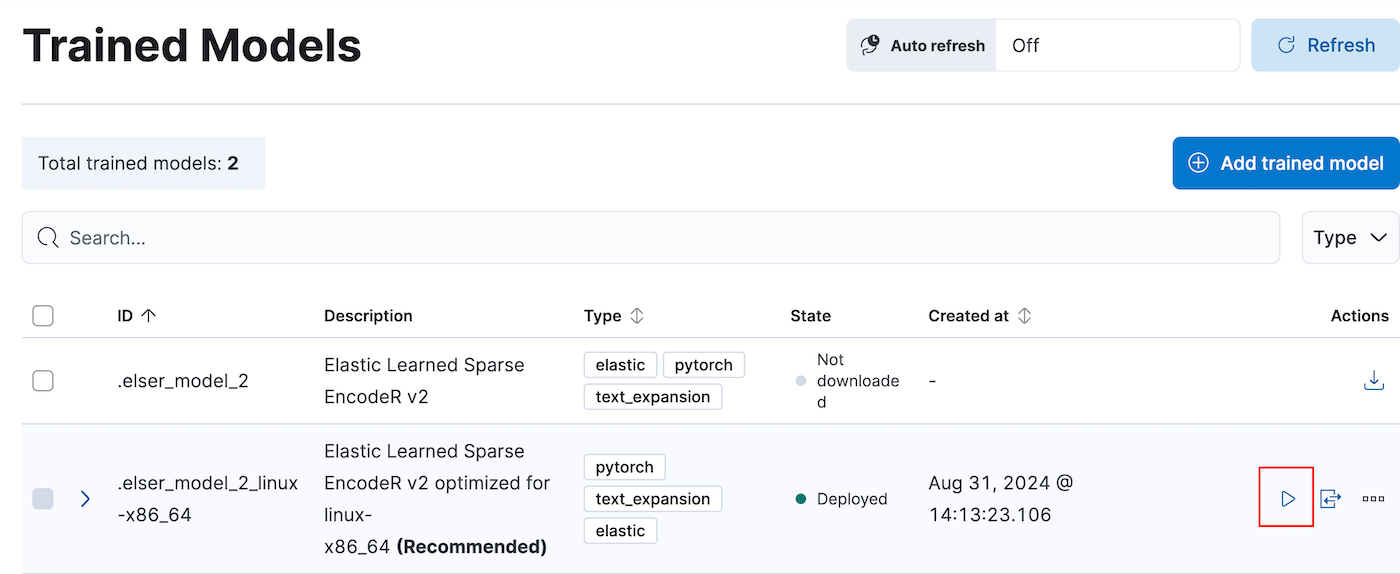
Deploy Elser by clicking the triangle button. This will use ML nodes so ensure your Elastic Cloud deployment allows autoscaling of ML nodes.
Once the model is deployed, run the following command to create an inference endpoint called elser_v2:
PUT _inference/sparse_embedding/elser_v2
{
  "service": "elser",
  "service_settings": {
    "num_allocations": 1,
    "num_threads": 4
  }
}
With our embedding model deployed, let's define a new index called elastic-job-requirements-semantic. We're going to chunk and embed the requirements and ideal_resume fields, so set them to semantic_text and set inference_id to elser_v2.
PUT elastic-job-requirements-semantic
{
  "mappings": {
    "properties": {
      "requirements": {
        "type": "semantic_text",
        "inference_id": "elser_v2"
      },
      "ideal_resume": {
        "type": "semantic_text",
        "inference_id": "elser_v2"
      }
    }
  }
}
Once the setup is done, let's run a reindex operation to processs our job descriptions and index the results in elastic-job-requirements-semantic. By setting size to 4, we ensure that processing will be done on batches of 4 documents at a time, which gives us some security in the event that the LLM API fails for whatever reason:
POST _reindex?slices=auto&wait_for_completion=false
{
  "source": {
    "index": "elastic-jobs",
    "size": 4
  },
  "dest": {
    "index": "elastic-job-requirements-semantic",
    "pipeline": "llm_gpt4o_job_processing"
  }
}
Execute the reindex, and watch as the processed docs fill up the elastic-job-requirements-semantic index!
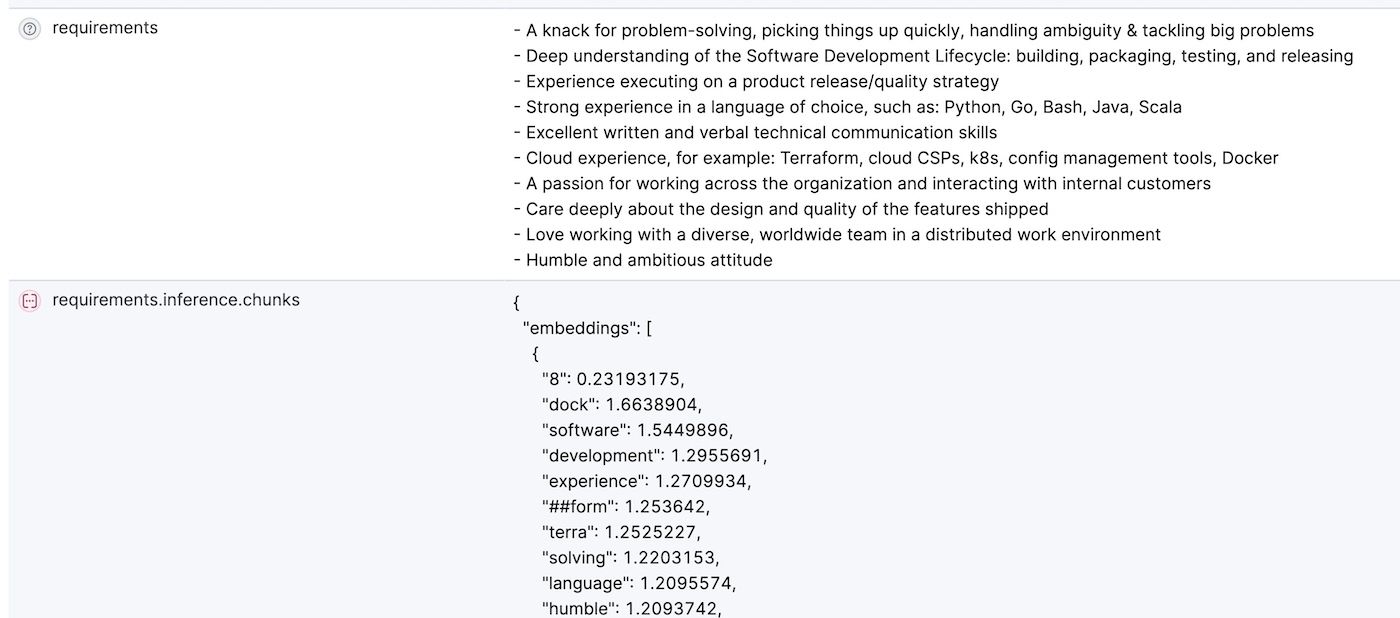
The new requirements field and its chunked embeddings in the elastic-job-requirements-semantic index.
The console will give you a task_id, which you can use to check the status of the reindexing with this command:
GET _tasks/EUgmrdCKS2aAVZC-Km_mVg:26927998Once the job is done, we can proceed to the final step!
Setting up resume search
For this step, we'll move to a python environment. In your project directory, create a .env file and fill it in with these values:
ELASTIC_ENDPOINT=<YOUR ELASTIC ENDPOINT>
ELASTIC_API_KEY=<YOUR ELASTIC API KEY>
ELASTIC_INDEX_NAME=<YOUR ELASTIC INDEX NAME>
AZURE_OPENAI_KEY_1=<AZURE OPEN AI API KEY>
AZURE_OPENAI_KEY_2=<AZURE OPEN AI API KEY>
AZURE_OPENAI_REGION=<AZURE OPEN AI API REGION>
AZURE_OPENAI_ENDPOINT=<AZURE OPEN AI API ENDPOINT>
Now add your resume to the directory. A .pdf file works best. I'm going to refrain from posting my resume here because I am shy.
Run the following command to install dependencies (Elasticsearch and OpenAI):
pip install elasticsearch==8.14.0 openai==1.35.13 llama-index==0.10.55And create a python script with two classes: LlamaIndexProcessor calls the SimpleDirectoryReader to load local documents, and the AzureOpenAIClient provides a convenient way to call gpt-4o.
import traceback
import uuid
import os
from elasticsearch import Elasticsearch, helpers
from openai import AzureOpenAI
from dotenv import load_dotenv
from llama_index.core import SimpleDirectoryReader
import pickle
load_dotenv()
'''
Load a pdf documnent using LlamaIndex's SimpleDirectoryReader
'''
class LlamaIndexProcessor:
    def __init__(self):
        pass

    def load_documents(self, directory_path):
        '''
        Load all documents in directory
        '''
        reader = SimpleDirectoryReader(input_dir=directory_path)
        return reader.load_data()
    def load_document(self, filepath):
        return SimpleDirectoryReader(input_files=[filepath]).load_data()

'''
Azure OpenAI LLM Class
'''
class AzureOpenAIClient:
    def __init__(self):
        self.client = AzureOpenAI(
            api_key=os.environ.get("AZURE_OPENAI_KEY_1"),
            api_version="2024-06-01",
            azure_endpoint=os.environ.get("AZURE_OPENAI_ENDPOINT")
        )
    def generate(self, prompt, model="gpt-4o", system_prompt=""):
        response = self.client.chat.completions.create(
            model=model,
            messages=[
                {"role": "system", "content": system_prompt},
                {"role": "user", "content": prompt}
            ],
            max_tokens=4096
        )
        return response.choices[0].message.content

LLM = AzureOpenAIClient()
llamaindex_processor=LlamaIndexProcessor()
Now it's time to search for jobs! Run this code to load your resume:
documents=llamaindex_processor.load_document('resume.pdf')
resume=documents[0].to_dict()['text']
Let's generate the core competencies of your resume with the following prompt:
competencies_prompt='''
Analyze the given resume and extract key skills, competencies, and qualifications. Generalize and categorize the information into broad, widely applicable terms. Present each item on a new line without numbering or bullets.

Avoid quoting directly from the resume. Instead, distill the information into generalized, transferable skills and competencies. Focus on:

General industry segments or fit
Technical skills and areas of expertise
Soft skills and interpersonal abilities
Professional competencies and responsibilities
Industry-specific knowledge
Educational background and qualifications
Types of relevant experience
Omit any explanatory text, categorization labels, or additional commentary. Each line should contain a single, distinct generalized skill or competency derived from the resume content.
'''

competencies=LLM.generate(resume, system_prompt=competencies_prompt)
For my resume, this was the block of competencies generated:
Machine learning engineering
Full-stack development
AI systems design and deployment
Team leadership
Productivity solutions
AI integration with developer tools
Real-time code analysis and generation
AI customer service solutions
...
...
Now, initialize the Python Elasticsearch client:
try:
    es_endpoint = os.environ.get("ELASTIC_ENDPOINT")
    es_client = Elasticsearch(
        es_endpoint,
        api_key=os.environ.get("ELASTIC_API_KEY")
    )
except Exception as e:
    es_client = None
And let's define a query!
Searching for a job using hybrid search
It's time to make use of a double hybrid search - I call it double because we're going to do two hybrid searches on separate fields each:
es_query={
  "retriever": {
    "rrf": {
      "rank_window_size":20,
      "retrievers": [
        {
          "standard": {
            "query": {
              "nested": {
                "path": "requirements.inference.chunks",
                "query": {
                  "sparse_vector": {
                    "inference_id": "elser_v2",
                    "field": "requirements.inference.chunks.embeddings",
                    "query": competencies
                  }
                },
                "inner_hits": {
                  "size": 2,
                  "name": "requirements.body",
                  "_source": [
                    "requirements.inference.chunks.text"
                  ]
                }
              }
            }
          }
        },
        {
          "standard": {
            "query": {
              "nested": {
                "path": "ideal_resume.inference.chunks",
                "query": {
                  "sparse_vector": {
                    "inference_id": "elser_v2",
                    "field": "ideal_resume.inference.chunks.embeddings",
                    "query": resume
                  }
                },
                "inner_hits": {
                  "size": 2,
                  "name": "ideal_resume.body",
                  "_source": [
                    "ideal_resume.inference.chunks.text"
                  ]
                }
              }
            }
          }
        }
      ]
    }
  },
  "size": 20
}
There are two rrf.retriever components. The first will embed the competencies and do a hybrid search over the requirements field. The second will embed the resume itself, and do hybrid search on the ideal_resume field. Run the search and let's see what we get!
search_results = es_client.search(index="elastic-job-requirements-semantic", body=es_query)

total_hits = search_results['hits']['total']['value']

for hit in search_results['hits']['hits']:
    print(f"Job Title: {hit['_source']['title']}")
    print(f"Description: {hit['_source']['descriptor']}")
    print('--------------------------')
The results were at the beginning of the post so replicating it here might be a bit odd.
And with that, we're done!
Ready to try this out on your own? Start a free trial.
Want to get Elastic certified? Find out when the next Elasticsearch Engineer training is running!
Related content
October 27, 2025
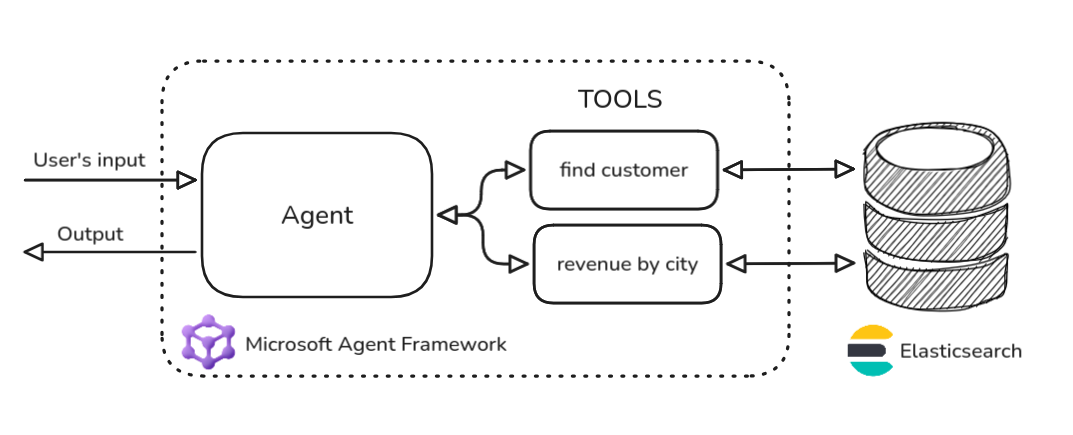
Building agentic applications with Elasticsearch and Microsoft’s Agent Framework
Learn how to use Microsoft Agent Framework with Elasticsearch to build an agentic application that extracts ecommerce data from Elasticsearch client libraries using ES|QL.
October 21, 2025
Introducing Elastic’s Agent Builder
Introducing Elastic Agent Builder, a framework to easily build reliable, context-driven AI agents in Elasticsearch with your data.

October 20, 2025
Elastic MCP server: Expose Agent Builder tools to any AI agent
Discover how to use the built-in Elastic MCP server in Agent Builder to securely extend any AI agent with access to your private data and custom tools.
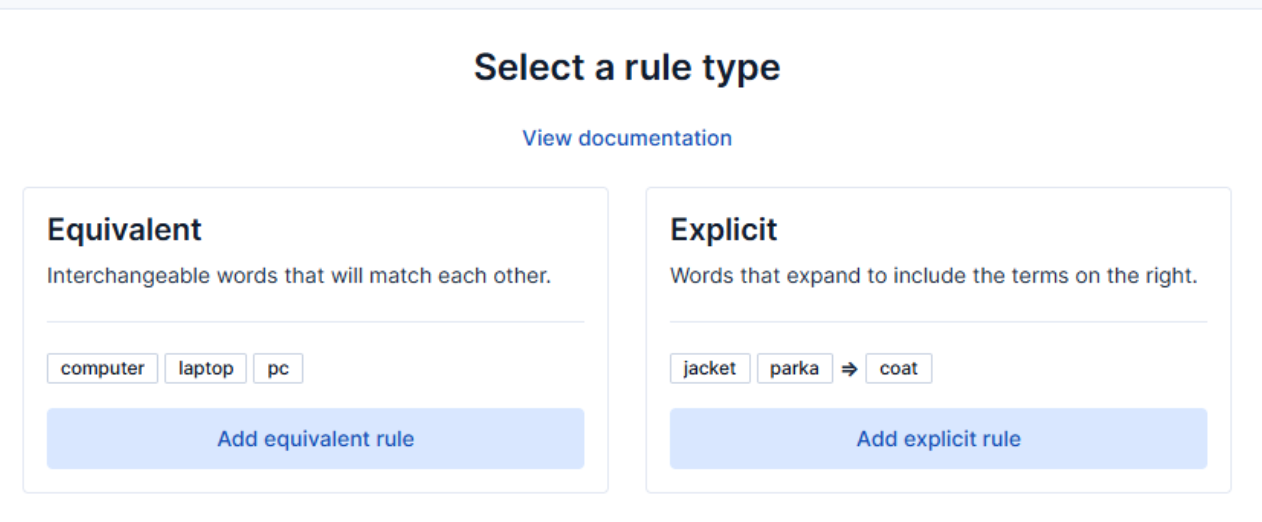
How to use the Synonyms UI to upload and manage Elasticsearch synonyms
Learn how to use the Synonyms UI in Kibana to create synonym sets and assign them to indices.

October 13, 2025
AI Agent evaluation: How Elastic tests agentic frameworks
Learn how we evaluate and test changes to an agentic system before releasing them to Elastic users to ensure accurate and verifiable results.