Have you ever tried to rename an index in Elasticsearch and realized there's simply no rename API endpoint? This happens to many people, because unlike a common file in the operating system, Elasticsearch indices are complex and distributed structures. Therefore, you cannot simply change the name directly. If you want to learn how to create, list, query, and delete indices, check out this guide.
In this blog, we will explain why this is the case, along with four practical ways to deal with this limitation, specifically:
- Aliases, which are the lightest option;
- The Clone API, which creates a quick copy of the index;
- Snapshot and restore for a complete backup-based copy;
- The Reindex API, which is the most powerful, but also the most resource-consuming.
Why doesn't Elasticsearch allow direct renaming of an index?
Elasticsearch organizes its data into indices, which in turn are formed by shards spread across several nodes in the cluster. Each shard is, basically, an independent instance of the Lucene engine, which physically stores the data.
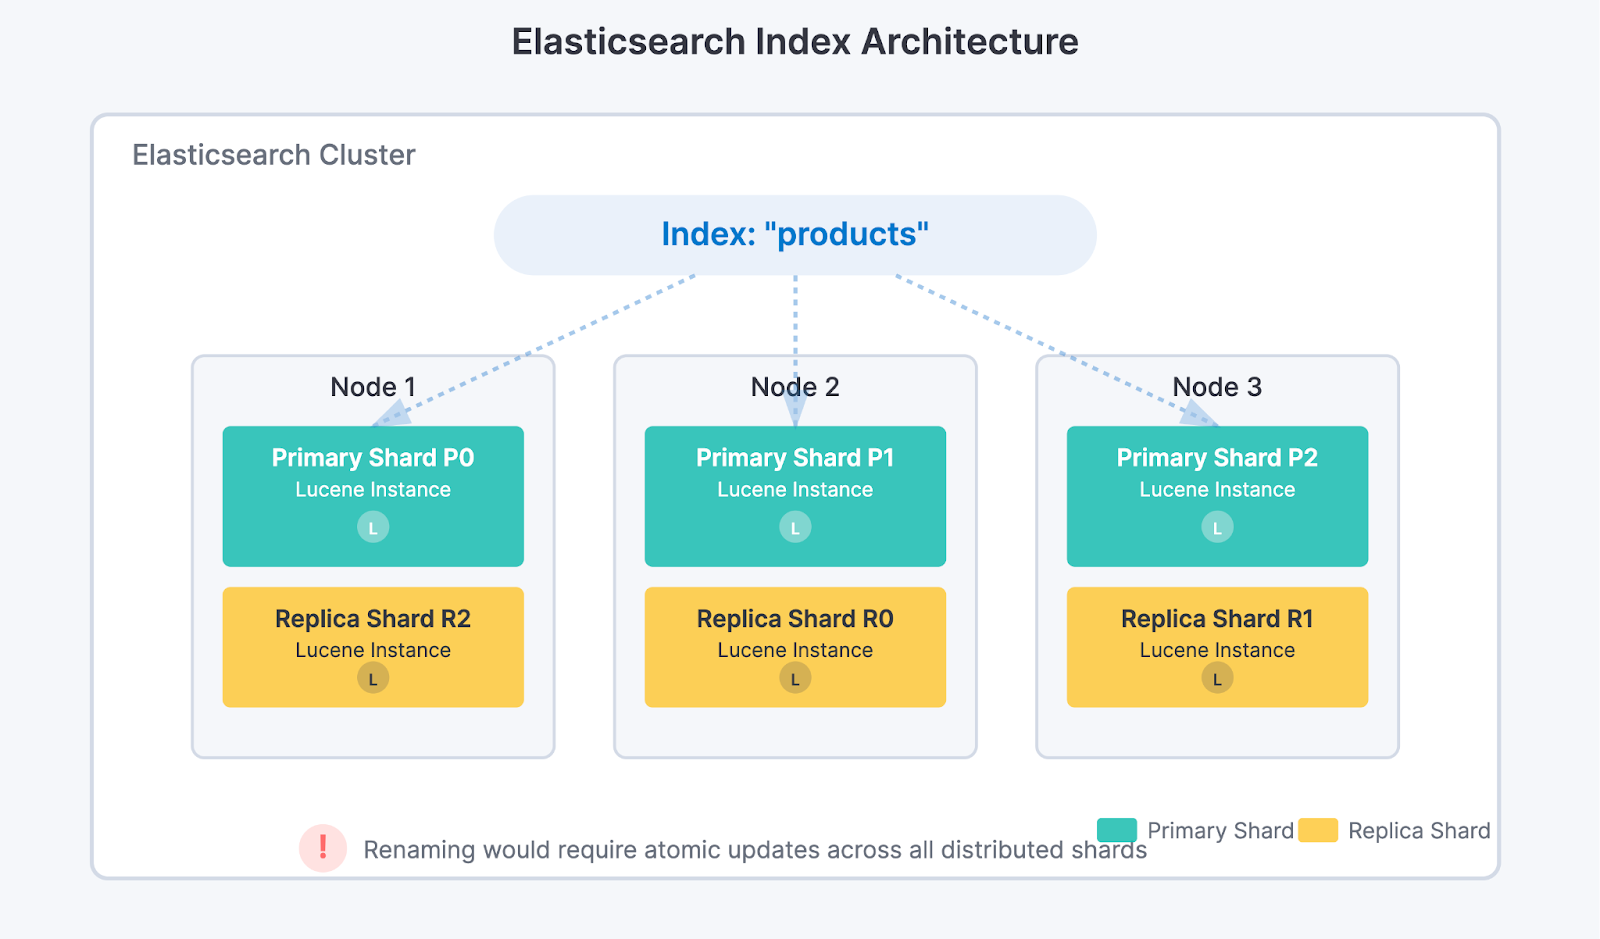
If it was possible to simply rename an index, the system would have to update the index name in all shards, on all nodes, in an absolutely atomic manner to avoid inconsistencies. This complexity and the risk of data corruption led the developers to choose not to create this functionality.
However, renaming an index may be necessary in many cases, such as changing field mappings or data types, aligning naming with new company standards, resolving conflicts in multi-tenant cluster environments, or updating names inherited from old systems.
Alias: the simplest and most flexible solution
When all we need is to make our applications access the index with another name, the best solution is to use aliases. Think of aliases as nicknames for our indices. They don't copy data, nor do they change anything on disk — they just update the metadata in the cluster so that the new name "points" to the real index. The change is practically instantaneous as it only updates cluster metadata and does not impact query performance, regardless of the index size.
For example, if we have an index called old_index and we want our applications to start using new_index, just add an alias like this:
POST /_aliases
{
  "actions": [
    {
      "add": {
        "index": "old_index",
        "alias": "new_index"
      }
    }
  ]
}
If your application writes data through the alias, you may need to specify the write index:
POST /_aliases
{
  "actions": [
    {
      "add": {
        "index": "new_index",
        "alias": "production_alias",
        "is_write_index": true
      }
    }
  ]
}
For more details about write index behavior and when it's required, see the Write index documentation.
This approach allows flexibility for our applications, facilitating smooth transitions and logical isolation, especially in microservices-based architectures, where each service may need different conventions to access data.
Clone API: fast copy, but with some limitations
If we cannot use an alias and need to have an index with a new name, the next step is to use the Clone API. This functionality creates a physical copy of the original index, but instead of duplicating the data, it reuses the data files through hard links in the file system. This makes the operation much faster than a full reindex.
Important: The Clone API has several limitations. It does not copy index metadata like aliases, ILM policies, or CCR settings. The target index must not exist, and both indices must have the same number of primary shards. For a complete list of requirements and limitations, see the Clone Index API documentation.
Before cloning, the original index needs to be in read-only mode and in a healthy green status to ensure data is not modified during the operation:
PUT /old_index/_settings
{
  "settings": {
    "index.blocks.write": true
  }
}
Then, just clone:
POST /old_index/_clone/new_indexFinally, if necessary, we unlock writes on the new index:
PUT /new_index/_settings
{
  "settings": {
    "index.blocks.write": false
  }
}
It is important to ensure sufficient disk space, even if the data is reused by hard links, because the new index needs to be independent.
Snapshot/Restore: backup-based renaming
If you need a complete, independent copy of your index, snapshot and restore offers an interesting alternative that can be faster than reindexing, especially for large indices. This method leverages Elasticsearch's backup functionality with the added ability to rename indices during the restore process.
This approach is particularly useful if you already maintain regular snapshots as part of your backup strategy. It's also ideal when dealing with large indices where reindexing would be too time-consuming, when moving data between clusters, or when you need a guaranteed point-in-time consistent copy of your data.
First, ensure you have a snapshot repository configured. If you don't have one, which is a prerequisite for this method, see the Snapshot repository documentation. Check your existing repositories with:
GET /_snapshotNext, create a snapshot of your index:
PUT /_snapshot/my_repository/rename_snapshot?wait_for_completion=true
{
  "indices": "old_index",
  "include_global_state": false
}Important: Just like with reindexing, ensure no writes are happening to the index during the snapshot process to guarantee consistency.
Finally, restore the snapshot with a new name using rename_pattern and rename_replacement:
POST /_snapshot/my_repository/rename_snapshot/_restore
{
  "indices": "old_index",
  "rename_pattern": "old_index",
  "rename_replacement": "new_index"
}
For more complex renaming patterns, you can use regular expressions:
POST /_snapshot/my_repository/rename_snapshot/_restore
{
  "indices": "logs-*",
  "rename_pattern": "logs-(.+)",
  "rename_replacement": "archived-logs-$1"
}
Reindex: the most powerful and flexible tool
The Reindex API is the solution we should use when we need to go beyond simple copying or renaming. It allows us to copy data from one index to another, but also to perform transformations, filters, structural changes, merging multiple indices, and other complex operations.
Optional safety step: The reindex operation itself does not modify or risk the original index in any way. However, if you plan to delete the original index after reindexing (as shown later in this article), you may want to create a backup first:
PUT /_snapshot/my_backup/snapshot_before_reindex?wait_for_completion=true
{
  "indices": "old_index"
}
For large indices, consider using wait_for_completion=false to avoid timeouts, then monitor the snapshot progress with GET /_snapshot/my_backup/snapshot_before_reindex/_status.
Next, we retrieve the original index's settings and mappings to correctly create the destination index:
GET /old_indexThis single command returns both settings and mappings together.
Now, we need to create the destination index with these settings. If you don't have an index template configured, it's essential to create the index manually before reindexing:
PUT /new_index
{
  "settings": {
    // paste the settings obtained from the original index here, but remove any system-generated settings like index.provided_name, etc.
  },
  "mappings": {
    // paste the mappings obtained from the original index here
  }
}
Important notes:
- When copying settings, remove all read-only and system-generated properties. Only include configurable settings like
number_of_replicas,refresh_interval,analysis, etc. For details on which settings can be specified at index creation, see the Index Settings documentation. - If you skip this step and do not have a template, Elasticsearch will automatically create the index during reindexing using dynamic mapping, which can result in incorrect data types for your fields.
With the destination index correctly created, we perform the basic reindexing as follows:
POST /_reindex
{
  "source": { "index": "old_index" },
  "dest": { "index": "new_index" }
}
For large indices, we can optimize the operation by running it in the background, parallelizing with slices, and controlling the throughput to avoid overloading the cluster. It is also possible to apply scripts to modify data while it is being copied.
For example:
POST /_reindex?slices=auto&wait_for_completion=false&refresh=false
{
  "source": { "index": "old_index" },
  "dest": {
    "index": "new_index"
  },
  "conflicts": "proceed",
  "script": {
    "source": "ctx._source.status = 'migrated';"
  }
}
Let's understand what each parameter does:
slices=auto:Parallelizes the operation by dividing the work into multiple slices (threads). The "auto" value lets Elasticsearch decide the ideal number based on the number of shards.wait_for_completion=false: Executes the operation in the background, immediately returning a task ID instead of waiting for completion."refresh": false: Disables automatic refresh on the destination index during copying, significantly improving performance. Data will only be visible for searching after a manual refresh. Once reindexing is complete, run:POST /new_index/_refresh."conflicts": "proceed":Continues reindexing even if it encounters document version conflicts, instead of stopping at the first error."script": Applies a transformation to each document during copying. In this example, we add a "status" field with the value "migrated" to all documents.
Controlling the transfer rate (throttling)
To avoid overloading the cluster, we can limit the reindexing speed:
POST /_reindex?requests_per_second=500
{
  "source": { "index": "old_index" },
  "dest": { "index": "new_index" }
}
When using wait_for_completion=false, the response immediately returns a task ID:
{
  "task": "oTUltX4IQMOUUVeiohTt8A:12345"
}
Keep this ID, as you will need it to track progress, especially if you are running multiple reindexing operations in parallel.
To track the progress of a specific task, use the task ID as follows:
GET /_tasks/oTUltX4IQMOUUVeiohTt8A:12345Or, to see all reindex operations in progress:
GET /_tasks?actions=*reindex&detailed=trueIf you lose the task ID, you can list all active tasks and search for yours:
GET /_tasks?actions=*reindex&detailed=true&group_by=parentsBefore making any changes to the aliases, validate if the reindexing was successful. Check the document count, index size and health, and run some test searches to ensure the data is correct.
1. Compare document counts:
GET /old_index/_count
GET /new_index/_count
2. Check index size and health:
GET /_cat/indices/old_index,new_index?v&h=index,docs.count,store.size,health3. Run some test searches to ensure the data is correct:
GET /new_index/_search
{
  "size": 5,
  "query": {
    "match_all": {}
  }
}
After everything is confirmed and validated, we update the aliases to point to the new index, ensuring our applications continue to function without interruption:
POST /_aliases
{
  "actions": [
    { "remove": { "index": "old_index", "alias": "production_alias" } },
    { "add": { "index": "new_index", "alias": "production_alias", "is_write_index": true } }
  ]
}
Only then can we safely remove the old index:
DELETE /old_indexWhen to use the Reindex API?
This tool is ideal for several day-to-day scenarios. It can be used to migrate legacy data to new structures, correct the data type of a field or values, consolidate data from multiple indices into one, reindex only documents that meet a specific criterion, or even apply ingest pipelines to enrich data during migration.
Despite its versatility, reindexing consumes many resources, so always perform tests and monitor the cluster closely.
Summarizing the characteristics of each method:
| Method | Use when | Speed | Impact on Cluster |
|---|---|---|---|
| Alias | Only need to change access name | Instantaneous | None |
| Clone | Need identical physical copy | Fast (hard links) | Low |
| Snapshot/Restore | Need hard copy or cross-cluster copy | Moderate | Low |
| Reindex | Need to transform data or structure | Slow (copies everything) | High |
Conclusion
In Elasticsearch, you cannot rename an index directly. This limitation stems from the system's distributed architecture, where indices are composed of multiple shards spread across cluster nodes.
If we need to change the name our applications use to access the index, we use aliases — it's fast, safe, and has no impact. When we need an identical physical copy, we resort to cloning. For complete hard copies or cross-cluster operations, snapshot/restore provides a reliable solution. And only when it is unavoidable to transform data or structures, we use reindexing, but with care.
In all cases, we validate the data afterwards, document the changes, and keep backups updated to ensure the integrity and continuity of operations.
References
For more detailed information about the concepts discussed in this blog, see the official Elasticsearch documentation:
- Aliases API - Complete guide for creating and managing index aliases
- Clone Index API - Documentation on cloning indices with hard links
- Reindex API - Comprehensive guide for reindexing operations, including throttling and async execution
- Task Management API - How to monitor long-running operations like reindex
- Index Settings - Understanding index settings, including read-only blocks
- Restore a snapshot - Complete guide on restore API including rename_pattern usage
- Snapshot and restore overview - Comprehensive guide covering the entire snapshot/restore process
Ready to try this out on your own? Start a free trial.
Want to get Elastic certified? Find out when the next Elasticsearch Engineer training is running!
Related content
October 20, 2025
How to deploy Elasticsearch on an Azure Virtual Machine
Learn how to deploy Elasticsearch on Azure VM with Kibana for full control over your Elasticsearch setup configuration.
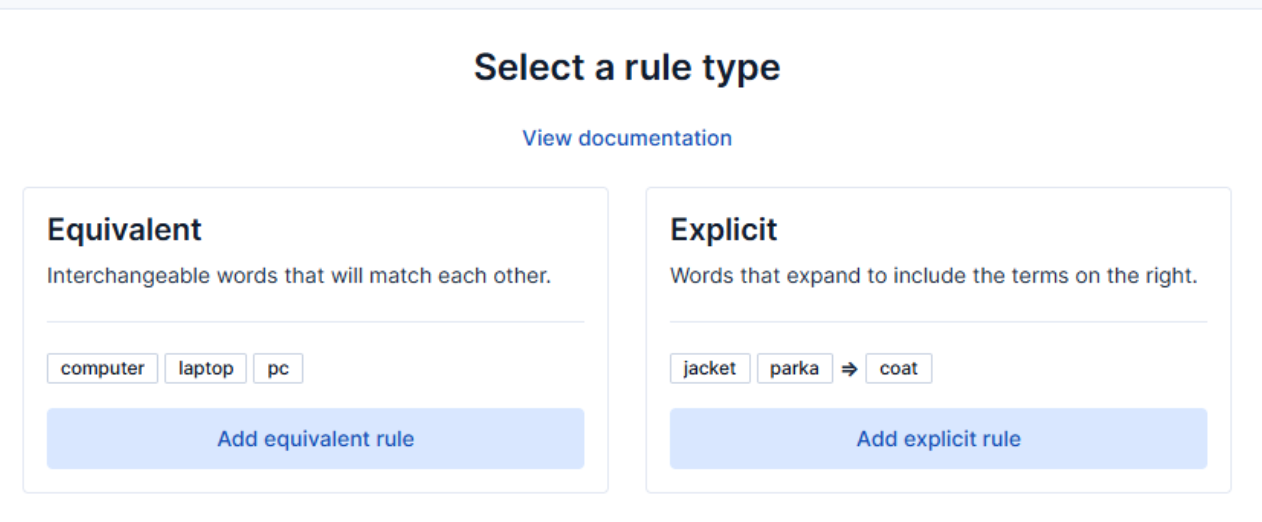
How to use the Synonyms UI to upload and manage Elasticsearch synonyms
Learn how to use the Synonyms UI in Kibana to create synonym sets and assign them to indices.

October 8, 2025
How to reduce the number of shards in an Elasticsearch Cluster
Learn how Elasticsearch shards affect cluster performance in this comprehensive guide, including how to get the shard count, change it from default, and reduce it if needed.
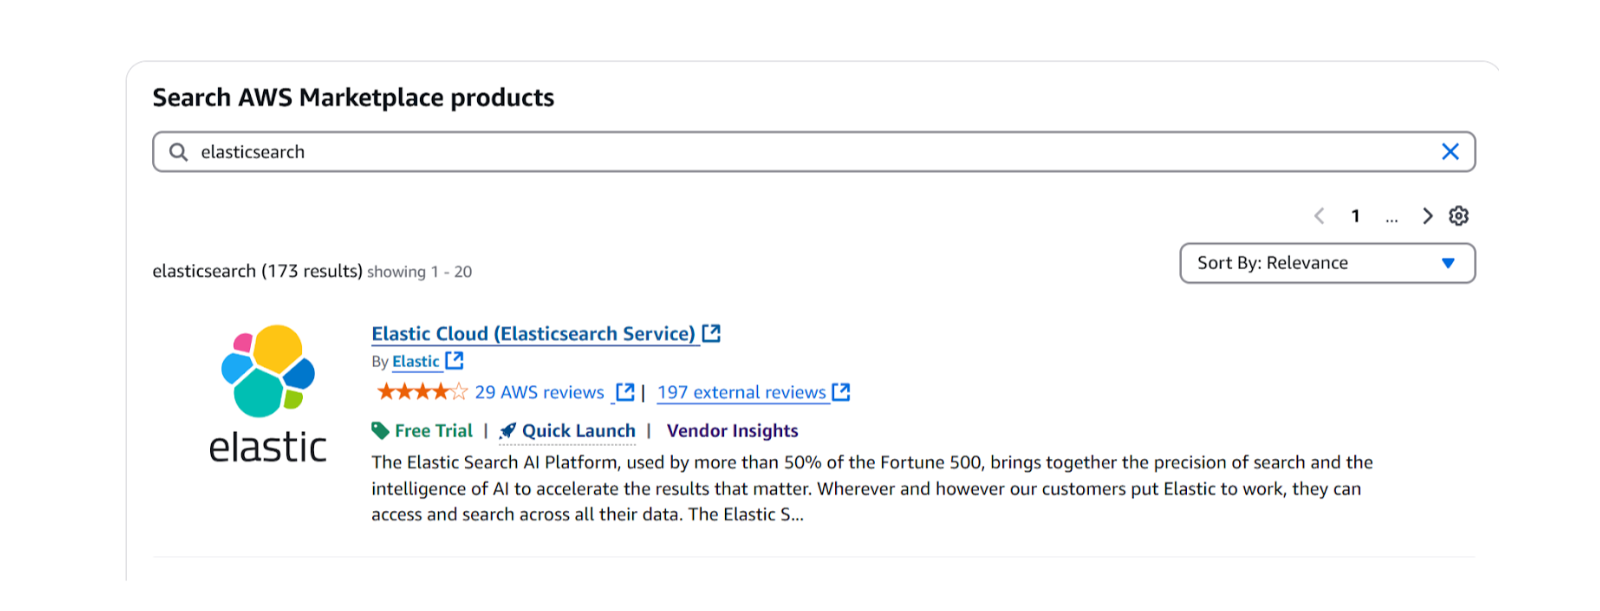
October 3, 2025
How to deploy Elasticsearch on AWS Marketplace
Learn how to set up and run Elasticsearch using Elastic Cloud Service on AWS Marketplace in this step-by-step guide.

September 29, 2025
HNSW graph: How to improve Elasticsearch performance
Learn how to use the HNSW graph M and ef_construction parameters to improve search performance.