This article will guide you through integrating Elasticsearch with Microsoft Copilot. We'll build a custom agent capable of retrieving and utilizing data from your Elasticsearch documents.
What is Microsoft Copilot
Microsoft Copilot is an AI companion that helps you achieve tasks across the Microsoft ecosystem products, offering functionality similar to ChatGPT for various productivity needs.
By using Microsoft Copilot Studio and a UI interface, you can build customized agents and equip them with actions. These actions connect to your APIs to fetch data and respond to user queries.
An action is a tool the agent can use to help you solve your tasks. The actions can connect to built-in platform connectors or to APIs. The OpenAPI JSON specification provides a standard format for describing your API, allowing Copilot to understand its functions, available endpoints, and how to correctly structure queries, including automatic parameter population.
We are going to build an agent that gives information about invoices stored in Elasticsearch, connecting via API. The agent will live on Microsoft Teams to work as a personal assistant.
This tutorial will guide you through the following steps:
All the code and files referenced in this blog post can be found in this GitHub repository.
Building the API
We’ll create a simple API that queries Elasticsearch. We’ll build it in a Jupyter notebook using FastAPI.
%pip install fastapi pyngrok uvicorn nest-asyncio elasticsearch==9 -qLet’s review the installed tools before importing them:
- fastapi, uvicorn: Generates a HTTP server to consume Elasticsearch.
- pyngrok: Creates a secure public IP address (tunnel) for your local server, enabling the Copilot agent to access it over the internet.
- elasticsearch: Elasticsearch’s Python client.
- nest-asyncio: Needed to create the server inside the Notebook environment.
import os
from datetime import datetime

import nest_asyncio
import uvicorn

from fastapi import FastAPI, Query
from pyngrok import conf, ngrok

from elasticsearch.helpers import bulk
from elasticsearch import Elasticsearch
To use the API in a Copilot agent, we need it to be accessible through the internet. So, we’ll use ngrok to create a tunnel to connect the API to the internet. Create a ngrok account and get an auth token here.
Let’s configure the environment variables:
os.environ["ELASTICSEARCH_ENDPOINT"] = (
    "Elasticsearch_endpoint"
)
os.environ["ELASTICSEARCH_API_KEY"] = (
    "Elasticsearch_api_key"
)
os.environ["NGROK_AUTH_TOKEN"] = "ngrok-token"
INDEX_NAME = "invoices"
Now, instantiate the Elasticsearch client:
_client = Elasticsearch(
    os.environ["ELASTICSEARCH_ENDPOINT"],
    api_key=os.environ["ELASTICSEARCH_API_KEY"],
)
Let’s start the server and create the following endpoints:
/search/semantic
Runs a semantic search based on the user’s query.
/search/by-date
Runs a search based on a date range.
In both cases, Elasticsearch returns a list of documents from each query.
app = FastAPI()

@app.get("/search/semantic")
async def search_semantic(query: str = Query(None)):
    # ... full code in the GitHub repository ...


@app.get("/search/by-date")
async def search_by_date(from_date: str = Query(None), to_date: str = Query(None)):
    # ... full code in the GitHub repository ...
Let’s configure the tunnel and run the server.
conf.get_default().auth_token = os.environ["NGROK_AUTH_TOKEN"]
ngrok_tunnel = ngrok.connect(8000)

print("Public URL:", ngrok_tunnel.public_url)

nest_asyncio.apply()
uvicorn.run(app, port=8000)
The Public URL you get will be provided to our Microsoft Copilot agent.
Public URL: https://81c1-181-237-140-155.ngrok-free.app

INFO:     Started server process [77882]
INFO:     Waiting for application startup.
INFO:     Application startup complete.
INFO:     Uvicorn running on http://127.0.0.1:8000 (Press CTRL+C to quit)
Set up Elasticsearch data
Mappings
Let’s index a list of invoices with the descriptions of the services provided, date, reference URL, total amount, and description.
We will also copy the properties we need for semantic search to a semantic_field field type.
_client.indices.create(
        index=INDEX_NAME,
        body={
            "mappings": {
                "properties": {
                    "id": {"type": "keyword"},
                    "file_url": {"type": "keyword"},
                    "issue_date": {"type": "date"},
                    "description": {"type": "text", "copy_to": "semantic_field"},
                    "services": {
                        "type": "object",
                        "properties": {
                            "name": {
                                "type": "text",
                                "copy_to": "semantic_field",
                            },
                            "price": {"type": "float"},
                        },
                    },
                    "total_amount": {
                        "type": "float",
                    },
                    "semantic_field": {"type": "semantic_text"},
                }
            }
        },
    )
Indexing data
We’ll upload a list of different invoices. The dataset can be found here.
Let’s create a function to run the invoices array and index it into Elasticsearch using the bulk API.
def build_data():
    for doc in invoices:
        yield {"_index": INDEX_NAME, "_source": doc}


try:
    success, errors = bulk(_client, build_data())
    print(f"{success} documents indexed successfully")

    if errors:
        print("Errors during indexing:", errors)

except Exception as e:
    print(f"Error: {str(e)}, please wait some seconds and try again.")
Copilot and agent configuration
To use Copilot chat, we’ll need an Office 365 account. If you don’t have one, you can create a trial account here.
Create the agent and actions
After you create an account, go to the main Copilot Studio site and follow the instructions below:
1. Follow the Microsoft steps to create an agent.
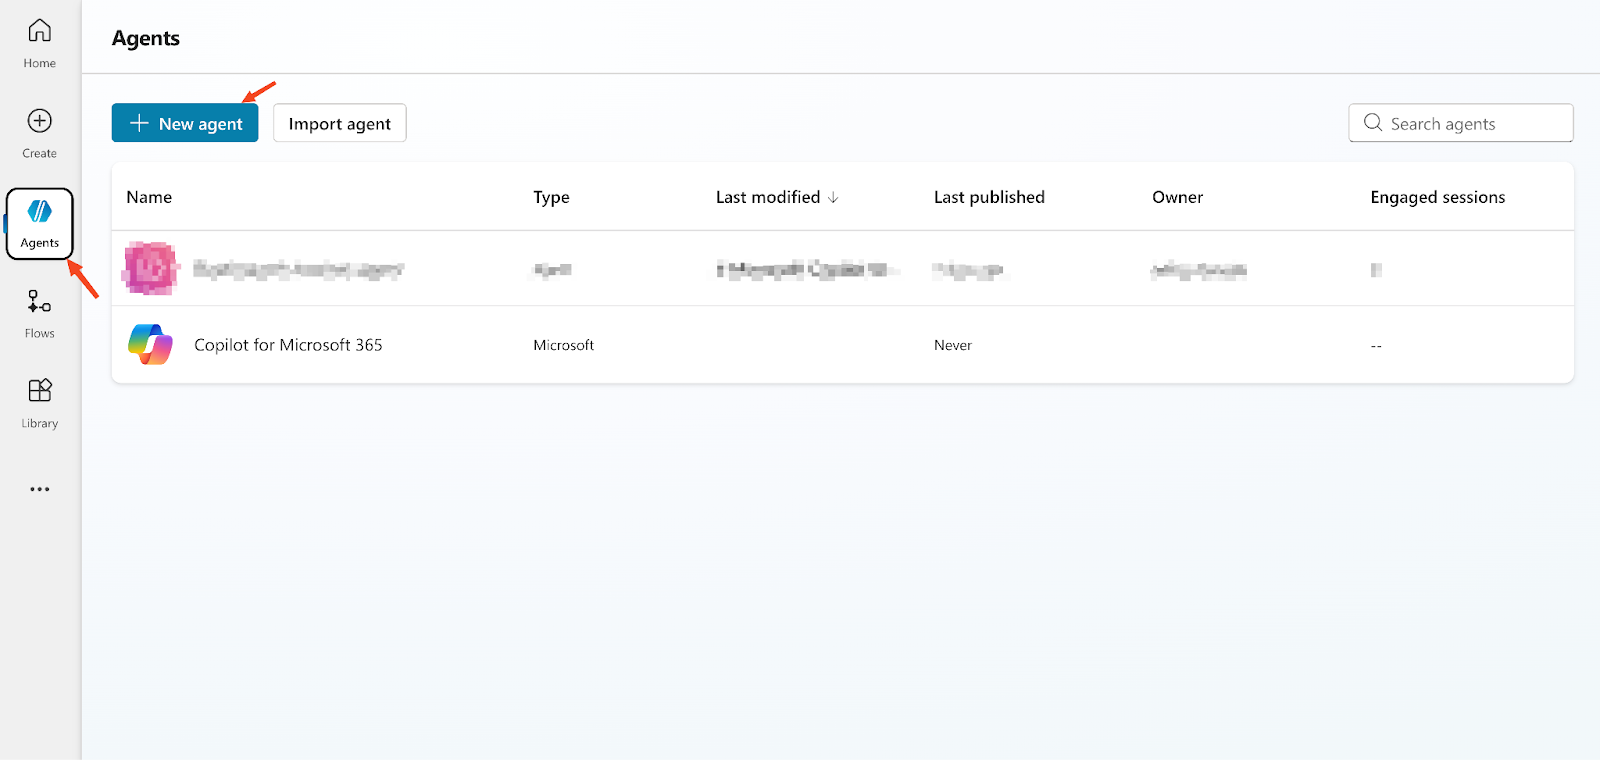
2. Add actions from a REST API.


An action is an API endpoint. For this example, you need to add two: one for the semantic text queries and another one for date based queries.
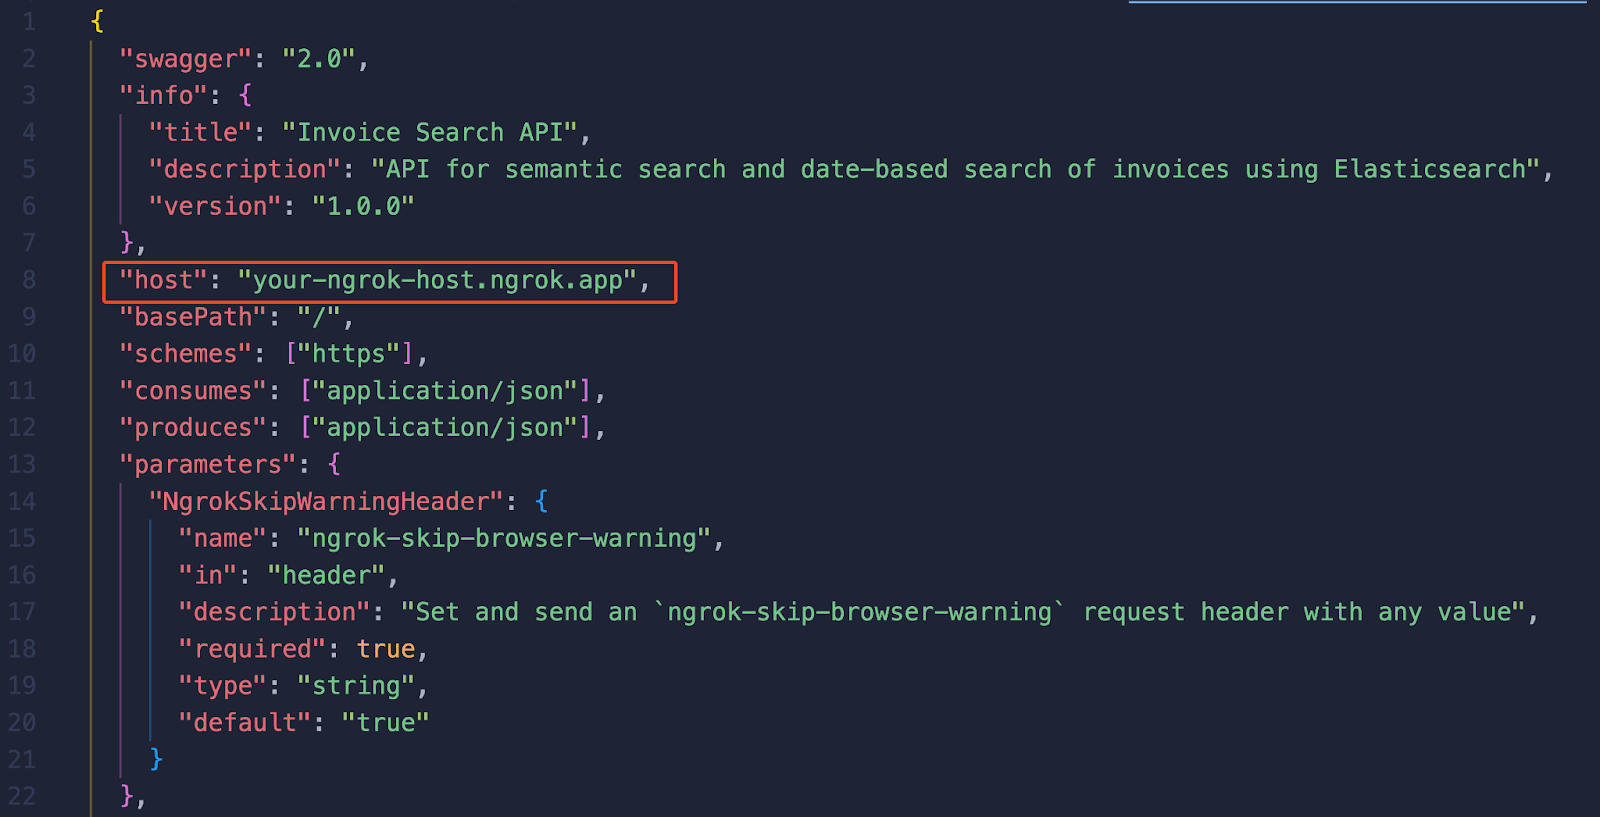
- To do this, you need to first generate an OpenAPI JSON reference of the API you just created. You can find the OpenAPI specification file in the GitHub repository dedicated to this article.
- In the OpenAPI configuration, replace the existing 'host' value with the ngrok-generated URL. Make sure you remove the 'https://' prefix, leaving only the hostname and port.
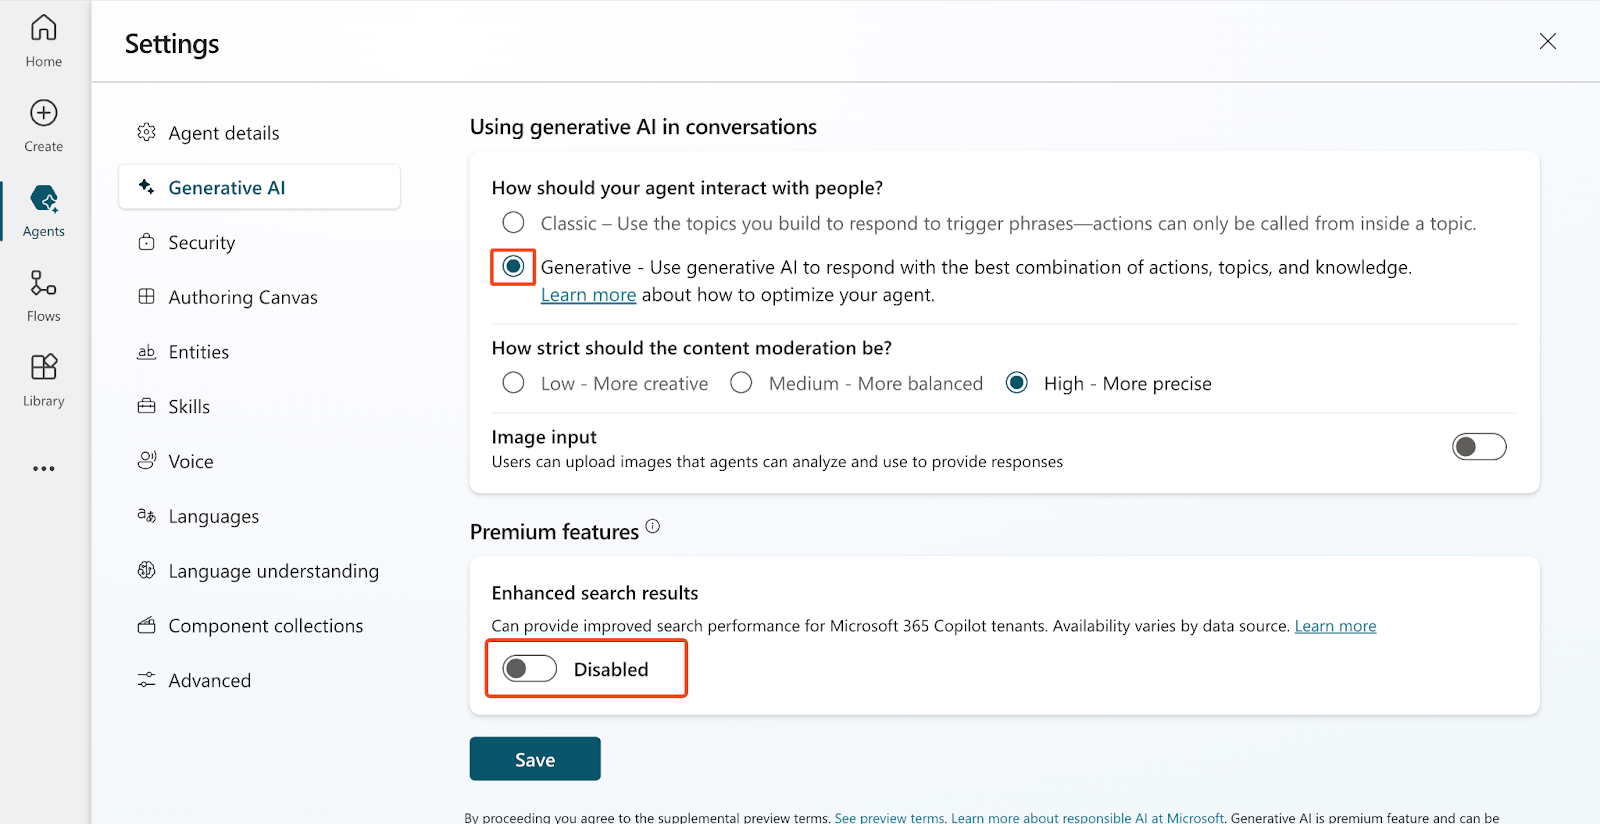
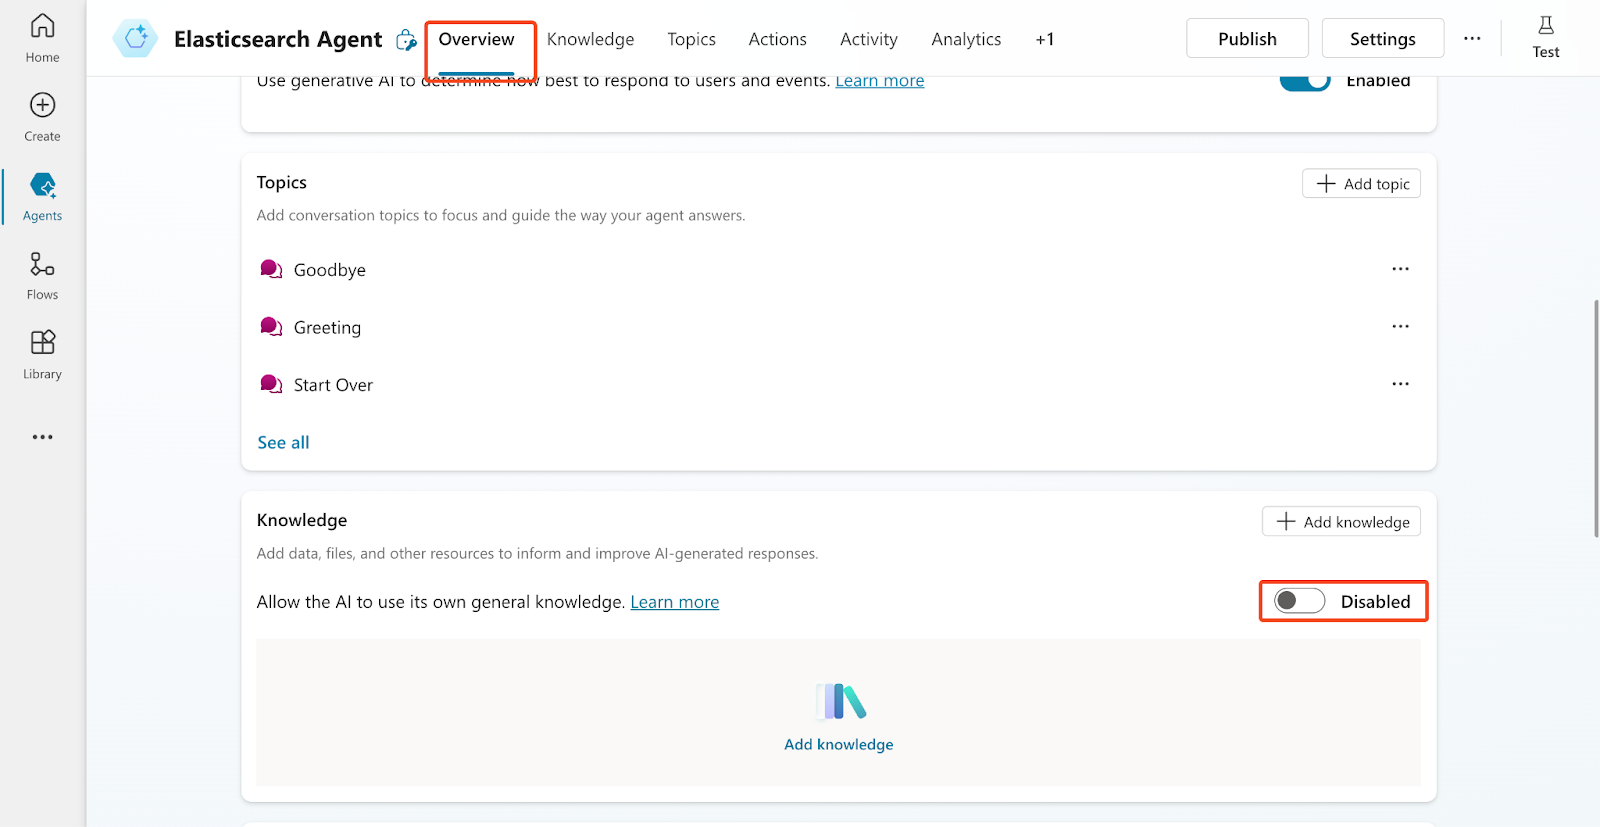
3. Click on Settings and activate Generative AI to be able to use GenAI to process the conversation. Select Actions, Knowledge, and Topics, depending on what Copilot detects in the conversation.
4. Clicking on Overview and then scrolling down, you’ll find the Knowledge section. Deactivate the option Allow the AI to use its own general knowledge. This will prevent the agents from responding using the general info from their training since we want them to focus on our Elasticsearch documents.
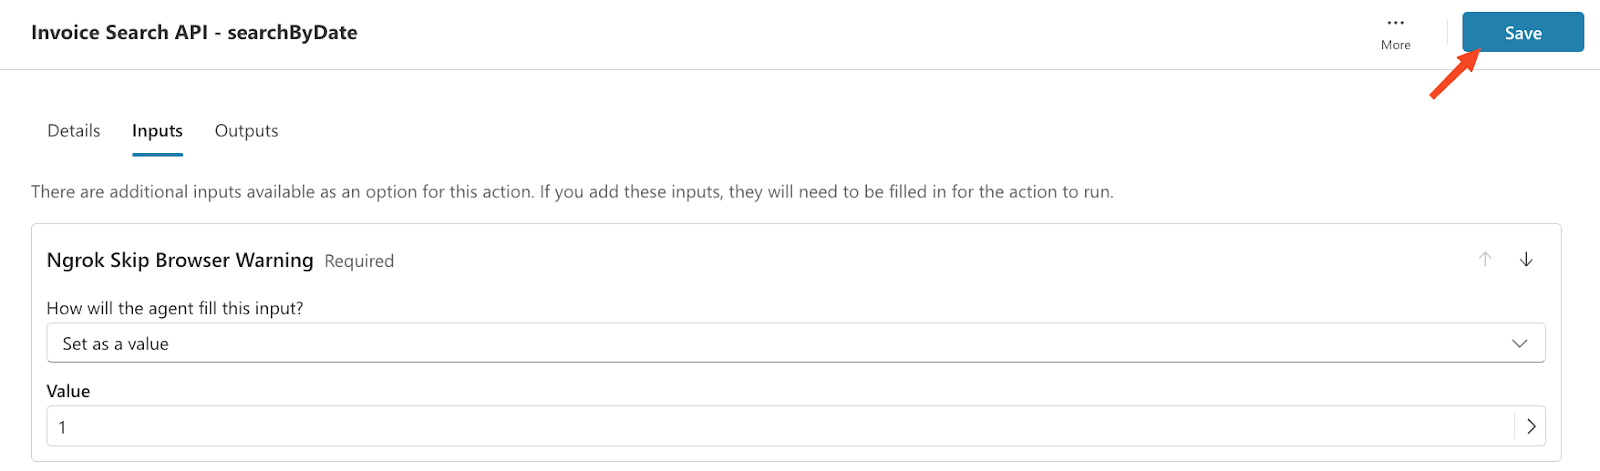
5. If you’re using the ngrok free layer, you must set the 'ngrok-skip-browser-warning' header with any value. This bypasses a browser verification step required by ngrok due to potential abuse of free tunnels.
To do this, go to “Actions > [Action] > Inputs > Ngrok Skip Browser Warning and click on “How will the agent fill this input?” and select “Set as value.” Add any value to Value and click on “Save” so you can use the endpoints with the ngrok tunnel:

Make the agent visible in Copilot
To use the agent from Microsoft 365 or Microsoft Teams, you must follow these steps:
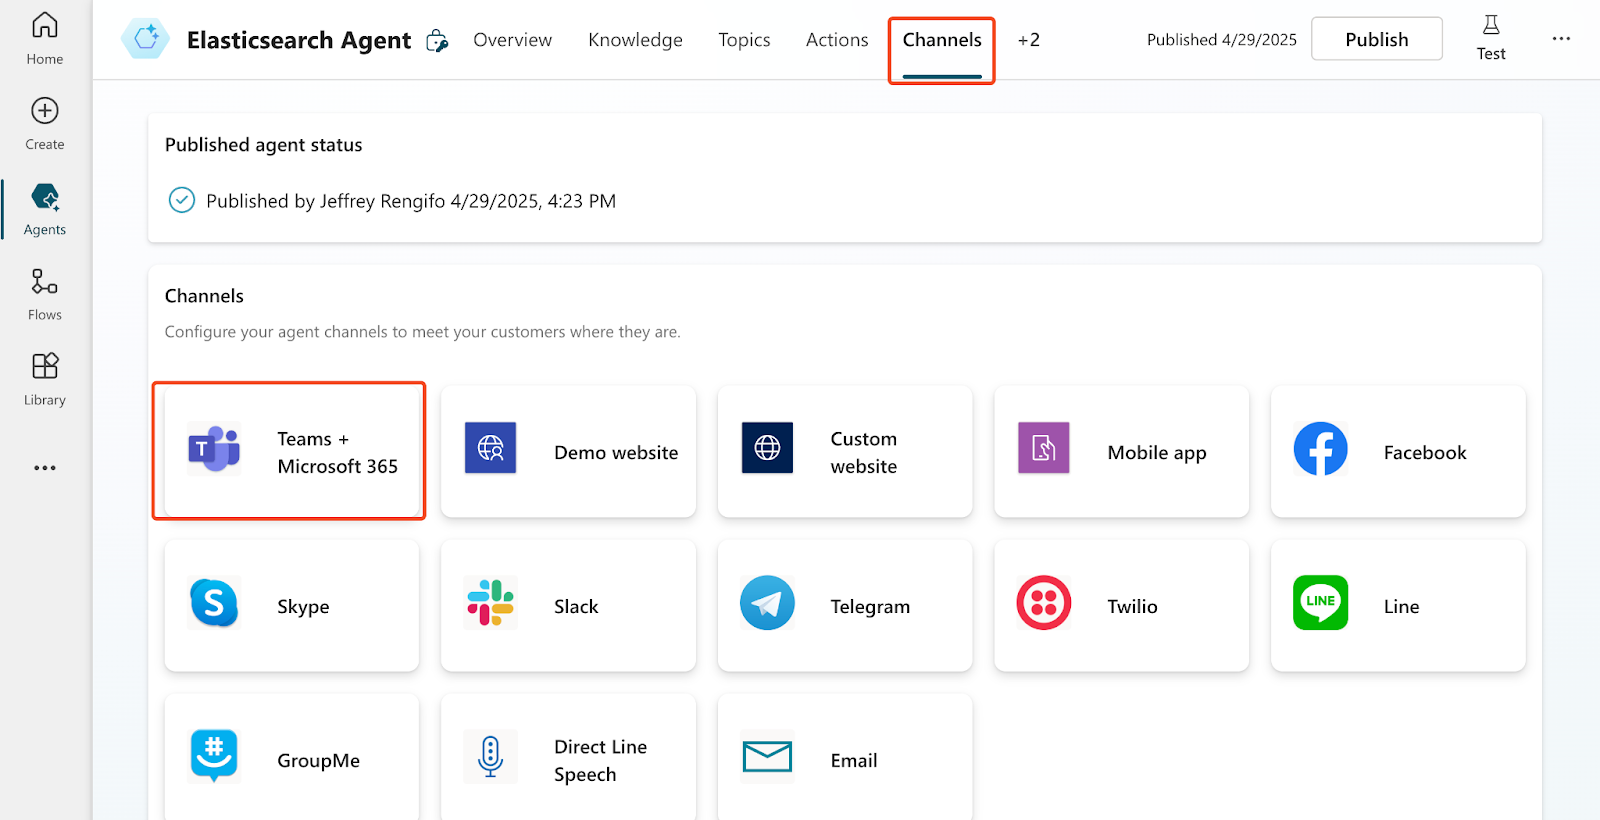
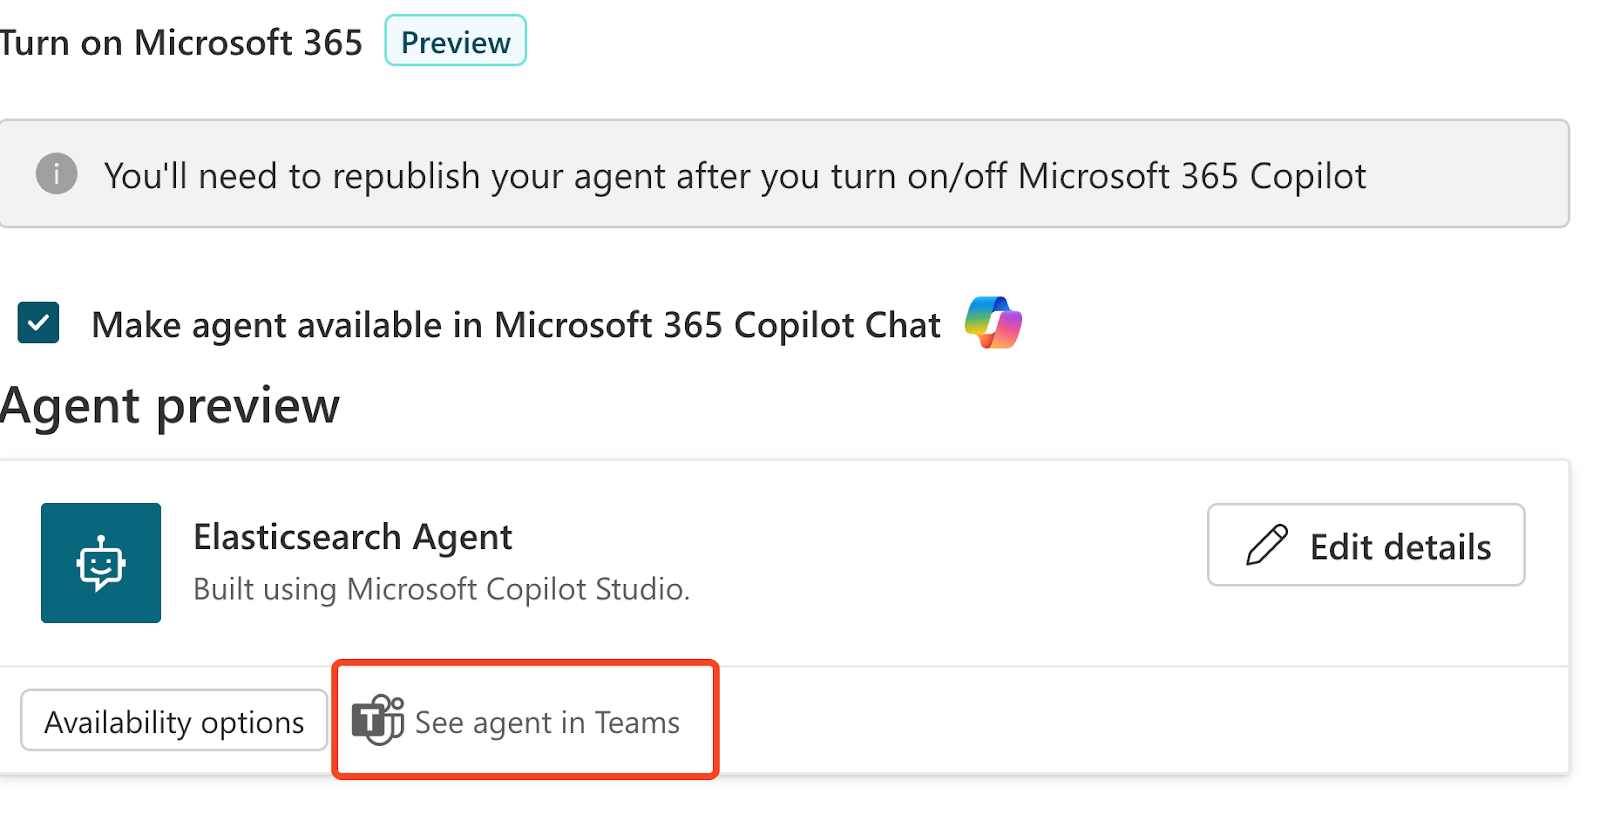
1. From Copilot Studio, go to Channels and click on Teams + Microsoft 365:
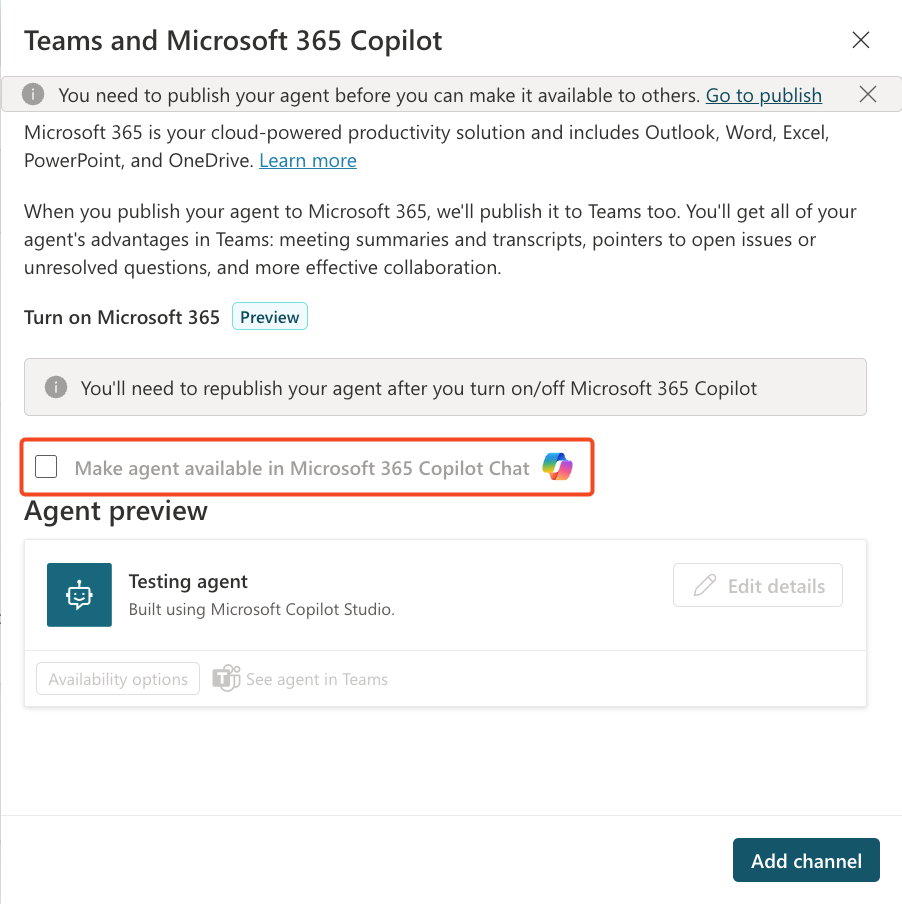
2. Unselect the option “Make agent available in Microsoft 365 Copilot Chat.” This option is only useful if you want to use the agent in Microsoft 365 Copilot, but we want to use it with Microsoft Teams.
3. Now click on “Add channel.”
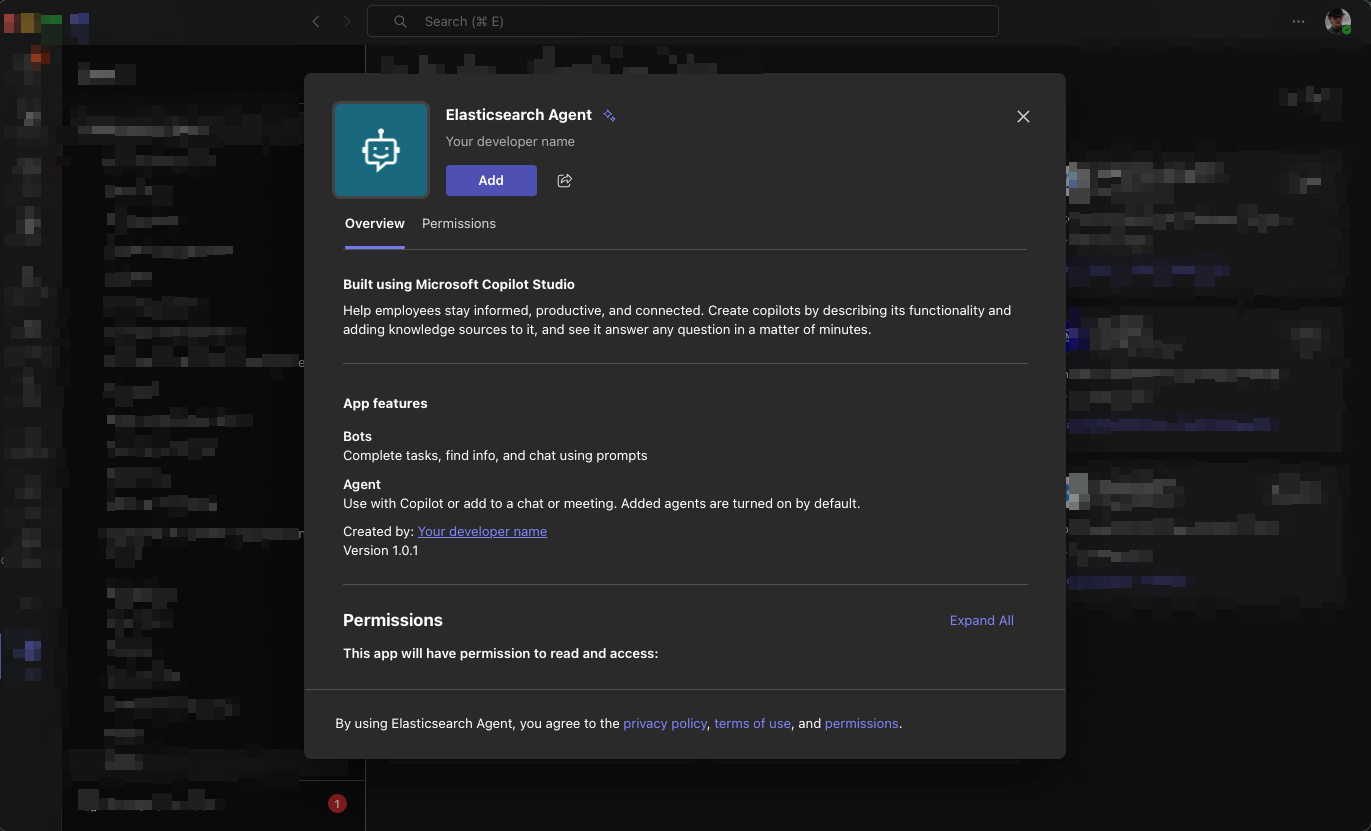
4. Once you have it on the channel, click See agent in Teams and add it directly.
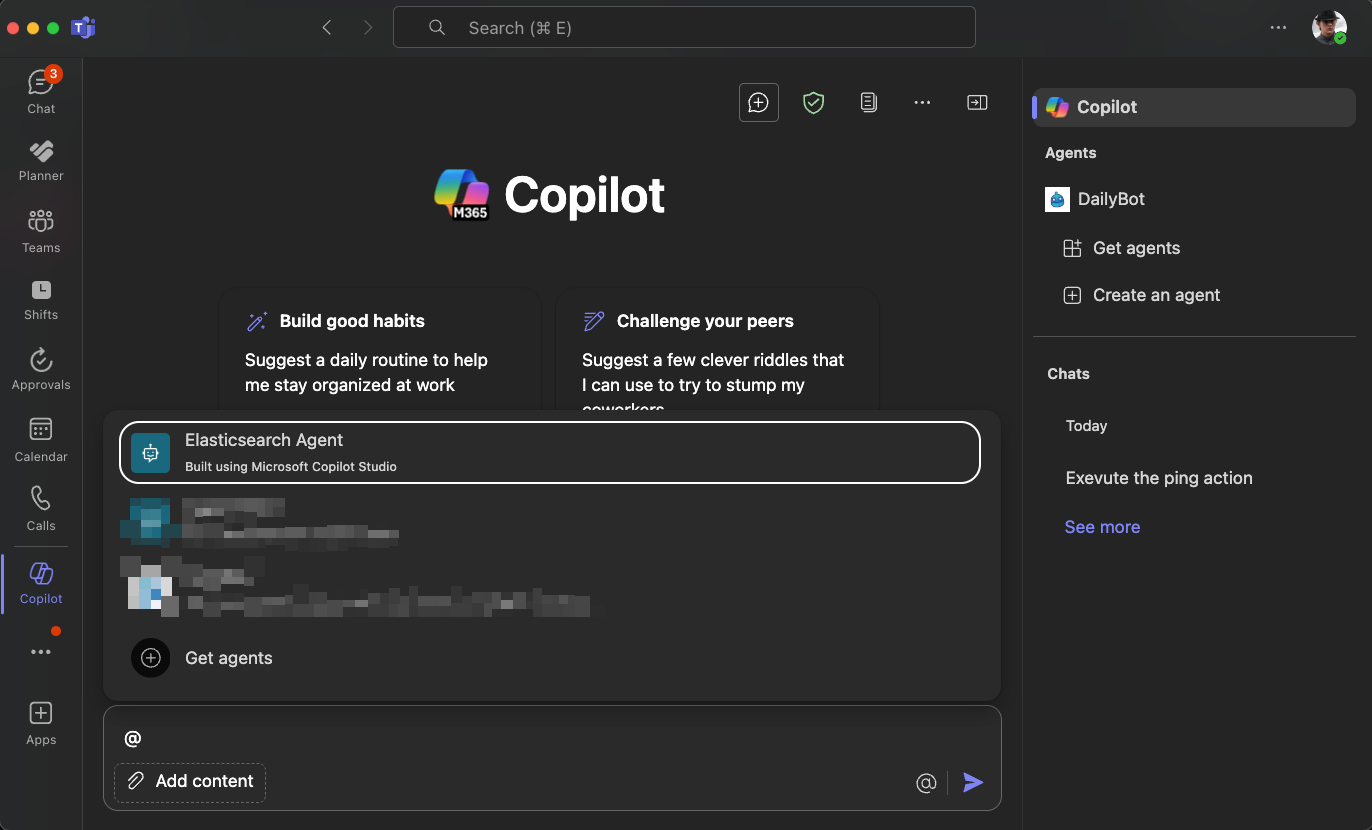
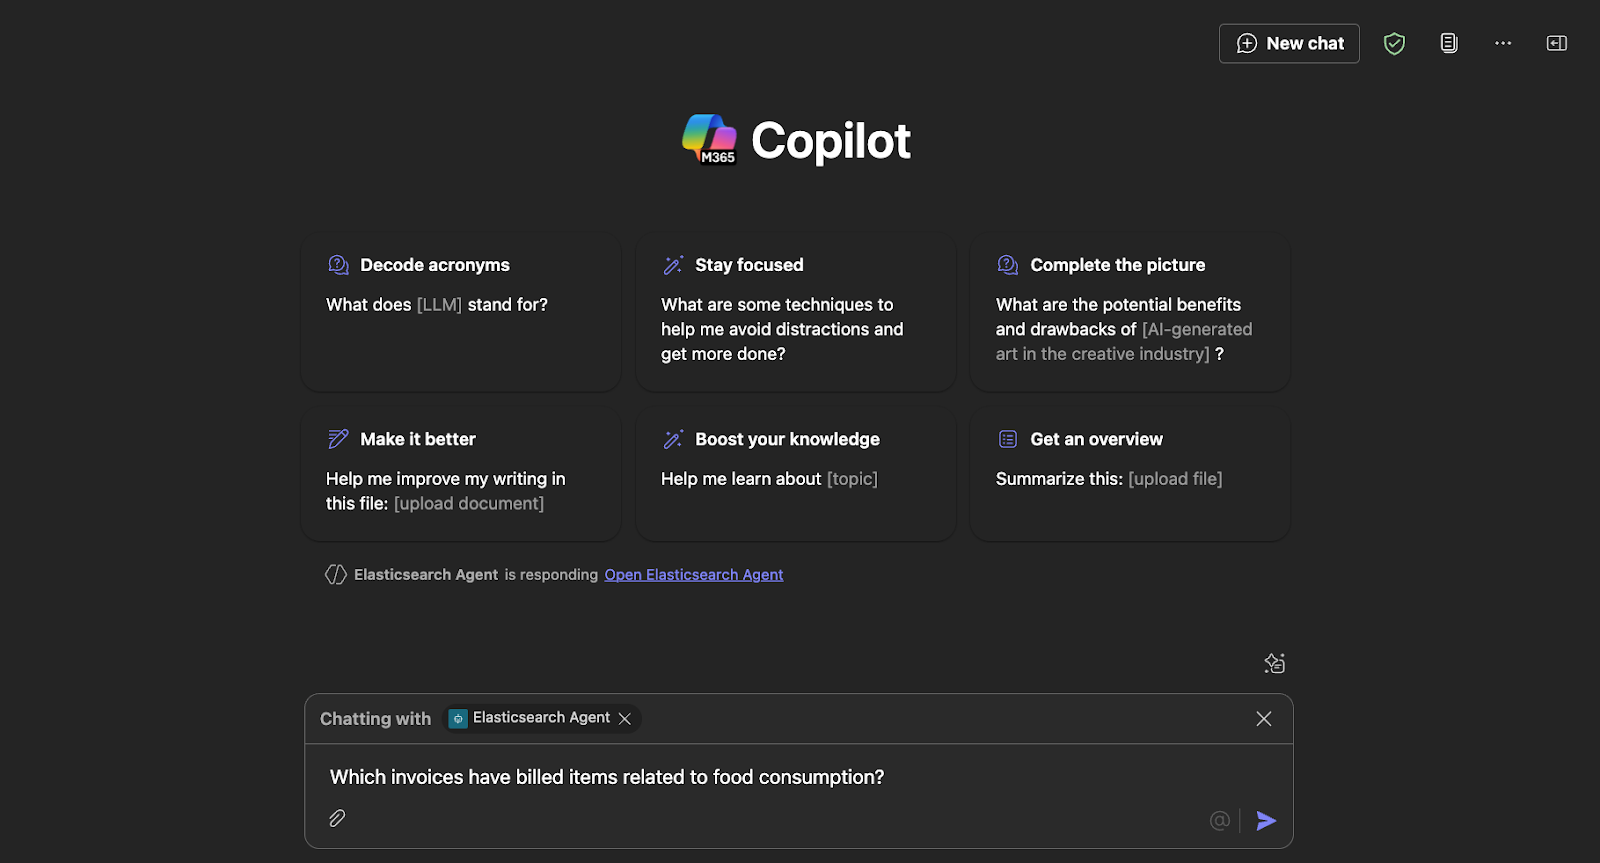
After adding it, you can start to use it from Copilot simply by typing an @ and selecting it from the options.
Using the agent
When using actions for the first time, Copilot will warn you about permissions and show a box when you need to grant permissions for each action by clicking on Connect. You must do this once per action.
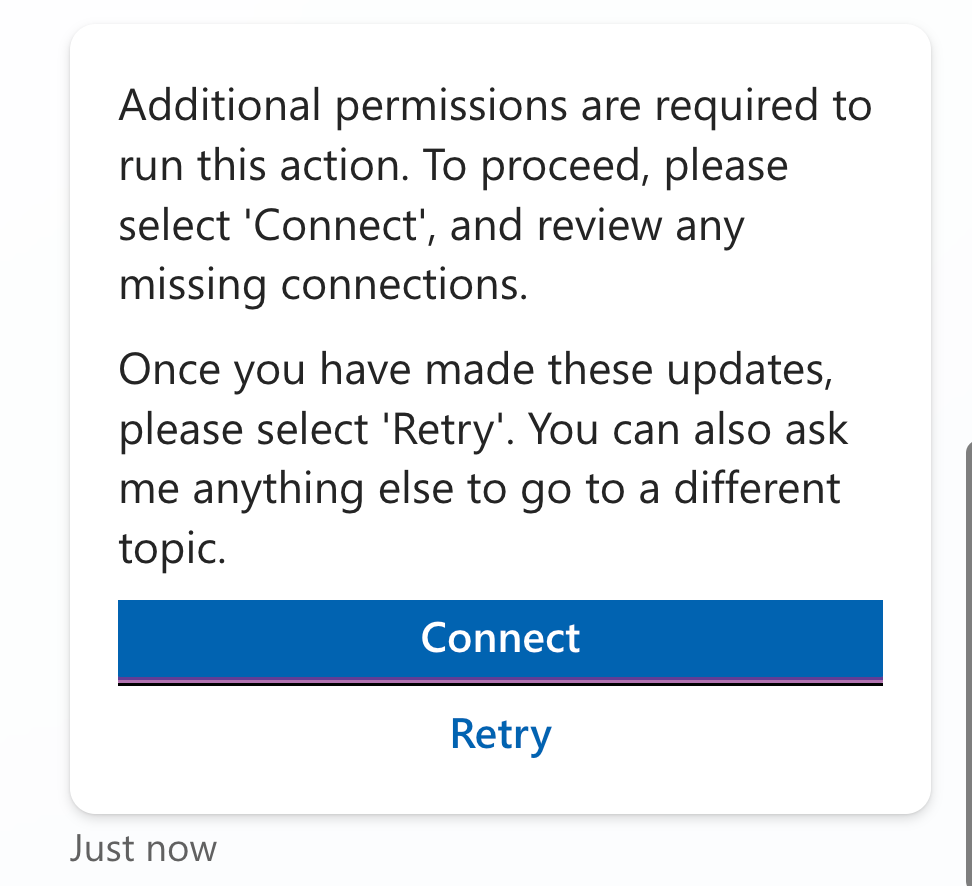
You are now ready to use the agent.
To test semantic search, let's ask the agent about invoices related to food expenses:
Let’s check the answer:
Thanks to the semantic search features, Copilot was able to find invoices that didn’t include the word food but instead contained words like “dinner” and “lunch.”
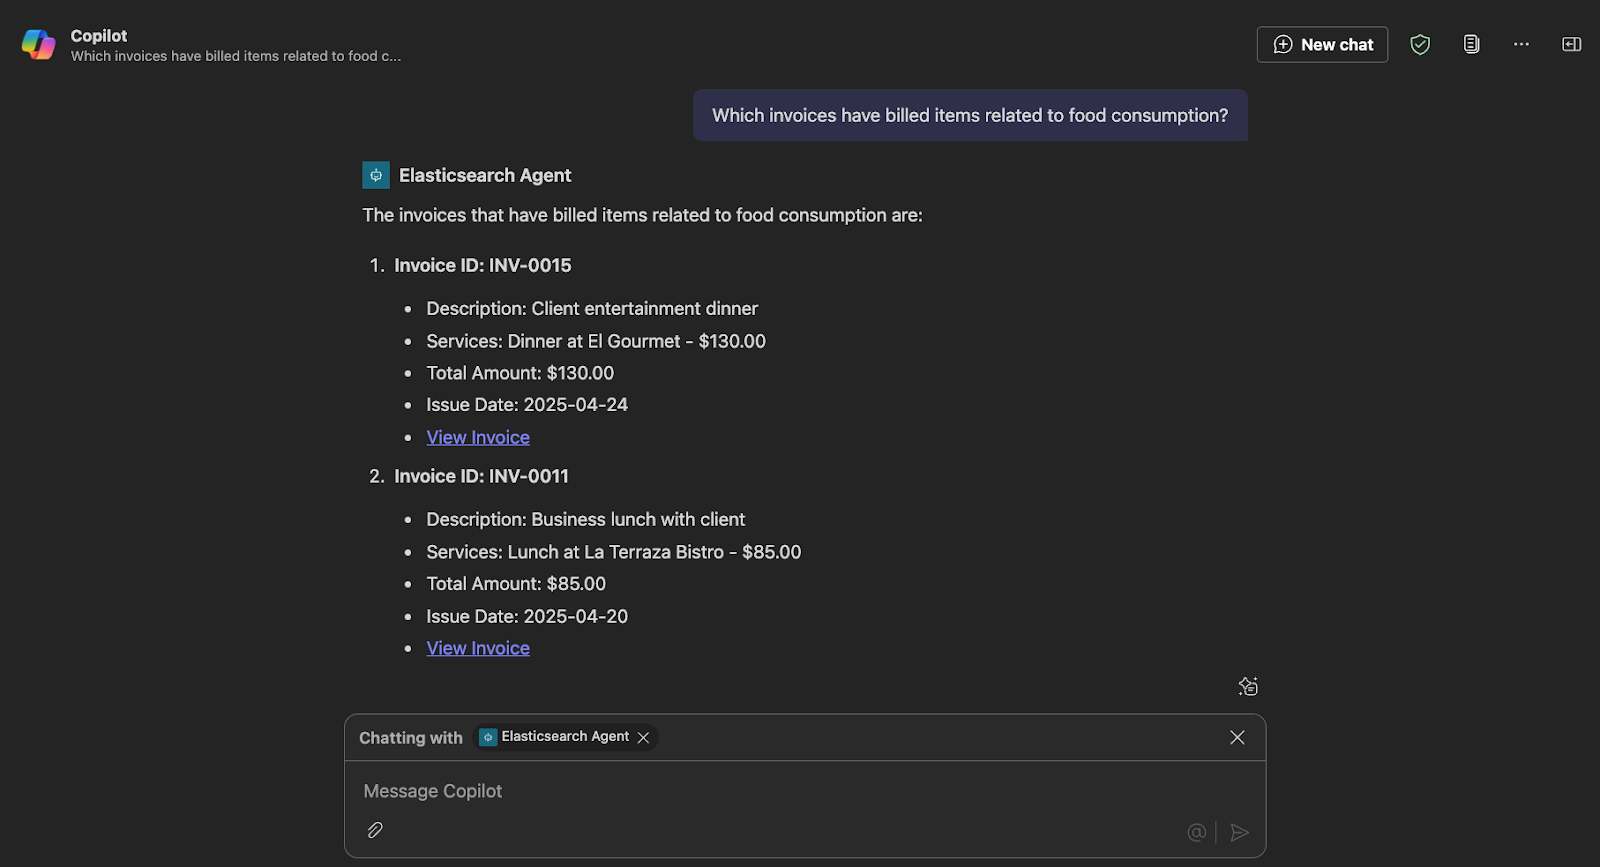
In the API logs, we can verify the called endpoint and the query generated by Copilot. In this case, it was “food consumption.”

Find the query in JSON format in this file, along with the raw hits returned by Elasticsearch for the previous query.
Now, let's test the date range search by querying for invoices issued within a specific timeframe:

These are the results:
The invoices issued between April 20th and April 22nd are
- Invoice ID: INV-0011
- Description: Business lunch with client
- Services: Lunch at La Terraza Bistro - $85.00
- Total Amount: $85.00
- Issue Date: 2025-04-20
- View Invoice (shown for illustration — in practice, this would link to the actual invoice)
- Invoice ID: INV-0012
- Description: Hotel accommodation during client visit
- Services: 3-night stay at Hotel Central - $450.00
- Total Amount: $450.00
- Issue Date: 2025-04-21
- View Invoice (shown for illustration — in practice, this would link to the actual invoice)
- Invoice ID: INV-0013
- Description: Team-building activity
- Services: Escape room experience for team - $200.00
- Total Amount: $200.00
- Issue Date: 2025-04-22
- View Invoice (shown for illustration — in practice, this would link to the actual invoice)
By reviewing the API requests, we can confirm that the data and the selected endpoint were correctly interpreted by Copilot:

The range query looks like this, and you can see here the data returned by Elasticsearch.
Conclusion
In this article, we successfully integrated Elasticsearch with Microsoft Copilot and created a personal assistant with access to our indices.
Using the OpenAI specification of your API with clear descriptions enables the agent to effectively select and utilize the appropriate endpoints.
This architecture is similar to Model Context Protocol (MCP) and in a future article, we’ll explore the new Microsoft Copilot integration with MCP and an Elasticsearch MCP server.
Ready to try this out on your own? Start a free trial.
Want to get Elastic certified? Find out when the next Elasticsearch Engineer training is running!
Related content

October 30, 2025
Context engineering using Mistral Chat completions in Elasticsearch
Learn how to utilize context engineering with Mistral Chat completions in Elasticsearch to ground LLM responses in domain-specific knowledge for accurate outputs.
October 27, 2025
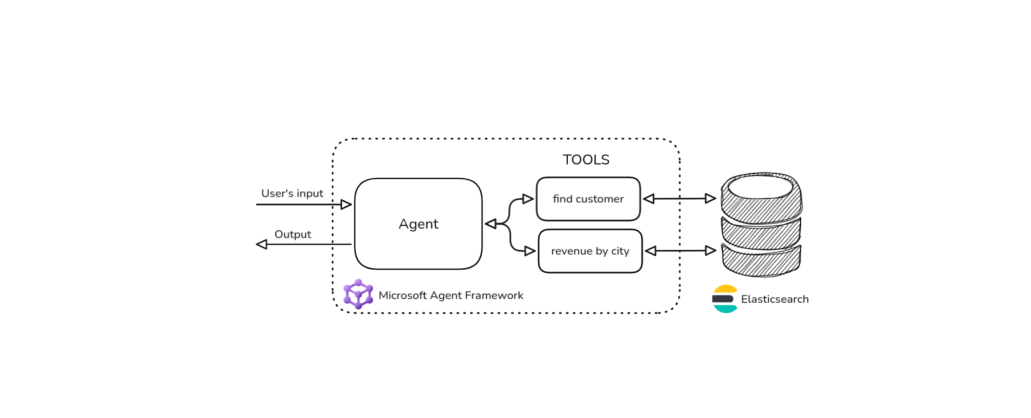
Building agentic applications with Elasticsearch and Microsoft’s Agent Framework
Learn how to use Microsoft Agent Framework with Elasticsearch to build an agentic application that extracts ecommerce data from Elasticsearch client libraries using ES|QL.
October 21, 2025
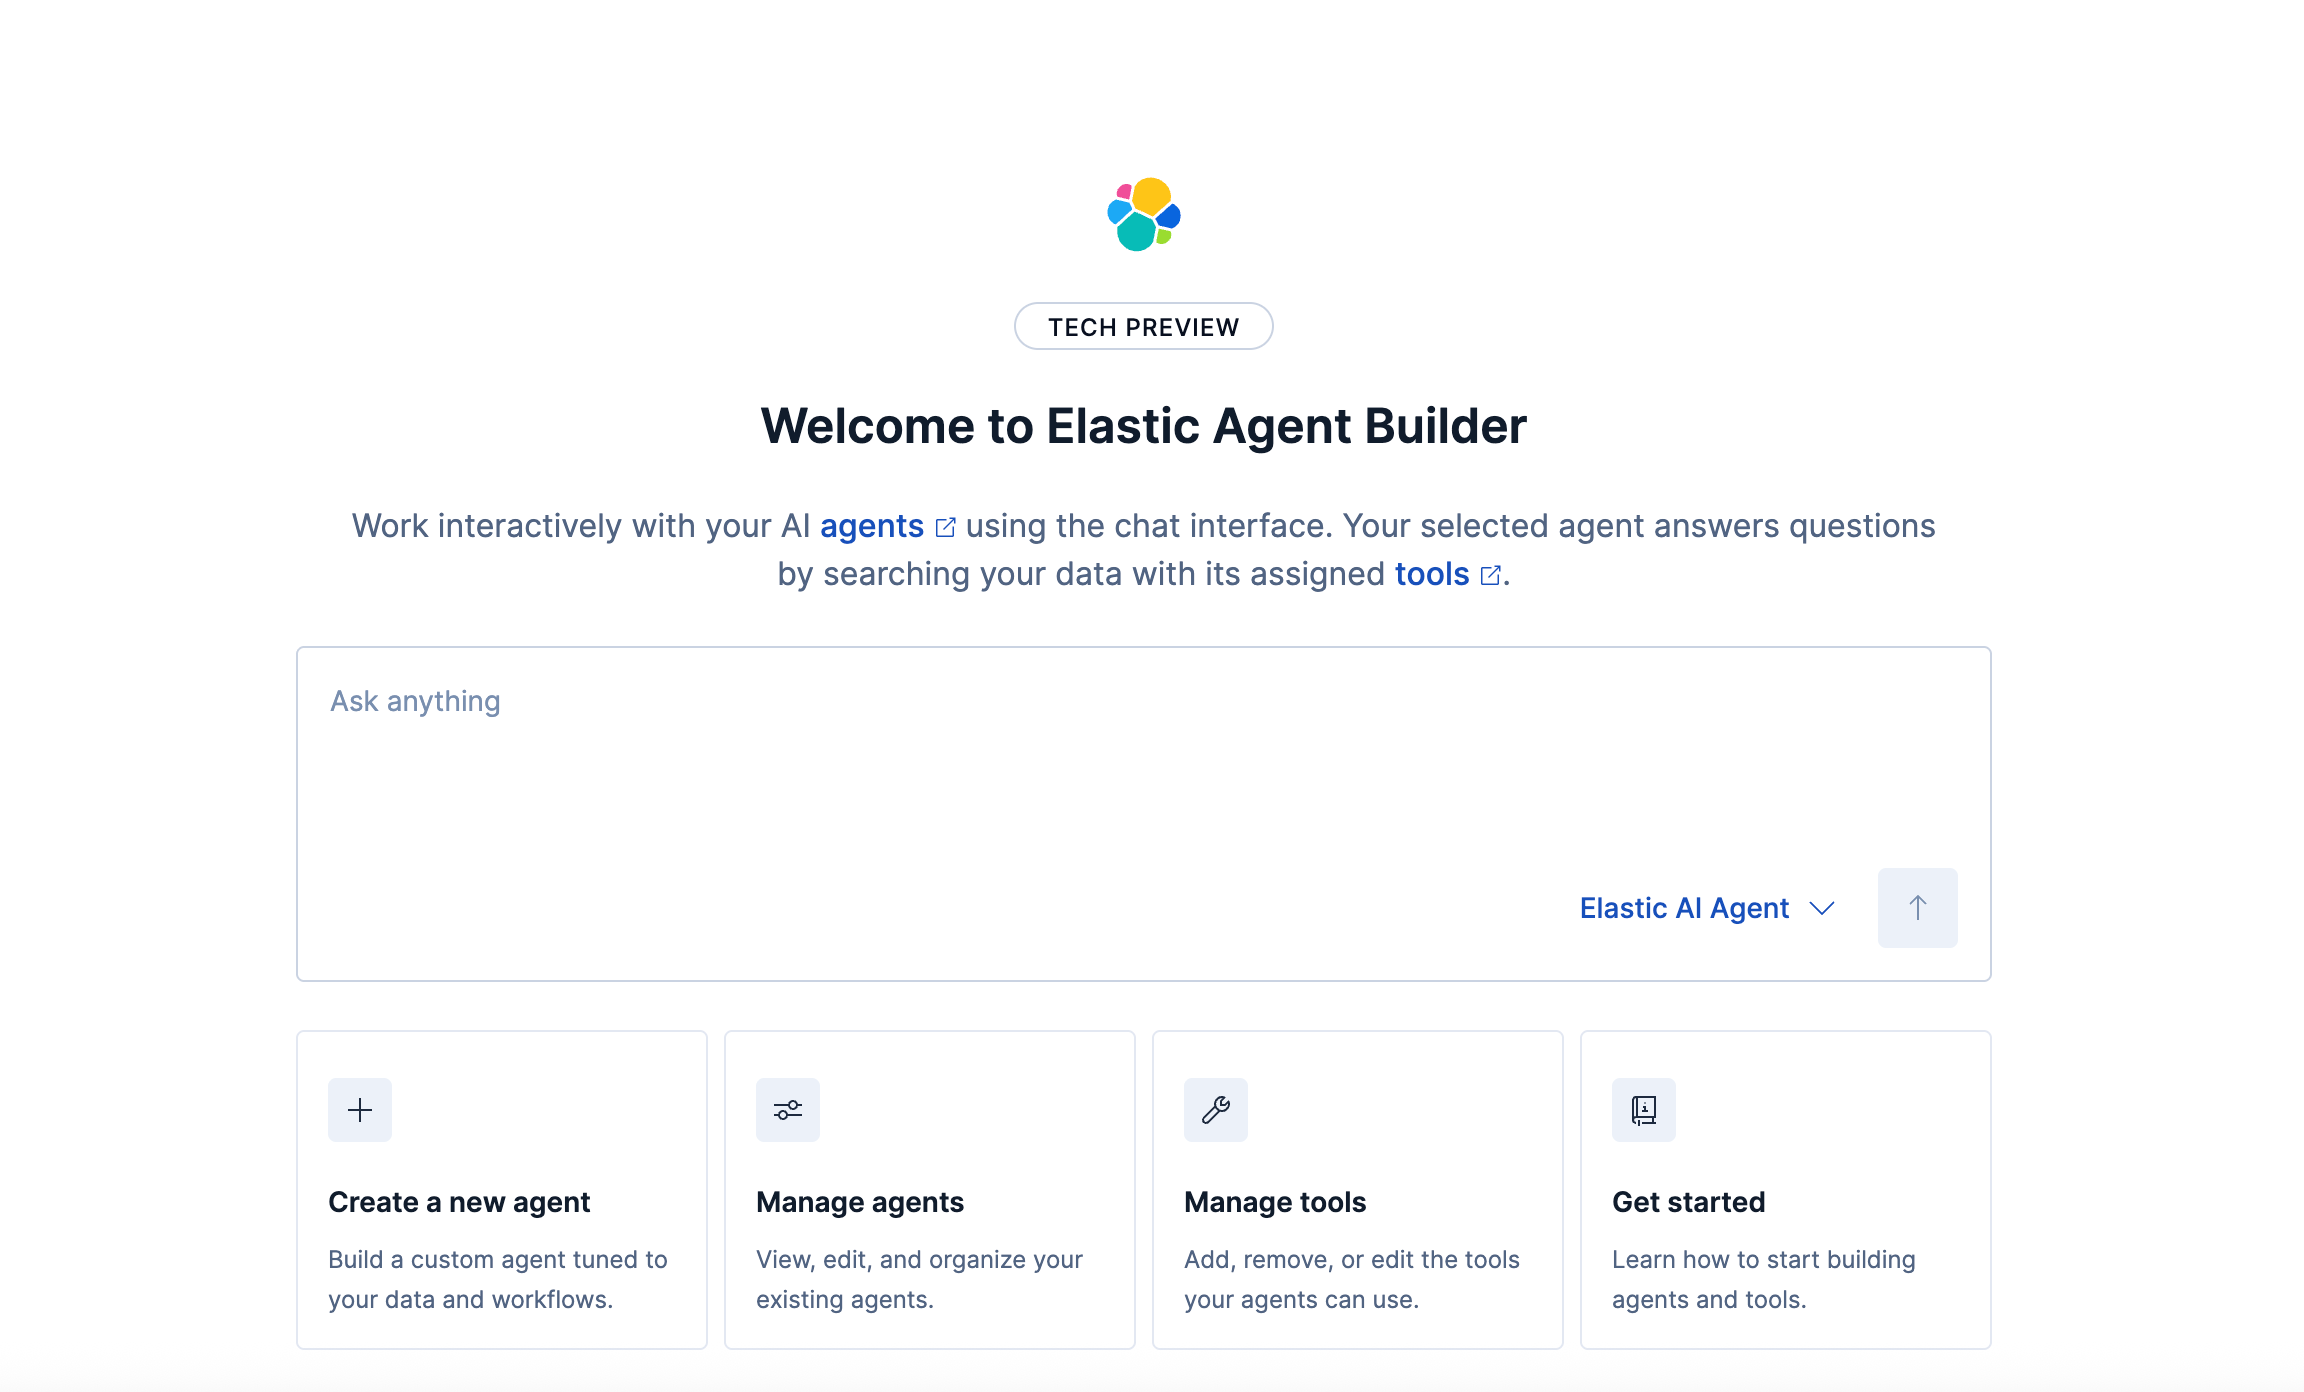
Introducing Elastic’s Agent Builder
Introducing Elastic Agent Builder, a framework to easily build reliable, context-driven AI agents in Elasticsearch with your data.

October 20, 2025
Elastic MCP server: Expose Agent Builder tools to any AI agent
Discover how to use the built-in Elastic MCP server in Agent Builder to securely extend any AI agent with access to your private data and custom tools.
How to use the Synonyms UI to upload and manage Elasticsearch synonyms
Learn how to use the Synonyms UI in Kibana to create synonym sets and assign them to indices.